
Account Track Registration: Adding, Changing, and Deleting Account Track Registrations
Use this function to assign a number to each account, and set Account Name, Password, Max. Allowance Set, Usable Function, and Output Permission for each account number.
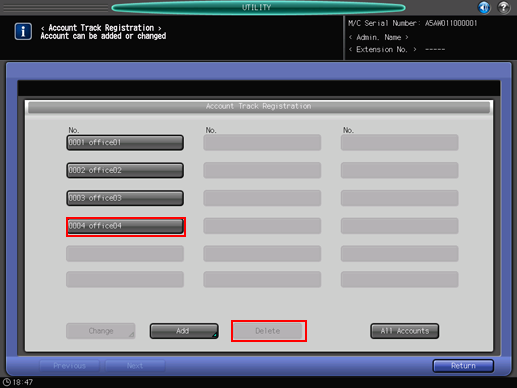
The registered account is listed on the screen. This list enables you to select an account to change the data as desired, or to delete that account.
Follow the procedure on Administrator Setting to display the [Administrator Setting Menu] screen.
Press [User Auth./Account Track] on the [Administrator Setting Menu] screen, and then press [Account Track] and [Account Track Registration] in sequence.
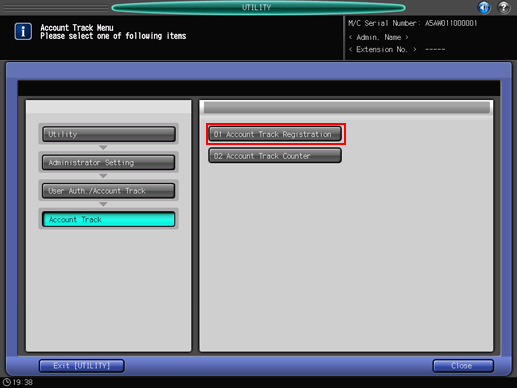
The [Account Track Registration] screen is displayed.
Follow the instructions below to add, change or delete the account data.
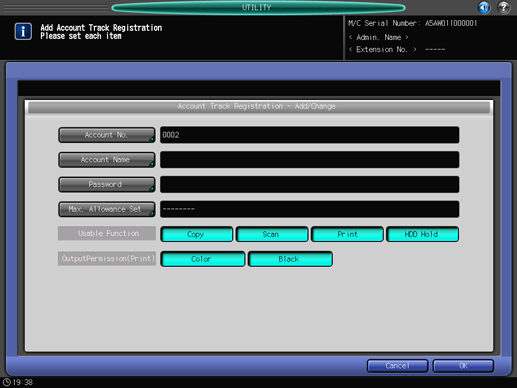
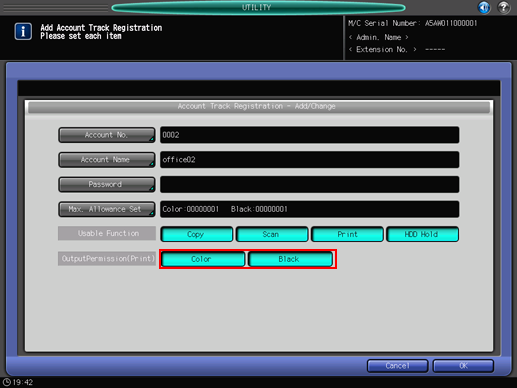
Press [Add] to display the [Account Track Registration Add/Change] screen.
Press [Account No.] to specify the account number.
The [Account Number Setting] screen is displayed. Use the keypad to enter the desired account number.
Account numbers can be set up to the upper limit, which is the value obtained by subtracting the User Distribute Number from 1,000.
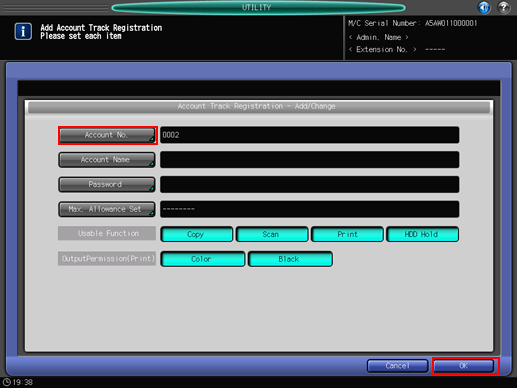
Press [OK] to complete the setting.
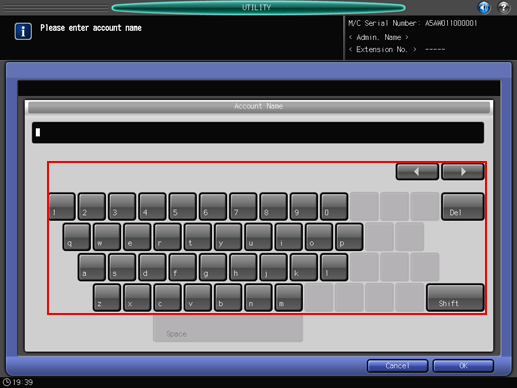
Press [Account Name] and [Password] to specify the account name and password.
Press [Account Name] to display the [Account Name Setting] screen. Enter the desired account name. You can enter up to 8 one-byte characters for the account name. For more information about how to enter characters, refer to Inputting Characters.
Press [Password] to display the [Password Setting] screen. Press [New Password] to display the [New Password Entry] screen. Enter a password, and press [OK]. Press [Input Confirmation] to display the [Input Confirmation] screen. Enter the same password, and press [OK]. You can enter up to 8 one-byte characters for the password. For more information about how to enter characters, refer to Inputting Characters.
Press [OK] on each screen to complete the setting.
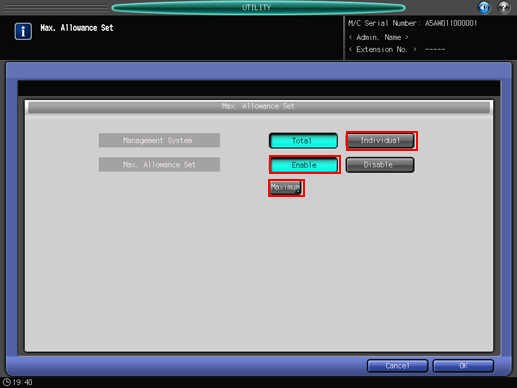
Press [Max. Allowance Set] to set the value.
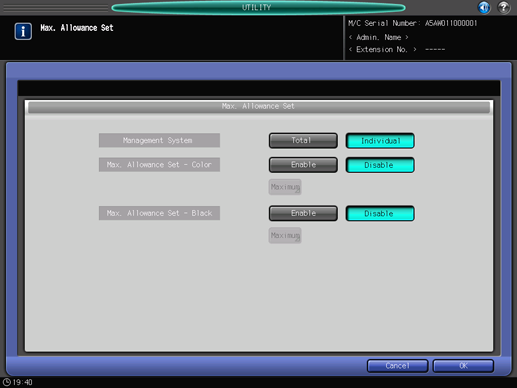
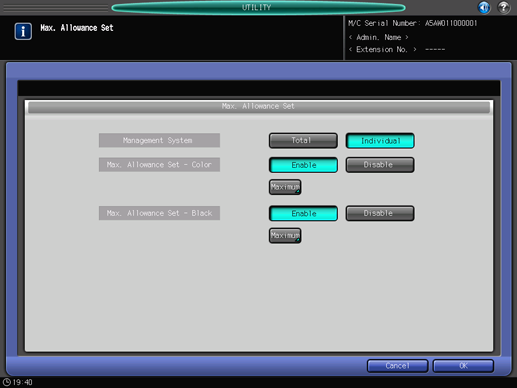
Press [Max. Allowance Set] to display the [Max. Allowance Set] screen. Specify the functions to be available to the authenticated account. Selecting [Individual] for [Management System] enables the limit count to be specified separately for Color and Black. Select [Enable], and then press [Maximum] to enter the desired limit count.
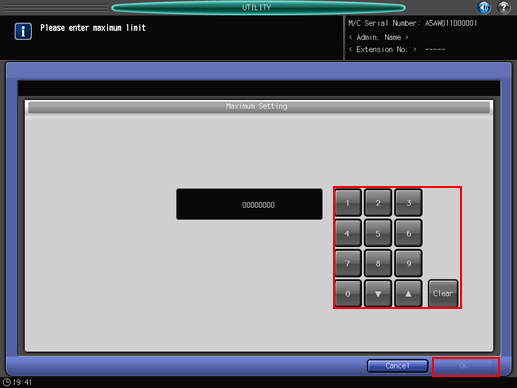
Press [OK] to complete the setting.
Make the selection for [Usable Function].
Press [Copy], [Scan], [Print], or [HDD Hold] on the right side of [Usable Function] to select a function that the user is allowed to use.
Select [Output Permission].
Press [Color] or [Black] on the right side of [Output Permission] to select the print type available to the account.
Change account data.
Select the account name of the data to be changed, then press [Change] to display the [Account Track Registration] screen.

Setting options provided on the screen and setting method are the same as those of adding account data, described in step 3.
When finished with making the desired changes, press [OK].
Delete account data.
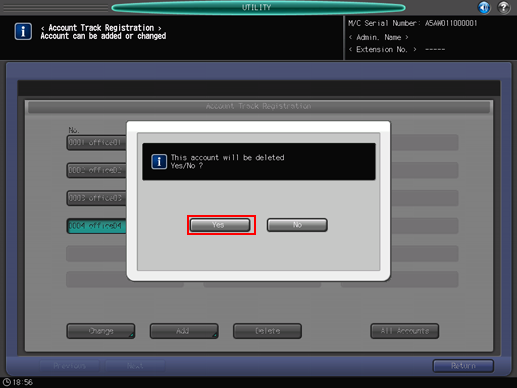
Select the account name to be deleted, then press [Delete].
Press [Yes] on the confirmation dialog to delete it. Or, press [No] to cancel.
Change the Usable Function, Max. Allowance Set, and Output Permission for all accounts collectively.
Press [All Accounts] to display the [Change All Accounts] screen.

Collective change is available for the selection of [Usable Function], setting of Management System and Upper Limit Setting in [Max. Allowance Set], and selection of [Output Permission]. The setting method is the same as that of adding account data, described in step 3.
Press [OK]. A dialog is displayed to confirm the collective change.

Press [Yes] to confirm the change and return to the [Account Track Registration] screen. Pressing [No] takes you back to the [Change All Accounts] screen. To return to the [Account Track Registration] screen, press [Cancel].
Press [Return] to return to the [Account Track Menu] screen.