
Pre-registration Adj.: Adjusting the Paper Loop Amount in the Pre-registration Roller
Adjust the paper loop amount in pre-registration roller section of the trays. This adjustment is required when the printed paper shows skew or wrinkles or when a paper jam occurs in the registration roller section.
Objects of Adjustment: Tray 1, Tray 2, Tray 3, Tray 4, Tray 5, Tray 6, Tray 7, Tray 8, Tray 9, ADU Large Size, ADU Small Size
Adjustment Range: -99 (Short) to +99 (Long) (1 step = 0.1 mm)
Follow the procedure on Administrator Setting to display the [Administrator Setting Menu] screen.
Press [System Setting] on the [Administrator Setting Menu] screen, and then press [Expert Adjustment], [Printer Adjustment], and [Pre-registration Adj.] in sequence.
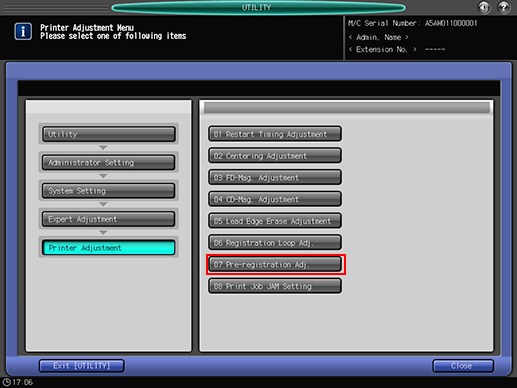
The [Pre-registration Adjustment] screen is displayed.
Press the key of the item to be adjusted.
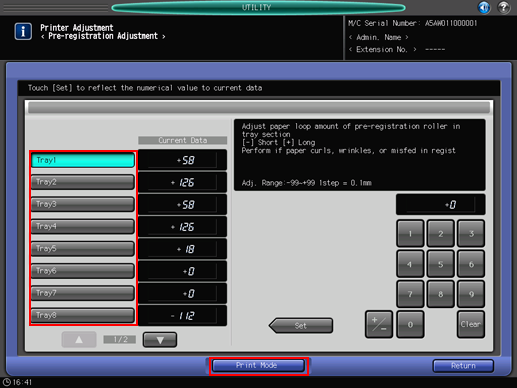
Press [Print Mode].
The [PRINT MODE] screen is displayed.
Set A3
 paper into the tray to be adjusted, select that tray and then press Start on the control panel.
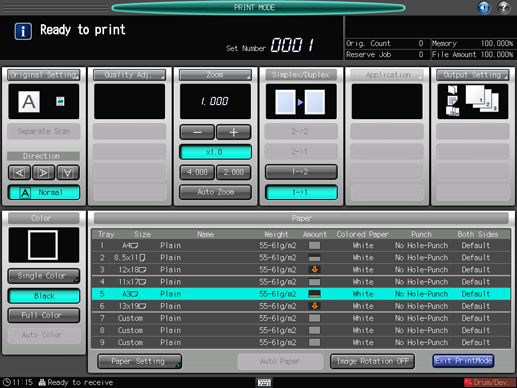
A sample pattern will be output.
Check the sample pattern.
If any adjustment is required, press [Exit PrintMode] to return to the [Pre-registration Adjustment] screen.
Use the touch panel keypad or the keypad on the control panel to enter the setting data.
Use [+/-] to specify the value to be positive or negative.
Press [Set] to change the current value.
Repeat steps 4 to 8 until the desired result is obtained.
Press [Return] to return to the [Printer Adjustment Menu] screen.