Registering an SMB Server as a Destination
Register an SMB server. Sending scan data to an SMB server is made easy by registering the SMB server as a destination.
You can register up to 30 SMB servers.
Follow the procedure on Scan Address Register to display the [Scan Address Register Menu] screen.
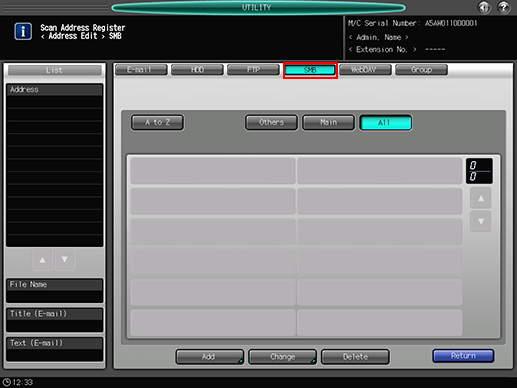
Press [Address Edit].
The [Scan Address Register] screen is displayed.
Press [SMB].

As default, the E-mail address list is displayed.
You can specify a destination tab that is displayed by default in [Scan Setting].
For details, refer to Scan Setting: Setting the Default Values for Scan Functions in User Setting or Scan Setting: Setting the Default Values for Scan Functions in Administrator Setting.
Press [Add].
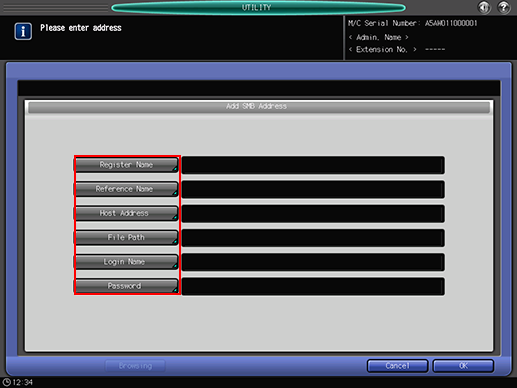
Enter information of a destination on the [Add SMB Address] screen. Pressing each item displays each screen to enter characters.

For details about how to enter characters, refer to Inputting Characters.
[Register Name]
Enter a name of a destination.
If you register the name, it is displayed on the destination list.
You can enter up to 24 one-byte characters (12 two-byte characters).
[Reference Name]
Enter text to search for a destination.
You can enter up to 24 one-byte characters (12 two-byte characters).[Host Address]
Enter the address of an SMB server.
You can enter up to 80 one-byte characters (40 two-byte characters).[File Path]
Enter the file path of an SMB server.
You can enter up to 80 one-byte characters (40 two-byte characters).Enter "a shared folder name" or "a shared folder name \a sub folder name" (use "\" as a separator).
[Login Name]
(Image Controller IC-602)
Enter the login name for an SMB server.
You can enter up to 32 one-byte characters (16 two-byte characters).[Login Name]
(Image Controller IC-310/Image Controller IC-308)
Enter the login name for an SMB server.
You can enter up to 32 one-byte characters (16 two-byte characters).Enter "domain\user name" or "work group\user name". A user name alone does not enable.
[Password]
Enter the password for an SMB server.
You can enter up to 32 one-byte characters.The entered password is shown by "*".
[Browsing]
(Image Controller IC-602)
Search a destination from the browse list on the network.
Refer to To Search for an SMB Server from a Browsing List for details.
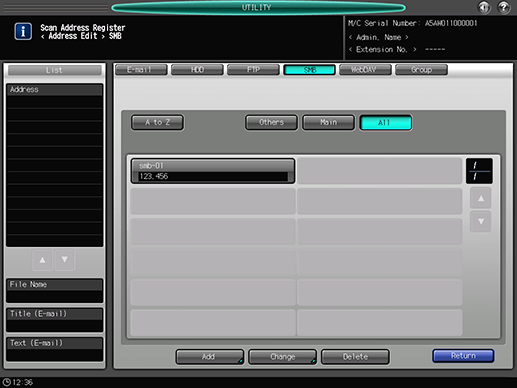
Press [OK].
Check that the registration is completed.

If destinations cannot be displayed on one page, press [
 ] or [
 ] to switch between pages.
