
Adjust a Point Color and a Profile Curve
You can execute the point color adjustment / profile curve adjustment for each CMYK/RGB object (CMYK/RGB Image, CMYK/RGB Graphic and CMYK/RGB Text).
Click [Adjust] of the object to execute the point color adjustment/profile curve adjustment.
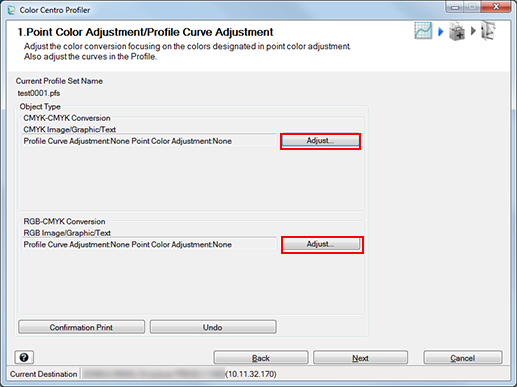
The [Adjust] screen is displayed.
Execute point color adjustment or profile curve adjustment.
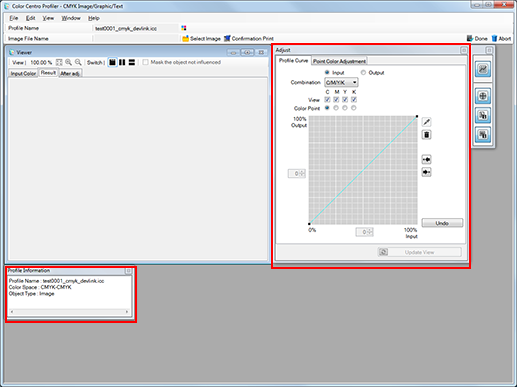
For specific instructions, refer to Adjust a Point Color and a Profile Curve.
Repeat from Step 1 to Step 2 for other objects.
The [Point Color Adjustment/Profile Curve Adjustment] screen returns.
Click [Confirmation Print] for the test printing.
[Confirmation Print] screen appears.
Click [Confirmation Print] for the test printing.
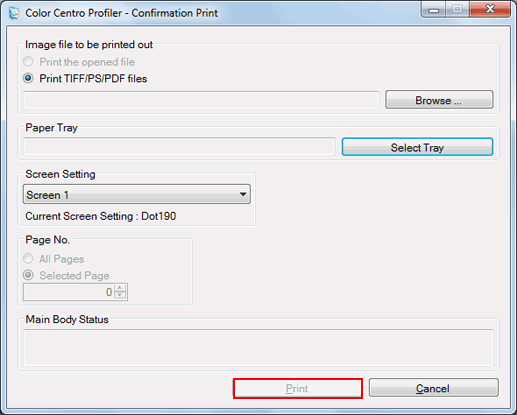
Click [Browse] to display the screen to select the image for printing.
Click [Select Tray] to display the screen to specify the tray used by confirmation printing.
From [Screen Setting], select the screen setting used by confirmation printing.
Specify the [Page No.].
When you select [Cancel], the [Confirmation Print] screen closes and the screen returns to the [Adjust] screen.
Confirm the result of test printing and click [OK].
The [Adjust] screen closes, and the screen returns to the [Point Color Adjustment/Profile Curve Adjustment] screen.
Click [Next].
Profile is calculated and generated.
After completing calculation, the Complete Profile screen appears.
Go to Complete the Procedure.