
Adjust a Point Color and a Profile Curve
On the [Point Color Adjustment/Profile Curve Adjustment] screen, you can adjust the profile curve and the output result of a specified color.
You can adjust a specified output color in Point Color Adjustment.
The difference from Alternative Color is whether the surrounding colors are affected.
- Alternative Color: This does not affect the surrounding colors
- Point Color Adjustment: This affects the surrounding colors
To adjust a specified output color only, use Alternative Color.
To adjust the point color and the profile curve, click [Adjust].
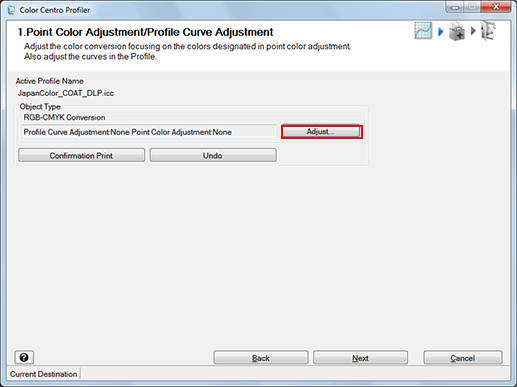
The [Adjust] screen is displayed.
Adjust the point color.
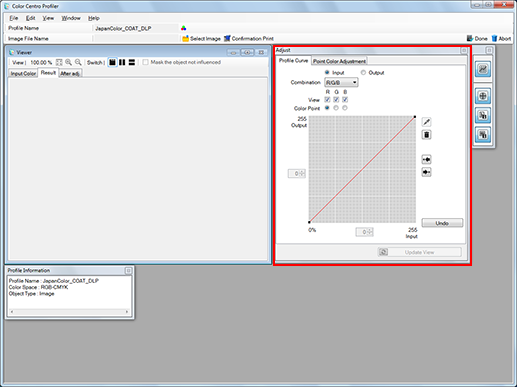
For details about how to add new point colors, refer to Add a Point Color.
For details about how to edit selected point colors, refer to Edit a Point Color.
For details about how to delete selected point colors, refer to Delete a Point Color.
With point color adjustment, the result value may be smaller than the set value. This is because the input/output curve is adjusted. The curve is generated based on the balance with the other adjustment points.
Adjust the profile curve.
For details, refer to Adjust a Profile Curve.
Click [Confirmation Print] for the test printing.
[Confirmation Print] screen appears.
Click [Confirmation Print] for the test printing.
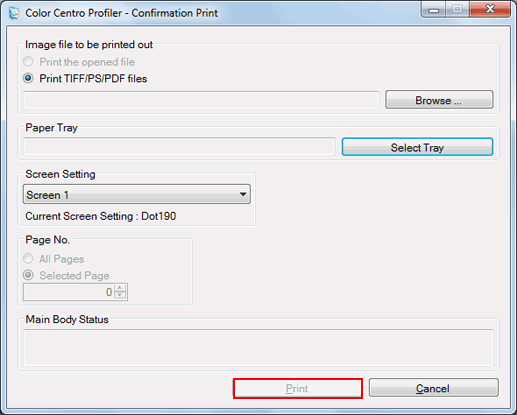
Click [Browse] to display the screen to select the image for printing.
Click [Select Tray] to display the screen to specify the tray used by confirmation printing.
From [Screen Setting], select the screen setting used by confirmation printing.
Specify the [Page No.].
When you select [Cancel], the [Confirmation Print] screen closes and the screen returns to the [Adjust] screen.
Confirm the result of test printing and click [Finish].
The [Adjust] screen closes, and the screen returns to the [Point Color Adjustment/Profile Curve Adjustment] screen.
Click [Next].
Profile is calculated and generated.
After completing calculation, the Complete Profile screen appears.
Go to Complete the Procedure.