
Specify Information to Print
This section describes how to set the color bar and the color setting information printed when a job is output.
From [File] menu, select [Color Verification].
[Color Verification] screen appears.
To set the printing items of the Color Settings Information, check [The Color Setting Information] and check the items you wish to print.
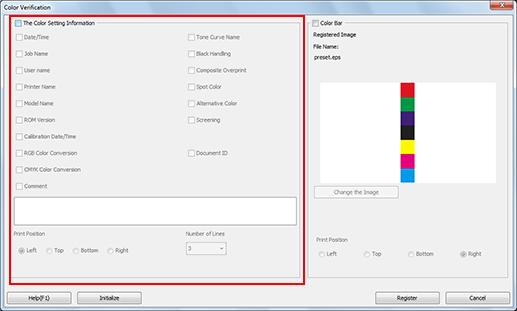
From [Print Position], select a radio button to set the printing position.
From [Number of Lines], select the number of lines (1 to 5 lines).
To set the color bar, check [Color Bar] and set the printing items.
The image of color patch that is being registered as the color bar is displayed.
If you wish to use a different eps file as the color bar, click [Change the Image] and specify the eps file.
When [Save] is selected as the print mode in the printer driver, select any of the check boxes: [User name], [Calibration Date/Time], [Printer Name], [RGB Color Conversion], [CMYK Color Conversion], [Tone Curve Name], [Spot Color], [Alternative Color], [Black Handling], [Composite Overprint], [Document ID], [Model Name], [ROM Version] or [Comment]. The checked items can be set as printing items when a job is output.
You can select a radio button from [Print Position] in order to set the printing position.
When you register the settings of the color information and the color bar, click [Register].
[Color Verification] is closed to return to [Color Default Settings] screen.
When you want to discard the current settings and use the registered settings at factory shipping, click [Initialize].