
Fine-adjusting the Side guides Interval of Paper Feed Unit PF-707m
Overview
If there is difference in the spacing between the upper and lower parts of the front and back Side guides, the paper may not be fed properly.
If this happens, adjust the spacing between the upper and lower parts of the Side guides so that they are equal.
- If the machine is not powered on, the tray cannot be pulled out. Turn the Sub power switch on. For details, refer to Turning This System On.
Procedure
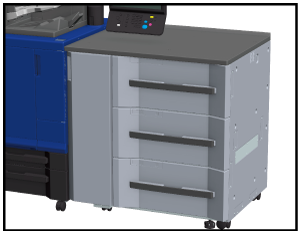

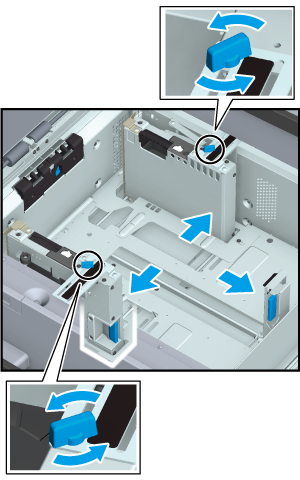
Rotate the Side guide lock knobs (2 locations) of the Side guides counterclockwise and loosen them.
Hold down the Side guide lock release lever of Side guides and the Rear edge guide lock release lever of Rear guide plate and open each of them wide.
- When moving the Side guides, hold both the front side Side guide lock release lever and back side handles. Trying to move just with the front side Side guides may misalign the position of Side guides.

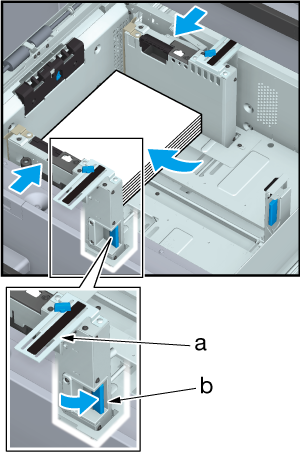
Position the lower part of the Side guides.
a: Paper size indicator
b: Side guide lock release lever
- Make sure that the distance between Side guides is not too short, that the paper is not warped, and that there are no gaps.

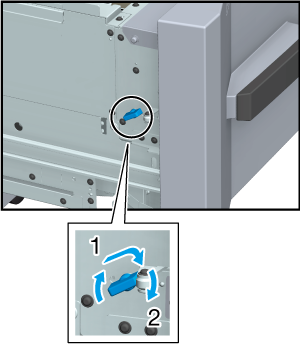

When you push the tray back into its home position, there is a motor sound with which the Tray bottom plate raises. When the motor sound stops and you pull out the tray, Tray bottom plate rises to the top.
- Do not pull out the tray until the motor sound stops. Since the Tray bottom plate is not fully raised up to the top, it may cause subsequent operational failures.
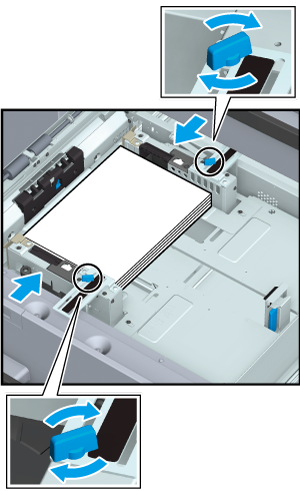
Move the top part of the Side guides and align the guide with the paper. Rotate the Side guide lock knobs (2 locations) clockwise and lock them.
- Make sure that the distance between Side guides is not too short, that the paper is not warped, and that there are no gaps.

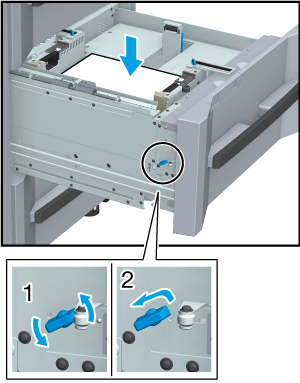
Rotate counterclockwise and loosen the Bottom plate fixing knob, slide it inward and rotate clockwise and fix it at that position. The Tray bottom plate goes down.

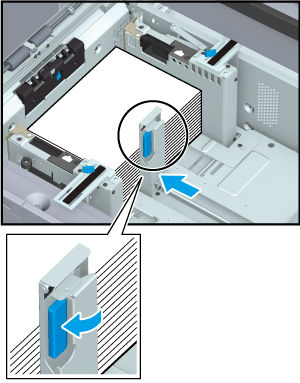
Load the paper so that it is aligned with the left side of the tray.
Hold down the Rear edge guide lock release lever of Rear guide plate and place against the paper.
- Exercise care that loaded paper does not exceed the maximum paper stack height label lines provided on Side guides in the tray. Load the paper so that it remains below the Paper holding plate fixing lever on the Air nozzle.
- Make sure that Rear guide plate is placed firmly against the paper. If there is a gap between the Rear guide plate and the paper, the machine will not be able to properly detect the correct paper size, which may lead to a failure in the paper feeding device.

The remaining paper amount indicator changes from " " to "
 ".
".

 in the upper-right of a page, it turns into
  and is registered as a bookmark.