
Shortcut Key Register
Select the desired shortcut keys for the following settings to be displayed on the COPY screen, SCAN screen, and STORE screen in order to improve the operability.
Up to 4 shortcut keys can be displayed under Application on the COPY screen.
Up to 2 shortcut keys can be displayed under Application, which can be reached from the SCAN screen - Scan Setting screen.
Up to 4 shortcut keys can be displayed under Quality Adj. on the COPY screen.
Up to 4 shortcut keys can be displayed under Quality Adj., which can be reached from the SCAN screen - Scan Setting screen.
Up to 4 shortcut keys can be displayed under Quality Adj. on the STORE screen.
COPY screen, SCAN screen - Select either shortcut keys or density setting to be displayed under Quality Adj. on the STORE screen. When you select the density setting, the screen does not display the shortcut keys specified in Quality Adj. of the COPY screen and Scan Setting screen accessible from the SCAN screen and STORE screen.
Up to 4 shortcut keys can be displayed under Output Setting on the COPY screen.
Display up to six Copy Mode Memory shortcut keys under the COPY screen.
Display up to six Scan Mode Memory shortcut keys under the SCAN screen.
Display up to six Store Mode Memory shortcut keys under the STORE screen.
Follow the procedure on Displaying the [User Setting Menu] Screen to display the User Setting Menu screen.
Press System Setting on the User Setting Menu screen, and then press Shortcut Key Register.

To display the shortcut keys under Application on the COPY screen, press Application(Copy) to display the Shortcut Key Register screen.
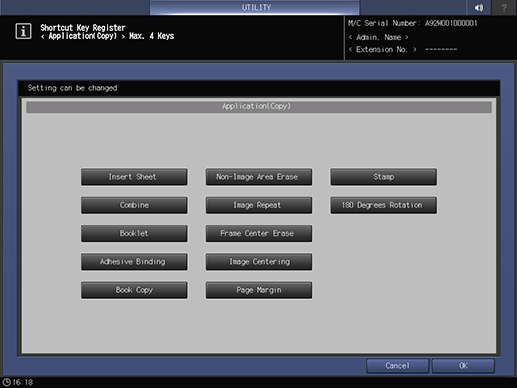
supplementary explanationSelect the desired application function buttons. Up to 4 keys can be selected.
Press OK to complete the setting.
The screen returns to the Shortcut Key Register Menu screen.
supplementary explanationTo cancel the change, press Cancel. In either case, the screen returns to the Shortcut Key Register Menu screen.
SCAN Screen - To display the shortcut keys under Application of the Scan Setting screen, press Application(Scan) to display the Shortcut Key Register screen.
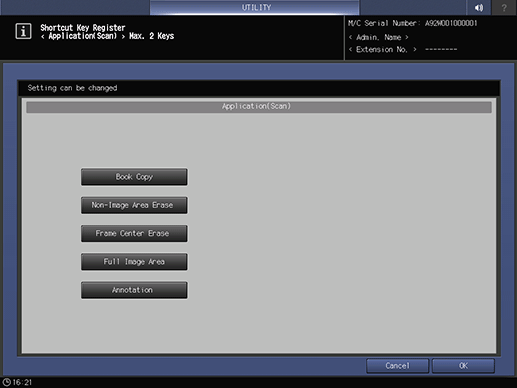
supplementary explanationSelect the desired application function buttons. Up to 2 keys can be selected.
Press OK to complete the setting.
The screen returns to the Shortcut Key Register Menu screen.
supplementary explanationTo cancel the change, press Cancel. In either case, the screen returns to the Shortcut Key Register Menu screen.
To display the shortcut keys under Quality Adj. on the COPY screen, press Quality Adj. (Copy) to display the Shortcut Key Register screen.

supplementary explanationSelect the desired quality adjustment function buttons. Up to 4 keys can be selected.
Press OK to complete the setting.
supplementary explanationTo cancel the change, press Cancel. In either case, the screen returns to the Shortcut Key Register Menu screen.
To display the shortcut keys under Quality Adj. on the Scan Setting screen accessible from the SCAN screen, press Quality Adj. (Scan) to display the Shortcut Key Register screen.
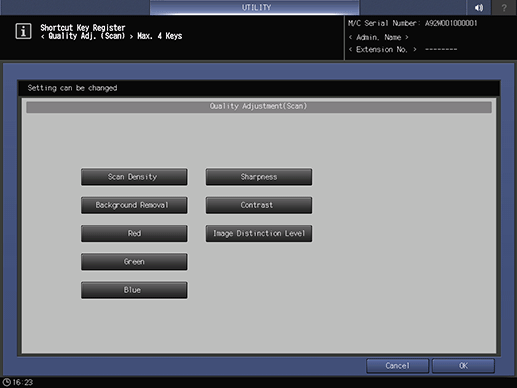
supplementary explanationSelect the desired quality adjustment function buttons. Up to 4 keys can be selected.
Press OK to complete the setting.
supplementary explanationTo cancel the change, press Cancel. In either case, the screen returns to the Shortcut Key Register Menu screen.
To display the shortcut keys under Quality Adj. on the STORE screen, press Quality Adj. (Store) to display the Shortcut Key Register screen.

supplementary explanationSelect the desired quality adjustment function buttons. Up to 4 keys can be selected.
Press OK to complete the setting.
The screen returns to the Shortcut Key Register Menu screen.
supplementary explanationTo cancel the change, press Cancel. In either case, the screen returns to the Shortcut Key Register Menu screen.
COPY Screen, SCAN Screen - To select whether to display shortcut keys or density setting under the Scan Setting screen or under the Quality Adj. of the STORE screen, press Quality Adj. Area Setting to display the Quality Adjustment Area Setting screen.
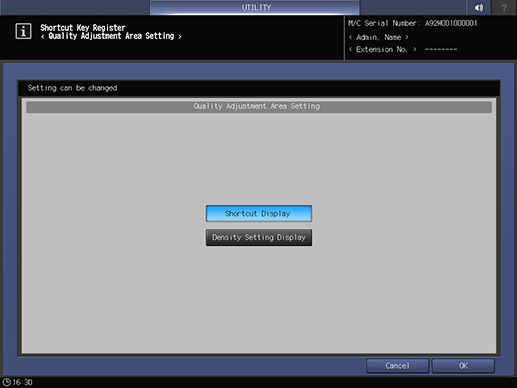
supplementary explanationSelect either Shortcut Display or Density Setting Display.
Press OK to complete the setting.
supplementary explanationTo cancel the change, press Cancel. In either case, the screen returns to the Shortcut Key Register Menu screen.
To display the shortcut keys under Output Setting on the COPY screen, press Output Setting to display the Shortcut Key Register screen.
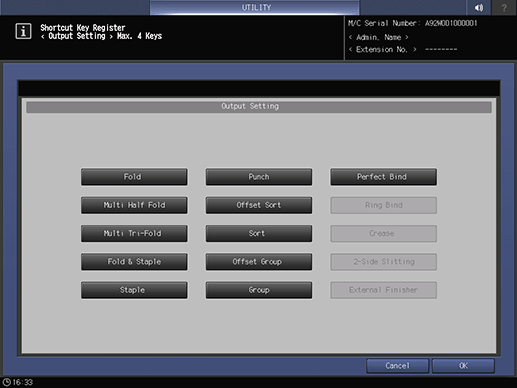
supplementary explanationSelect the desired output setting function buttons. Up to 4 keys can be selected.
supplementary explanationTo cancel the change, press Cancel. In either case, the screen returns to the Shortcut Key Register Menu screen.
To display the Copy Mode Memory shortcut keys under the COPY screen, press Copy Mode Memory to display the registration screen.

supplementary explanationPress the target Copy Mode Memory key. Six Copy Mode Memory keys can be assigned to F1 to F6.
Press OK to complete the setting.
supplementary explanationTo cancel the change, press Cancel. In either case, the screen returns to the Shortcut Key Register Menu screen.
To display the Copy Mode Memory shortcut keys under the SCAN screen, press Scan Mode Memory to display the registration screen.

supplementary explanationPress the target Scan Mode Memory key. Six Scan Mode Memory keys can be assigned to F1 to F6.
Press OK to complete the setting.
supplementary explanationTo cancel the change, press Cancel. In either case, the screen returns to the Shortcut Key Register Menu screen.
To display the Store Mode Memory shortcut keys under the STORE screen, press Store Mode Memory to display the registration screen.
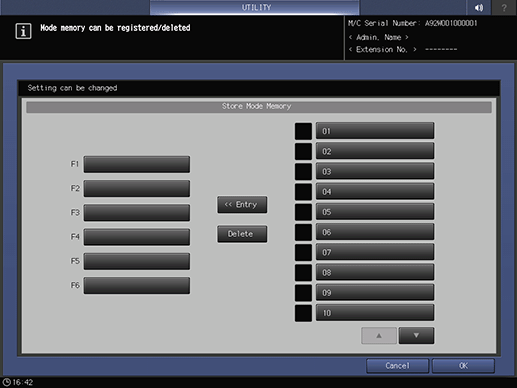
supplementary explanationPress the target Store Mode Memory key. Six Store Mode Memory keys can be assigned to F1 to F6.
Press OK to complete the setting.
supplementary explanationTo cancel the change, press Cancel. In either case, the screen returns to the Shortcut Key Register Menu screen.