
External Server Settings
Set the server to be used for authentication via an external server. First, register multiple external servers, then select one of them as the default.
Set the following options, as necessary.
Item | Setting Description | |
|---|---|---|
Server Name | You can enter up to 32 one-byte characters or symbols for the name. | |
Server Type | Active Directory | Default Domain Name You can enter up to 64 one-byte characters or symbols for the name. |
NTLMv1 | Default Domain Name You can enter up to 63 one-byte characters or symbols for the name. | |
NTLMv2 | Default Domain Name You can enter up to 63 one-byte characters or symbols for the name. | |
NDS over IPX | Default NDS Tree Name You can enter up to 63 one-byte characters or symbols for the name. Default NDS Context Name You can enter up to 191 one-byte characters or symbols for the name. | |
NDS over TCP/IP | Default NDS Tree Name You can enter up to 63 one-byte characters or symbols for the name. Default NDS Context Name You can enter up to 191 one-byte characters or symbols for the name. | |
LDAP | Server Address: Host Name, IPv4 Address, IPv6 Address | |
Search Base You can enter up to 255 one-byte characters or symbols for the name. SSL Setting: ON, OFF Port Number: 1 to 65535 Timeout: 5 to 300 Authentication Type: Simple, Digest-MD5 Search Attributes You can enter up to 63 one-byte characters or symbols for the name. | ||
Follow the procedure on Displaying the [Administrator Setting Menu] Screen to display the Administrator Setting Menu screen.
Press User Auth./Account Track on the Administrator Setting Menu screen, and then press External Server Settings.
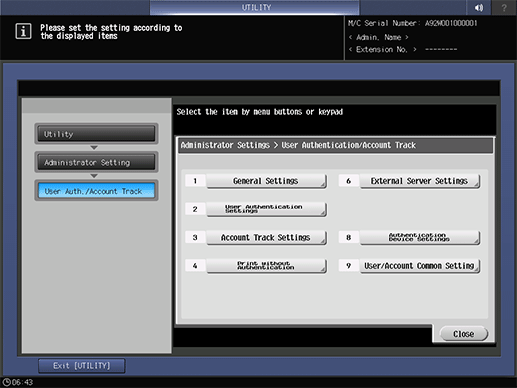
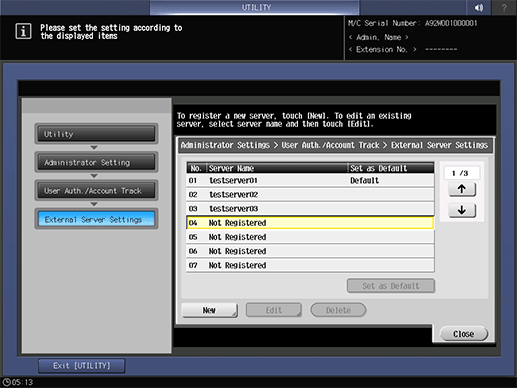
The External Server Settings screen is displayed.
Select an unregistered (or blank) line on the External Server Settings screen, and press New to register a new external server.

The New screen is displayed.
supplementary explanationIf you need to edit registered data, proceed to step 7.
supplementary explanationIf you need to delete registered data, proceed to step 9.
Press Server Name to display the Server Name screen and enter a name for the server.
supplementary explanationBe sure to enter a server name. If not, the registration cannot be completed.
supplementary explanationPress OK after entering the name.
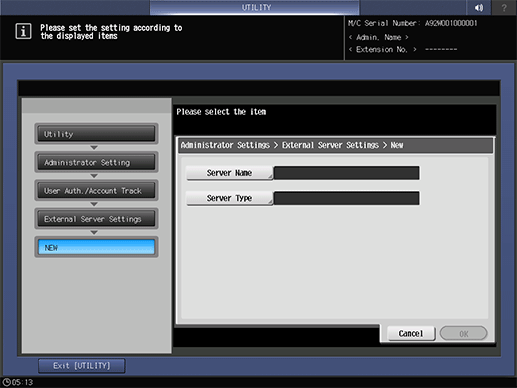
Press Server Type.
The Server Type screen is displayed.
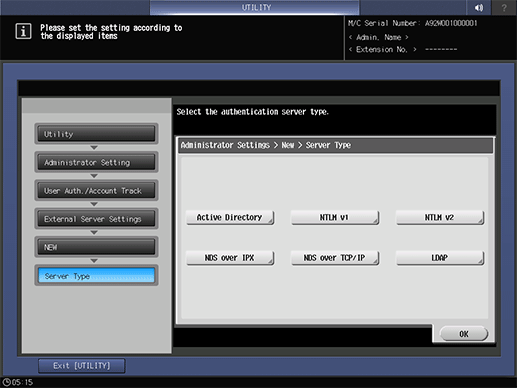
Press one of the following options to configure the details: Active Directory, NTLMv1, NTLMv2, NDS over IPX, NDS over TCP/IP, and LDAP.
Press OK on each screen when completed.
Select a line on the External Server Setting screen and press Edit to edit data for the registered external server.
The Edit screen is displayed.
Repeat steps 4 to 6 above to edit the existing setting and press OK.
Select a line on the External Server Setting screen and press Delete to delete data for the registered external server.
A confirmation dialog is displayed.

Press Yes, and press OK to complete the setting.
supplementary explanationOr, press No to cancel.

Select the line in which the server to be used in external server authentication is registered, and press Set as Default.
Press Close.
The screen returns to the User Auth./Account Track screen.