
Highlight Adjustment
Change the printer gamma curve to adjust the gradation and background density in highlights.
Use this function when the color reproducibility in the highlight part varies depending on the selection of screen for Screen 1, Screen 2, and Stochastic, respectively.
Tips
Make this adjustment after completing the Gamma Automatic Adjustment.
Highlight Automatic Adjustment is to be made as the printer gamma adjustment using a scanner. Make this adjustment especially when the printer gamma requires to be finely adjusted.
Follow the procedure on Displaying the [Administrator Setting Menu] Screen to display the Administrator Setting Menu screen.
Press System Setting on the Administrator Setting Menu screen, and then press Expert Adjustment, Quality Adjustment, and Highlight Adjustment in sequence.

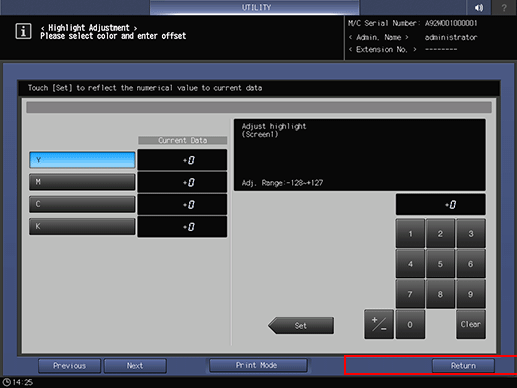
The Highlight Adjustment screen is displayed.
Use Next and Previous to select the screen to be adjusted.
Press Print Mode.
The PRINT MODE screen is displayed.
Select A4 long edge feed paper, then press Start on the control panel.
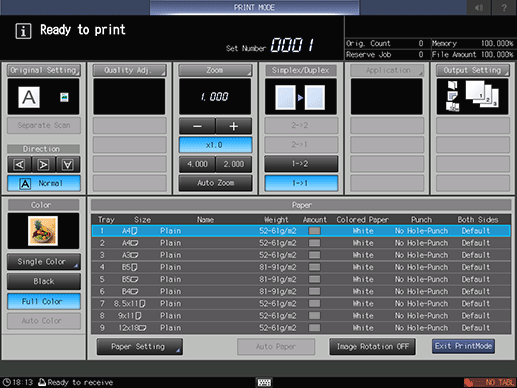
A test chart is printed.
Press Exit PrintMode to return to the Highlight Adjustment screen.
Check the output chart.
Check that the highlight part of each of cyan, magenta, yellow, and black begins with the even gradation.
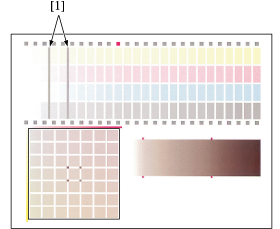
Make an adjustment, if required.
Use the touch panel keypad or the keypad on the control panel to enter the setting data.
supplementary explanationUse +/- to specify the value to be positive or negative.
supplementary explanationPress Set to change the current value.
supplementary explanationAdjustment Range: -128 (lighter) to +127 (darker)
Repeat steps 4 to 8 until the desired result is obtained.
Press Return to return to the Quality Adjustment Menu screen.