Save the Tone Curves
This section describes how to save the adjusted tone curve.
When you register the settings to the image controller, the adjusted tone curve can be adopted to the output.
When the tone curve is saved in Local, My Documents or Network, the tone curve is saved as the tone curve profile (Extension: .xml).
Click Save on the Tone Curve Adjustment screen.
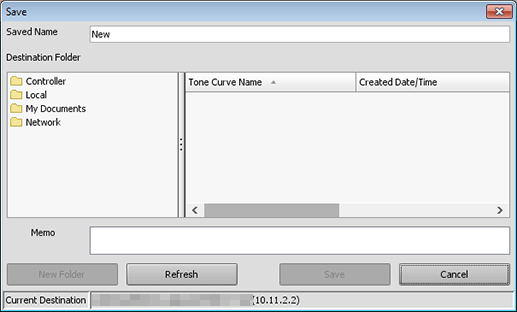
Save screen appears.
Enter the name of the adjusted tone curve in Saved Name.
You can enter up to 31 one-byte characters (31 two-byte characters).
From the tree view of Destination Folder, select the place to save the tone curve.
The list appears according to the selection.
supplementary explanationTo update the tree view to the latest information, click Refresh.
supplementary explanationTo save the tone curve to a new folder, click New Folder to add a new destination folder.
If necessary, enter the description to Memo.
You can enter up to 64 one-byte characters (32 two-byte characters).Click Save.
When you select Controller as the destination folder, the tone curve is saved in the image controller.
When you select Local, My Documents or Network as the destination folder, the tone curve is saved as the tone curve profile (Extension: .xml).
supplementary explanationYou can specify the tone curve to use as default from among registered tone curves in the image controller when you use "Color Default Settings" function or "Color Configuration Management" function.