
Install Color Centro: Windows
Insert the installation CD-ROM into the CD-ROM drive of the computer.
supplementary explanationCheck that the installer starts, and then go to Step 2.
supplementary explanationIf the installer does not start, double-click setup.exe on the CD-ROM, and then go to Step 3.
Click Administration Tools - Color Centro - Install.
supplementary explanationIf the User Account Control window is displayed, click Yes.
Select a language, and then click OK.

supplementary explanationIf .NET Framework 3.5 is not installed on your computer, follow the instructions on the screen to install it.
Click Next.
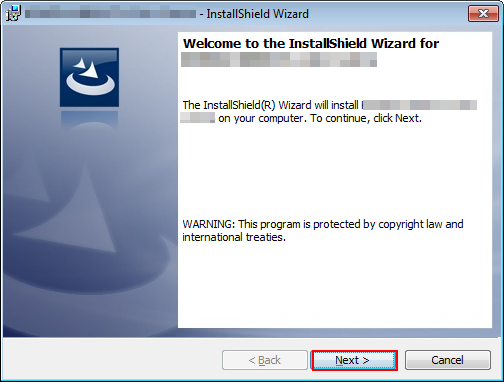
The License Agreement screen is displayed.
Check the contents, then click I accept the terms in the license agreement. Click Next.
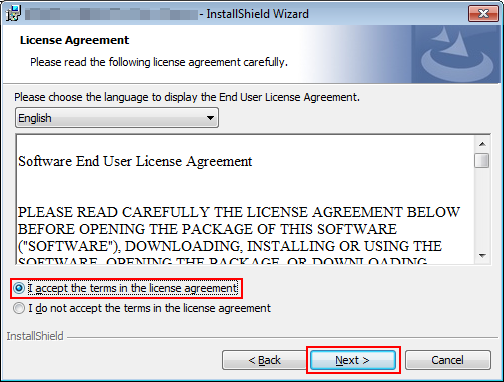
supplementary explanationIf you disagree, you will not be able to install Color Centro.
supplementary explanationBy selecting from the drop-down list, you can change the language of the license agreement.
Select the destination folder and click Next.
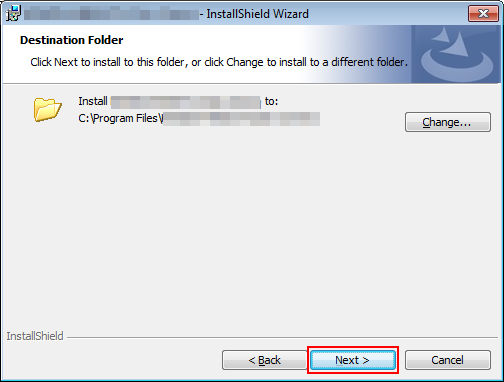
supplementary explanationBy default, Color Centro is installed to one of the following locations.
32bit OS: C:\Program Files\MFP-Printer Utility\Color Centro
64bit OS: C:\Program Files (x86)\MFP-Printer Utility\Color Centro
supplementary explanationIf you want to change the destination folder, click Change and select the desired location on the displayed screen and click OK.
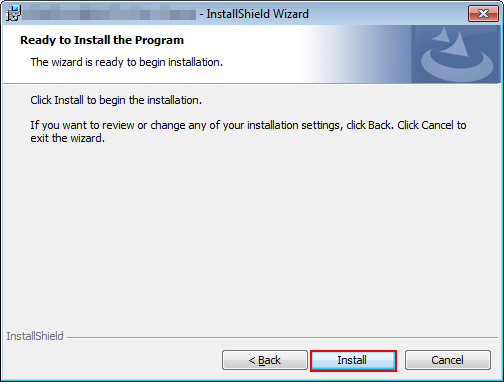
Click Install.
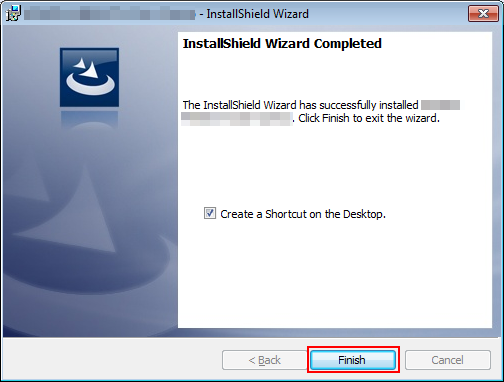
Click Finish.
The installation is complete.
supplementary explanationIf you check Create Shortcut on the Desktop before clicking Finish, a shortcut icon is created on the Desktop.
supplementary explanationReadme for Color Centro is installed as well as Color Centro in the selected installation location.