
Adjusting a point color
Spot color management flow
Click Adjust.
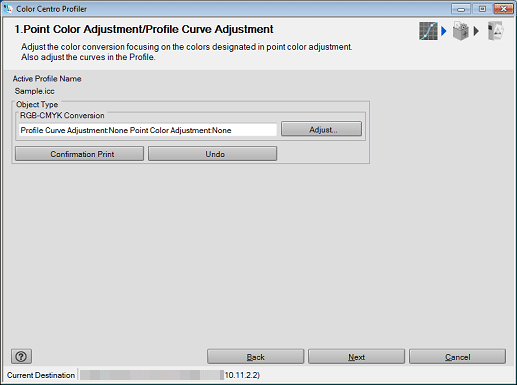
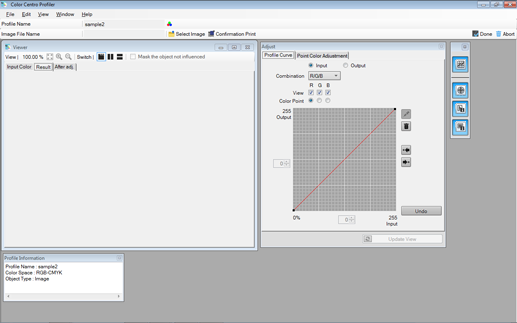
The Adjust screen is displayed.
Adjust the point color.
supplementary explanationFor details about how to add new point colors, refer to Add a Point Color.
supplementary explanationFor details about how to edit selected point colors, refer to Edit a Point Color.
supplementary explanationFor details about how to delete selected point colors, refer to Delete a Point Color.
With point color adjustment, the result value may be smaller than the set value. This is because the input/output curve is adjusted. The curve is generated based on the balance with the other adjustment points.
Adjust the profile curve.
supplementary explanationFor details, refer to Adjust a Profile Curve.
Click Confirmation Print for the test printing.
Confirmation Print screen appears.
Click Print for the test printing.
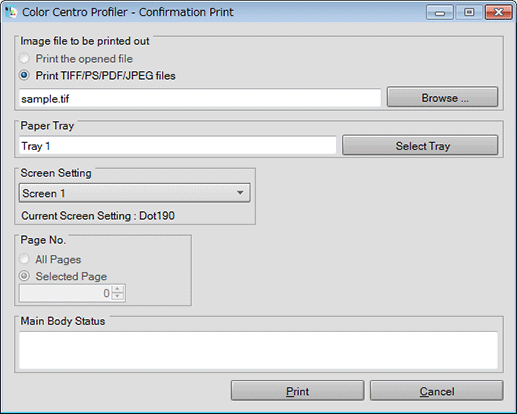
supplementary explanationClick Browse to display the screen to select the image for printing.
supplementary explanationClick Select Tray to display the screen to specify the tray used by confirmation printing.
supplementary explanationFrom Screen Setting, select the screen setting used by confirmation printing.
supplementary explanationSpecify the Page No..
supplementary explanationWhen you select Cancel, the Confirmation Print screen closes and the screen returns to the Adjust screen.
Confirm the result of test printing and click Done.
The Adjust screen closes, and the screen returns to the Point Color Adjustment/Profile Curve Adjustment screen.
Click Next.
Profile is calculated and generated.
After completing calculation, the Complete Profile screen appears.
Click Finish.
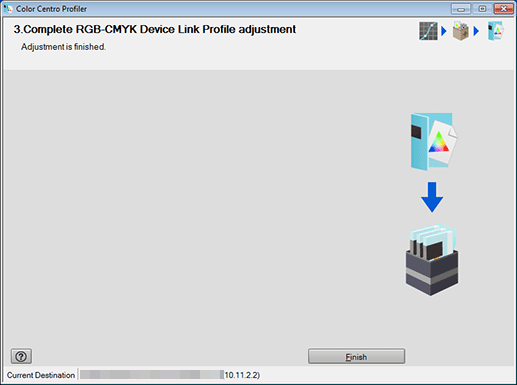
The wizard is completed.
Color Centro Profiler is closed to return to Profile Management screen.
supplementary explanationTo specify a profile as default, use Color Default Settings. You can select a profile for each type of objects.
Add a Point Color
Click the Point Color Adjustment tab on the Adjust screen, and click
 .
.
A numbered line is added to the Adjustment Point (RGB).
Enter the value (0 to 255) of the added point color of the added line to R, G and B. Or, click
 and select a color from the Color Palette screen. Then, click OK.
The new input color is displayed on Pointed Color.
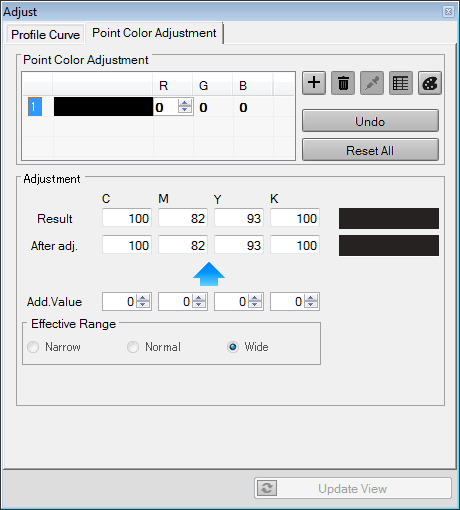
From Effective Range, set the effective range.
The color conversion result is displayed in Result and After adj.. The color of Result is displayed at the top of the Sample Color (to the right of Result), and the color from After adj. adjustment is displayed at the bottom.
supplementary explanationWhen you select Narrow, the result of adjustment has influence on the color range which includes only the near colors to the input color.
supplementary explanationWhen you select Wide, the result of adjustment has influence on the color range which includes the colors which are away from the input color.
supplementary explanationWhen you select Normal, it has influence on the middle range between Narrow and Wide.
supplementary explanationYou can specify Effective Range per point color.
supplementary explanationThe values displayed in Result and After adj. are the values to which the Input curve and color conversion table are applied.(Output curve is not applied to the values yet.)
Enter the value into Add. Value to make the value of After adj. the target value.
supplementary explanationTo discard the Add. Value settings, click Undo.
Edit a Point Color
Click the Point Color Adjustment tab on the Adjust screen, and select the point color (input color) you wish to edit from Adjustment Point (RGB).
The input color is displayed at the bottom of the Sample Color (to the right of Result).
From Effective Range, select the effective range.
The color conversion result is displayed in Result and After adj.. The color of Result is displayed at the top of the Sample Color and the color of After adj. is displayed at the bottom.
supplementary explanationWhen you select Narrow, the result of adjustment has influence on the color range which includes only the near colors to the input color.
supplementary explanationWhen you select Wide, the result of adjustment has influence on the color range which includes the colors which are away from the input color.
supplementary explanationWhen you select Normal, it has influence on the middle range between Narrow and Wide.
supplementary explanationYou can specify Effective Range per point color.
supplementary explanationThe values displayed in Result and After adj. are the values to which the Input curve and color conversion table are applied.(Output curve is not applied to the values yet.)
Enter the value into Add. Value to make the value of After adj. the target value.
supplementary explanationTo discard the Add. Value settings, click Undo.
Delete a Point Color
Click the Point Color Adjustment tab on the Adjust screen, and select the point color (input color) you wish to delete from Adjustment Point (RGB).
Click Delete.
The selected point color is deleted.