
FD-Mag. Adjustment
Adjust the magnification in paper feed direction when scanning on the ADF.
NOTICE
Make this adjustment after completing Adjustment - Machine Adjustment - Printer Adjustment - FD-Mag. Adjustment.
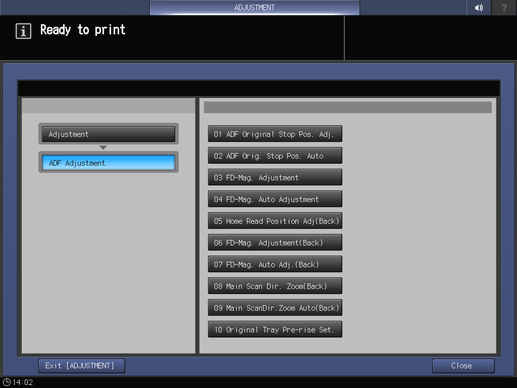
Press Adjustment on the MACHINE screen to display the Adjustment Menu screen.
Press ADF Adjustment and FD-Mag. Adjustment in sequence.
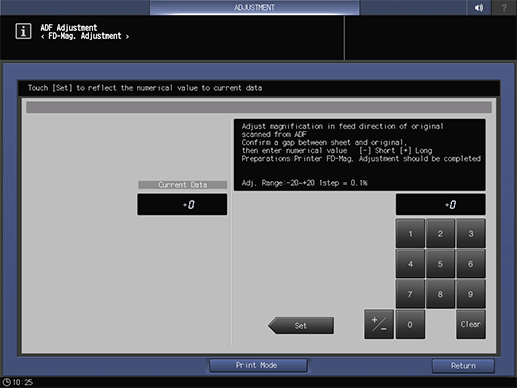
Press Print Mode.
Load A4 paper in a tray, and select that tray.
Place the test chart on the ADF tray, and press Start on the control panel.
A sample pattern will be output.
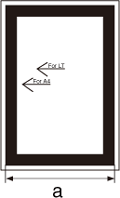
supplementary explanationFace the test chart surface upward and place it in the ADF tray.
Make sure that the difference between the lengths (a) of the output paper and test chart is within the allowance range.
Allowance: 0 mm ± 1.0 mm
If any adjustment is required, press Exit PrintMode to return to the FD-Mag. Adjustment screen.
Use the touch panel keypad to enter the set value.
supplementary explanationUse +/- to specify the value to be positive or negative.
supplementary explanationPress Set to change the Current Value.
supplementary explanationAdjustment Range: -20 (Short) to +20 (Long) (1 step = 0.1%)
Repeat steps 3 to 8 until the desired result is obtained.
Press Return.
The screen returns to the ADF Adjustment Menu screen.