
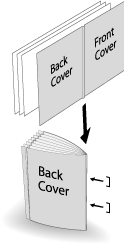
Creasing a cover in Fold & Staple or Multi Half-Fold
When Saddle Stitcher SD-513 equipped with Creaser Unit CR-101 is mounted on the machine, one crease can be applied to a cover for paper folding in Fold & Staple or Multi Half Fold.
Menu item | Description | Illustration |
|---|---|---|
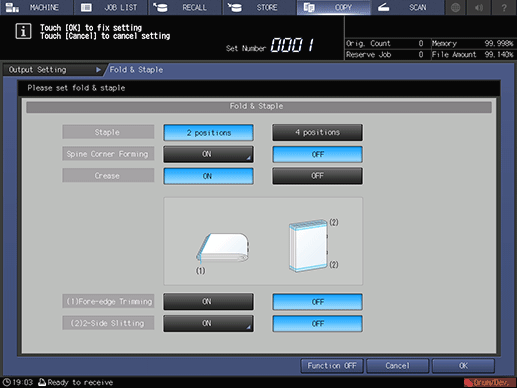
Fold & Staple Select Crease - ON on the Fold & Staple screen. | When With Cover is selected in combination with Booklet of the application function, one crease is applied only to a cover for Fold & Staple, and the cover is folded and stapled with the body. This function can be combined with the cut edge trimming function. |
|
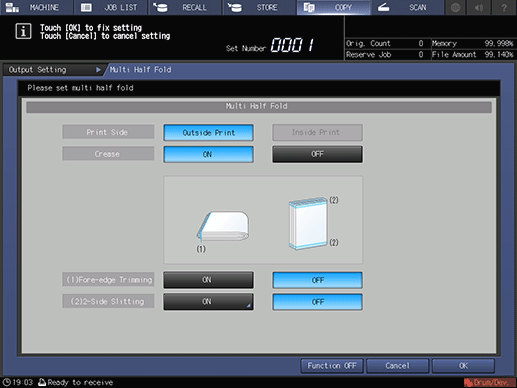
Multi Half Fold Select Crease - ON on the Multi Half Fold setting screen. | When With Cover is selected in combination with Booklet of the application function, one crease is applied only to a cover for Multi Half Fold, and the cover is half-folded with the body. This function can be combined with the cut edge trimming function. |
|

NOTICE
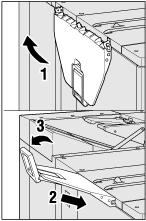
The paper processed in Fold & Staple or Multi Half Fold is output to the delivery tray. Set the delivery tray extension (tray) to make preparations for opening the Stopper. Otherwise, the output paper may drop from the delivery tray. Also, the full-load detection function may not work.
NOTICE
A misalignment may occur between the fold position and crease position depending on the paper weight. In such a case, adjust the crease position to suit the fold position. For details, refer to [Crease Position Adjustment].
Tips
If Fold & Staple or Multi Half is selected, the body cannot be creased.
The crease position is fixed to the center.
The crease side cannot be selected.
Reference
Check paper information before use. For details, refer to Equipment, Equipment, Capacity, and Saddle Stitcher SD-513 processing capacity.
Position the original.
supplementary explanationThe number of original pages to be loaded is set to that for Fold & Staple or Multi Half Fold, and the number of folded sheets is determined. For details about the number of folded sheets, refer to Saddle Stitcher SD-513.
Load the cover for Fold & Staple or Multi Half Fold into any tray.
supplementary explanationThe cover paper must be loaded into Tray1 to Tray9. PI1, PI2, and PB cannot be set to a cover.
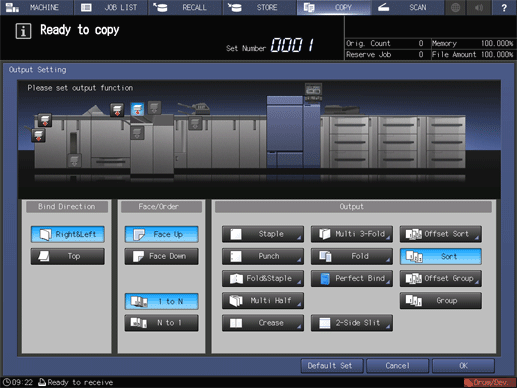
Press the COPY tab to display the COPY screen.
Press Output Setting.
The Output Setting screen is displayed.
Select either Fold&Staple or Multi Half.
This displays the Fold & Staple Setting or Multi Half Fold Setting screen.
In (1) Fore-edge Trimming, select ON or OFF.
supplementary explanationWhen Fold&Staple is selected in step 5, select 2 positions or 4 positions in Staple, then also select ON or OFF in (1) Fore-edge Trimming.
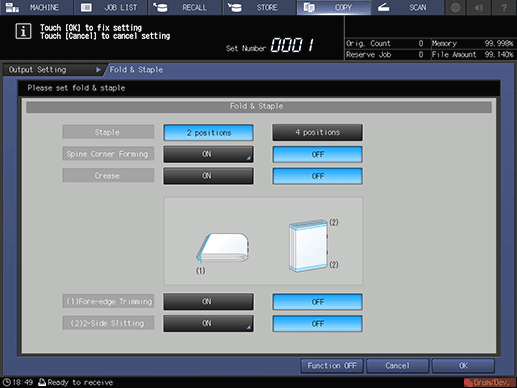
supplementary explanationIf Multi Half is selected in step 5, select ON or OFF in (1) Fore-edge Trimming.
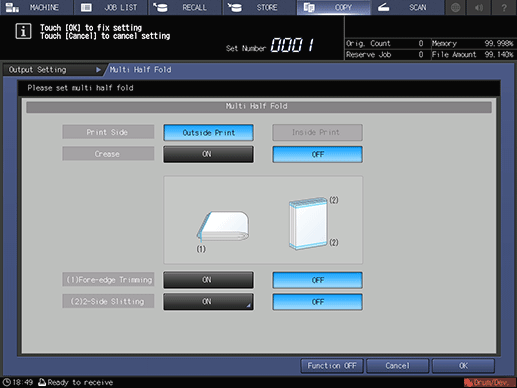
supplementary explanationWhen the saddle stitcher is equipped with Trimmer Unit TU-503, 2-Side Slitting is available. For details, refer to 2-Side Slitting in Fold & Staple and Multi Half-Fold.
Select Crease - ON.
Press OK.
supplementary explanationTo undo the setting, press Cancel.
supplementary explanationTo disable the function while keeping the current setting, press Function OFF.
This returns to the Output Setting screen.
supplementary explanationFold&Staple or Multi Half and Crease are highlighted. In this case, no crease setting can be configured even if Crease is pressed.
Press OK on the Output Setting screen to return to the COPY screen.
An icon representing specified function is displayed under Output Setting on the COPY screen.
You also find that Booklet in Application is selected automatically.
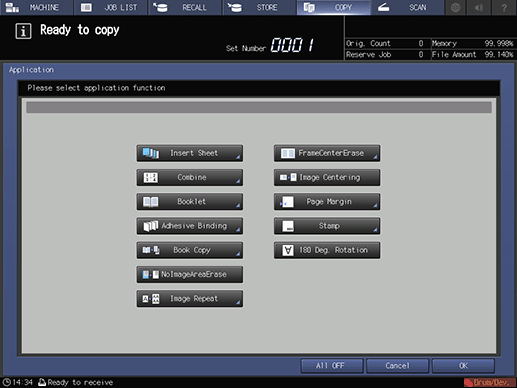
Press Application, then press Booklet.
In Cover Sheet, select With Cover.
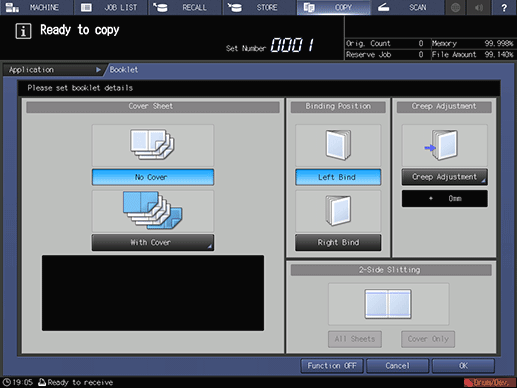
From Front Cover and Back Cover, select the tray you loaded a cover into in step 2.
supplementary explanationWhen selecting the desired one from a tray paper, first select With Cover (Print) or With Cover (Blank).

Press OK.
This returns to the Booklet screen.
Select Left Bind or Right Bind in Binding Position.
Press OK to return to the COPY screen.
Select additional copy conditions, as desired.
Enter the desired print quantity using the keypad.
supplementary explanationThe number of copies that can be output to the delivery tray varies depending on the copy paper. For details, refer to Capacity.
Set the delivery tray extension (tray), then pull up the Stopper.
Press Start on the control panel.