
Original Size
Custom: Copying Custom Size Original
The machine usually detects the standard size of the original fed through the ADF or positioned on the original glass (Standard mode).
Use the Custom mode to scan and copy the standard size area set as the original size to be scanned, irrespective of the actual original size.
This function also allows you to specify/register the desired special size in 0.1 mm increments, and to recall the registered size when needed.
preconditionWith Full Area in Custom mode set, the maximum scanning area is 297.0 mm 431.8 mm / 11.690" 17.000". In this case, Auto Zoom and Auto Paper do not function.
preconditionCustom sizes can be registered. Registered size information can be utilized later for both original and copy paper size settings.
Position the original.
Press the COPY tab to display the COPY screen.
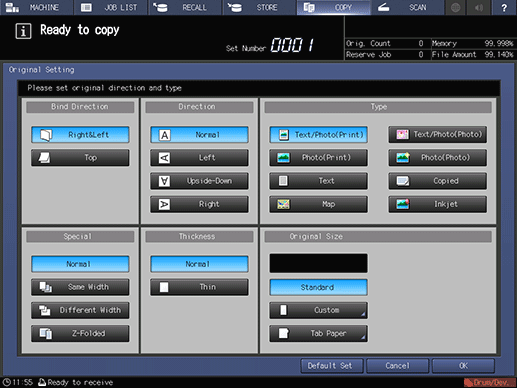
Press Original Setting.
The Original Setting screen is displayed.
Press Custom.
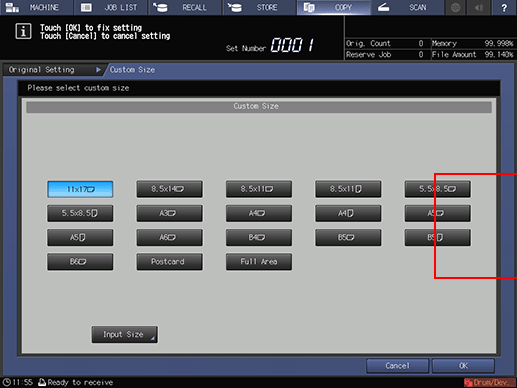
The Custom Size screen is displayed.
Specify the desired scanning size.
Selecting from size keys:
Select the desired standard size key. The machine scans the special size original as selected standard size.
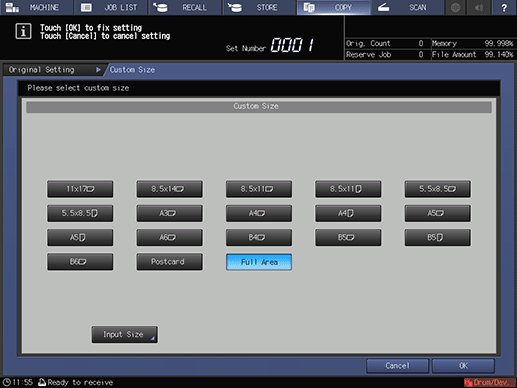
Selecting Full Area:
To scan and copy using the maximum scanning area of 297.0 mm 431.8 mm / 11.690" 17.000", select Full Area. In this case, Auto Zoom and Auto Paper do not function.
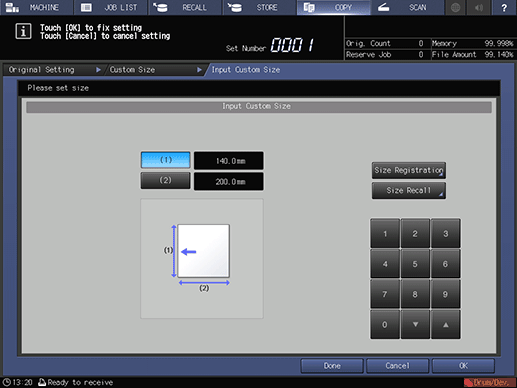
Specifying a special size:
supplementary explanationTo display the Input Custom Size screen, press Input Size.
supplementary explanationPress the key (1) indicating widthwise dimension. Use the touch panel keypad or downup to enter the desired value. Available input range is from 100 mm to 297.0 mm / 3.940" to 11.690" in widthwise dimension.
supplementary explanationPress the key (2) indicating lengthwise dimension. Use the touch panel keypad or downup to enter the desired value. Available input range is from 140 mm to 431.8 mm / 5.515" to 17.000" in lengthwise dimension.
supplementary explanationPress OK. The specified size is displayed on the Custom Size screen. To return to the COPY screen, press Done.

Registering a special size:
supplementary explanationTo display the Input Custom Size screen, press Input Size.
supplementary explanationPress the key (1) indicating the widthwise dimension, or (2) indicating the lengthwise dimension. Use the touch panel keypad or downup to enter the desired value. Available input range is from 100 mm to 297.0 mm / 3.940" to 11.690" in widthwise dimension, and from 140 mm to 431.8 mm / 5.515" to 17.000" in lengthwise dimension.
supplementary explanationTo display the Size Registration screen, press Size Registration.
supplementary explanationSelect the desired Register Name key, using Next and Previous as needed. Select the key with a name displayed to overwrite the size and name already registered for that key.
supplementary explanationTo display the Custom Size Name Setting screen, press Add. Enter the name within 20 one-byte characters, and press OK. The screen returns to the Size Registration screen.
supplementary explanationPressing Delete will display a dialog for confirmation. Press Yes to delete the data registered for the selected key.
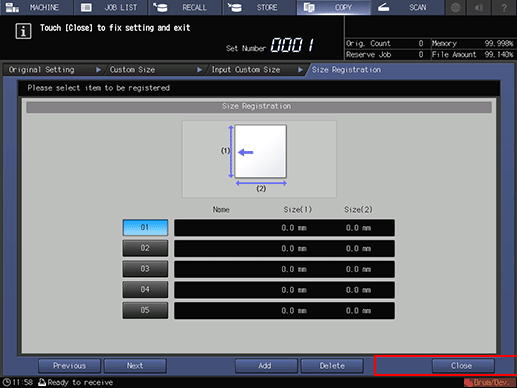
supplementary explanationTo return to the Input Custom Size screen, press Close.
supplementary explanationPress OK. The registered size is displayed on the Custom Size screen.

Recalling a special size:
supplementary explanationTo display the Input Custom Size screen, press Input Size.
supplementary explanationTo display the Size Recall screen, press Size Recall.
supplementary explanationSelect the desired Register Name key, using Next and Previous as needed.
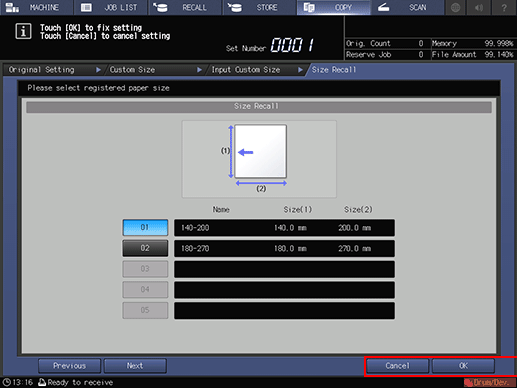
supplementary explanationTo return to the Input Custom Size screen, press OK. The recalled size is displayed on the Input Custom Size screen.
supplementary explanationPress OK. The recalled size is displayed on the Custom Size screen.
Press OK.
The screen returns to the Original Setting screen.
Press OK.
The screen returns to the COPY screen.
supplementary explanationTo restore the default setting, press Default Set. To resume the previous setting, press Cancel.
Tab Paper: Copying Tabbed Original
Use Tab Paper mode to scan A4 long edge feed + tabbed original/8.5 11 long edge feed + tabbed original in order to copy it including the tab part.
Reference
For details about loading tabbed paper in a tray, refer to About Loading Tab Paper.
preconditionAvailable tabbed original sizes are only A4Tlong edge feed / 8.5 11Tlong edge feed.
preconditionFor A4Tlong edge feed, the width of the tab part can be selected from 12.7 mm or 15.0 mm. For details, refer to [A4 Tab Width Setting].
preconditionAs for 8.5 11Tlong edge feed, the width of the tab part is 12.7 mm.
preconditionFor copying the tab part, Paper Setting in addition to Original Setting are required. Specify tab paper to the tray in Paper Setting. For details, refer to Setting Paper in a Paper Tray.
Position the original.
Press the COPY tab to display the COPY screen.
Press Original Setting.
The Original Setting screen is displayed.
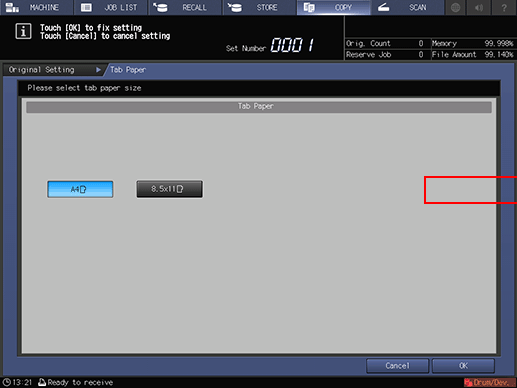
Press Tab Paper under Original Size.

The Tab Paper screen is displayed.
Select either A4Tlong edge feed or 8.5 11Tlong edge feed, then press OK.
The screen returns to the Original Setting screen.
Press OK.
The screen returns to the COPY screen.
supplementary explanationTo restore the default setting, press Default Set. To resume the previous setting, press Cancel.