Page Margin: Adjusting Copy Image Position
Overview of binding margin
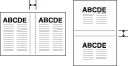
Use this function to create a binding margin on copies in order to make it easier for filing purposes, and also to adjust the position of copy image on both front and back sides when making 2-sided copies, in order to correct the image dislocation.
When Booklet or 2 Repeat mode of Image Repeat has been already selected, this function allows you to make the desired amount of blank space between the two images on a page.
Original | Output |
|---|---|
|
|

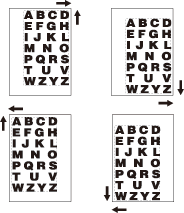
preconditionAvailable shift directions are Top, Bottom, Right, and Left.
preconditionShift amount: 0 mm to 250 mm in 0.1 mm increments
preconditionWhen Booklet or 2 Repeat mode of Image Repeat has already been selected, the Page Space key appears clear on the screen to show its availability.
preconditionPage Space width: -250.0 mm to 250 mm in 0.1 mm increments
Binding margin operation
Position the original.
Display the COPY screen and press the desired button under Simplex/Duplex.
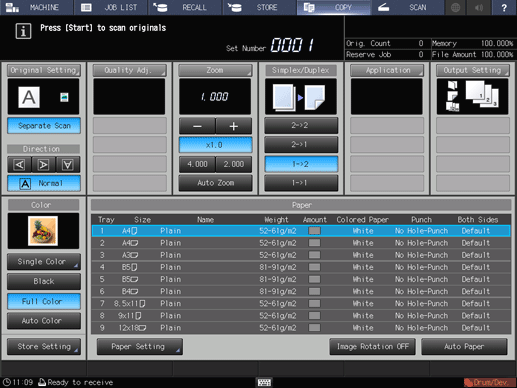
Press Application on the COPY screen.
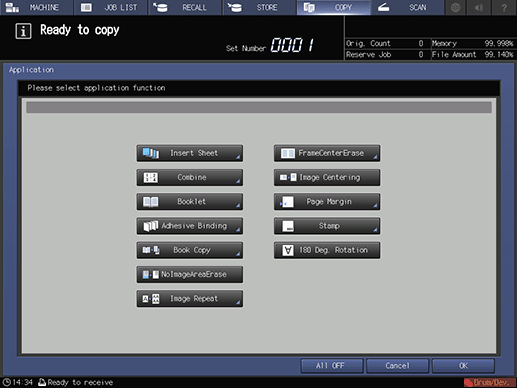
Press Page Margin on the Application screen.
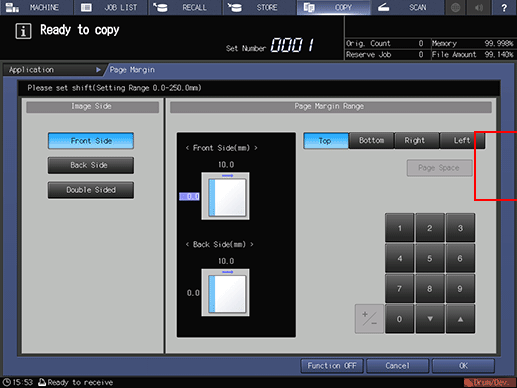
Select the side of copy paper to be adjusted with image position.
Select Front Side, Back Side, or Double Sided under Image Side.
supplementary explanationFor 1-sided copies, only the front side setting will be effective.
supplementary explanationTo have the same shift amount on both sides of 2-sided copies, select Double Sided.
Specify the shift direction and amount.
Use Top or Bottom to shift the image in lengthwise direction, and Right or Left in widthwise direction.
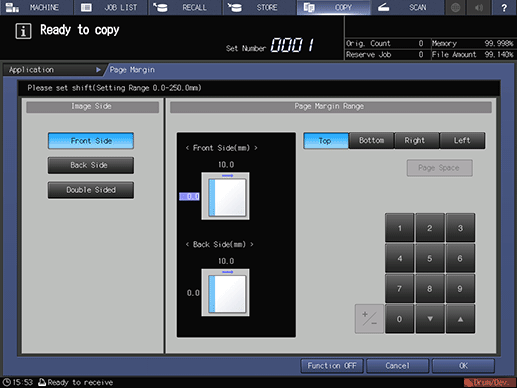
supplementary explanationSelect the desired shift direction key. Use the touch panel keypad or downup to enter the desired shift amount.
supplementary explanationShift amount: 0 mm to 250 mm in 0.1 mm increments
supplementary explanationShift direction should be based on Direction specified on the COPY screen.
To specify the shift amount individually for the front and back sides, select either Front Side or Back Side under Image Side, then enter the shift amount for each as described in step 6.
To use the Page Space function, select Page Space and enter the desired page space amount.
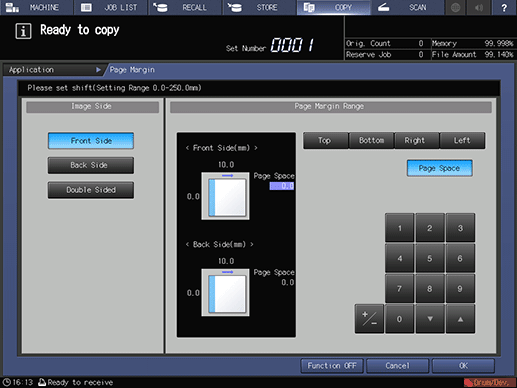
supplementary explanationThe Page Space key appears clear on the screen only when Booklet or 2 Repeat mode of Image Repeat has already been selected.
supplementary explanationPage Space width: -250.0 mm to 250.0 mm in 0.1 mm increments
supplementary explanationFor the Page Space amount, shift direction is not needed to be specified.
Press OK to complete the setting.
supplementary explanationTo resume the original settings, press Cancel. To cancel the Page Margin function with the current setting saved, press Function OFF.
Press OK on the Application screen to return to the COPY screen.
The Page Margin icon and shortcut key are displayed under Application on the COPY screen.
Enter the desired print quantity from the keypad on the control panel.
Press Start on the control panel.
supplementary explanationPrinting does not start without returning to the COPY screen. Be sure to display the COPY screen.
Page Space
The Page Space function is available only when Booklet or 2 Repeat mode of Image Repeat has already been selected. Use this function to make the desired amount of blank space between the two images on a page.
Booklet Pagination | Page Interval |
|
|
2 Repeat mode of Image Repeat | Page Interval |
|
|