
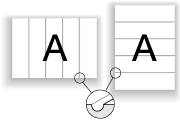
Creasing Paper
When Saddle Stitcher SD-513 equipped with Creaser Unit CR-101 is mounted on this machine, paper can be creased.
Select the desired one from 1, 2, 3, and 4 creases, then determine the crease position.
For the convex side of creases, select the front side or back side.
Reference
The number of creases is limited depending on the copy conditions to be combined.
When Fold & Staple or Multi Half is selected, only one crease can be applied to the cover. The body cannot be creased. For details, refer to Creasing a cover in Fold & Staple or Multi Half-Fold.
When Tri-Fold is selected, only two creases can be applied to the paper to be folded in three. For details, refer to Creasing Paper in Multi Tri-Fold.
When Perfect Bind is selected, two or four creases can be applied to the cover. The body cannot be creased. For details, refer to About Perfect Binder PB-503.
Menu item | Description | Illustration |
|---|---|---|
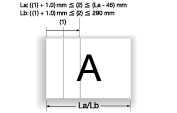
The Number of Creases Select the desired one from 1 Piece, 2 Pieces, 3 Pieces, and 4 Pieces. Paper length La: 240 mm to 336 mm Paper length Lb: 337 mm to 488 mm | 1 Piece: Applies one crease. Crease position (1): Paper La: 7 mm to (La - 46) mm (0.1 mm increments) Paper Lb: (Lb - 330) mm to 290 mm (0.1 mm increments) |
|
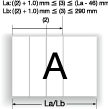
2 Pieces: Applies two creases. Crease position (2): Paper La: (Position (1) + 1.0) mm to (La - 46) mm (0.1 mm increments) Paper Lb: (Position (1) + 1.0) mm to 290 mm (0.1 mm increments) |
| |
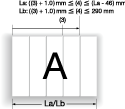
3 Pieces: Applies three creases. Crease position (3): Paper La: (Position (2) + 1.0) mm to (La - 46) mm (0.1 mm increments) Paper Lb: (Position (2) + 1.0) mm to 290 mm (0.1 mm increments) |
| |
4 Pieces: Applies four creases. Crease position (4): Paper La: (Position (3) + 1.0) mm to (La - 46) mm (0.1 mm increments) Paper Lb: (Position (3) + 1.0) mm to 290 mm (0.1 mm increments) |
| |
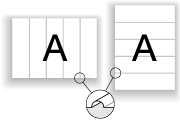
Crease Side Select Front or Back. | Front: Applies creases to the front side. |
|
Back: Applies creases to the back side. |
|

Position the original.
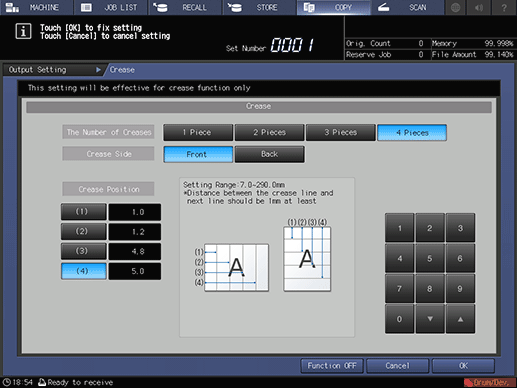
Press the COPY tab to display the COPY screen.
Press Output Setting.
The Output Setting screen is displayed.
Press Crease.
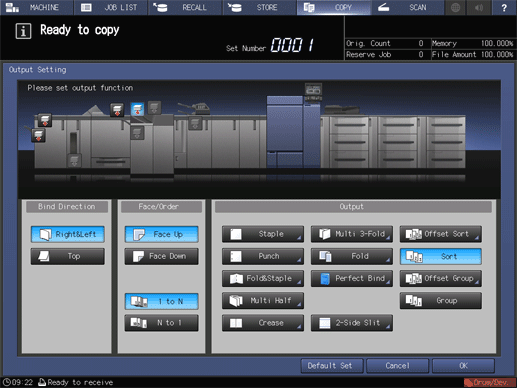
The Crease setting screen is displayed.
Select the number of creases.
Select the desired button from 1 Piece to 4 Pieces.
Set the crease position.
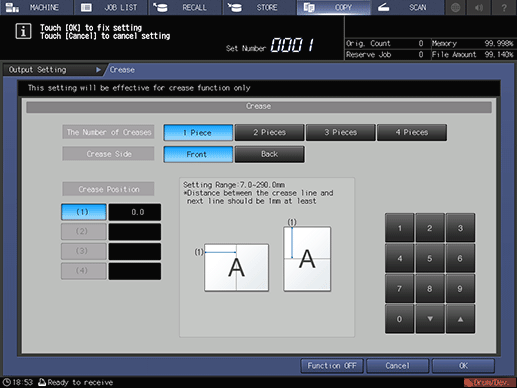
Select (1) for Crease Position, then press the keypad on the screen, the down key, or the up key to enter the first crease position. Specify the second and subsequent crease positions in the same way.
supplementary explanationThe available crease position varies depending on the paper length (length of the long side).
When paper length La is between 240 mm and 336 mm, crease position (1) is set to 7 mm (La - 46) mm (0.1 mm increments).
When paper length Lb is between 337 mm and 488 mm, crease position (1) is set to (Lb - 330) mm to 290 mm (0.1 mm increments).
supplementary explanationThe second and subsequent crease positions are set to (La - 46) mm from the higher value than the preset crease position by 1.0 mm when paper length La is between 240 mm and 336 mm. When paper length Lb is between 337 mm and 488 mm, the crease position is set to 290 mm from the higher value than the preset crease position by 1.0 mm.
Select the crease side.
In Crease Side, select Front or Back.
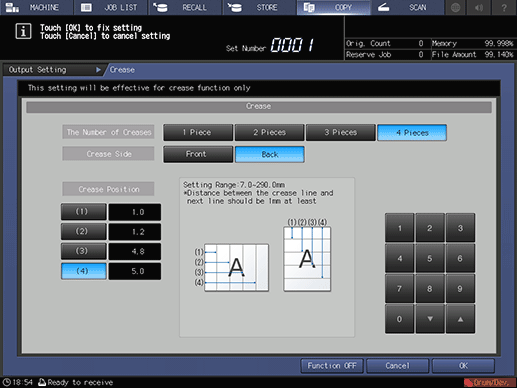
Press OK.
supplementary explanationTo undo the setting, press Cancel.
supplementary explanationTo disable the function while keeping the current setting, press Function OFF.
This returns to the Output Setting screen.
Press OK on the Output Setting screen to return to the COPY screen.
An icon representing specified function is displayed under Output Setting on the COPY screen.
Select additional copy conditions, as desired.
Enter the desired print quantity using the keypad.
Press Start on the control panel.
supplementary explanationIf crease positions are displaced on the output paper, re-specify the crease positions on the crease setting screen described in step 6. For example, if 210 mm is specified, a crease may be applied at 211 mm position due to expansion and contraction of paper. In such a case, specify 209 mm.