Spot Color Information
Overview
You can use Color Centro to create and edit spot colors.
Using sample data (sample B), you can check the procedure during the actual operation.
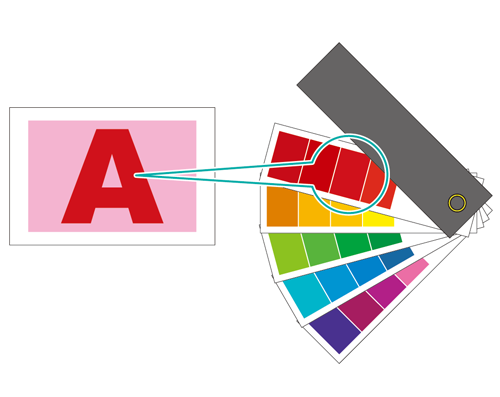
• Meaning and Purpose of Spot Colors
Spot colors specified by the application are replaced by and printed in CMYK colors according to the spot color table.
Tips
The image controller is provided with a spot color table for printing "DIC," "CF," "HKS," and "PANTONE" spot colors in CMYK colors.
Using Color Centro, you can create, register and edit new spot colors and spot color tables. This function allows you to add custom spot colors that are not registered in the machine's spot color table, and adjust and replace colors that are not reproduced as desired.
• When to perform
[Registering a New Spot Color]
When you want to use custom spot colors for printing
When you want to use spot colors that are not registered in the table
[Editing Spot Colors]
When a spot color is not reproduced as desired
When you want to adjust the coloration of a spot color
When you want to replace a spot color with another color
•Intended Environment
Operating system | Windows 7 |
Application | Color Centro 2.1 / Adobe Acrobat XI Pro |
Image Controller | Image Controller IC-604 |
Printer driver | PS Plug-in driver |
* The sample screen may be different from the actual display depending on your system environment and application version/revision.
•Samples
Sample B: B_sample.pdf
Provided in the "/contents/sample/" folder on the User's Guide CD supplied with this machine.
•Workflow
Registering Spot Color Information with Color Centro
Create and save a new custom spot color that is not registered in the machine's spot color table.
"SampleTable - SampleColor" in "Sample of Color Patch" for sample B is used as an example. Register a spot color called "Sample Color" and print out the original image with its red color replaced with "C100%."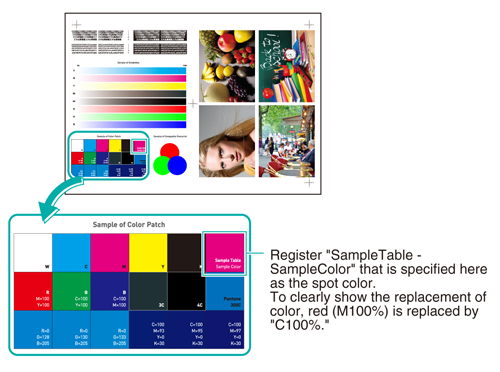
To clearly show the replacement of color, the CMYK color "red" is replaced by "blue" in this example. In actual use, you can use this function to define and replace subtly different colors.
Editing Spot Color Information with Color Centro
If the spot color is not printed as desired or if you want to replace the spot color with another color, you can edit the spot color to adjust the output CMYK color.
"Pantone 300C" in "Sample of Color Patch" for sample B is used as an example. The blue color in "Pantone 300C" is replaced by "M100%" for printing.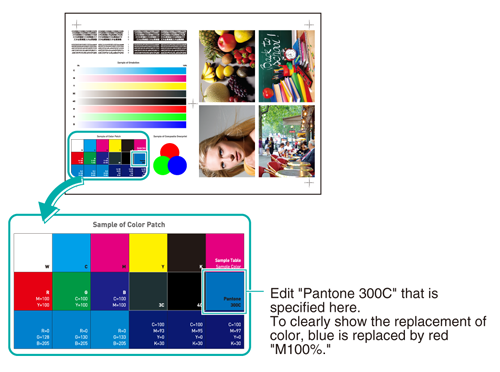
To clearly show the replacement of color, the "blue" color is replaced by "red" in this example. In actual use, you can use this function to adjust and replace subtly different colors.
Applying Spot Colors for Printing Using the Printer Driver
Apply and print the registered/edited spot color.
•Precautions
To reproduce stable colors, in addition to regular calibration, make other pre-output image quality adjustments as necessary, such as when changing screens or papers or when hue is important. For details, refer to Image quality adjustment using image controller.
Registering Spot Color Information with Color Centro
Start Color Centro, and create and save a spot color.
Start Color Centro and log in to the machine. (Refer to Start Color Centro.)
The Color Centro top screen is displayed.
Click Spot Color on the top screen.
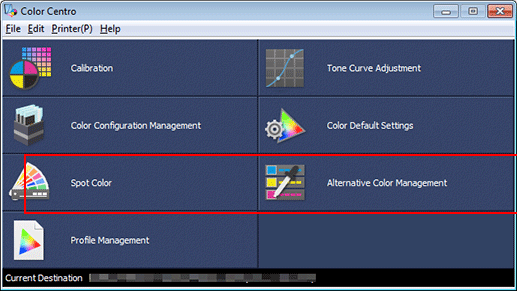
The Spot Color screen is displayed.
Select New Table from the File menu, and then click New.
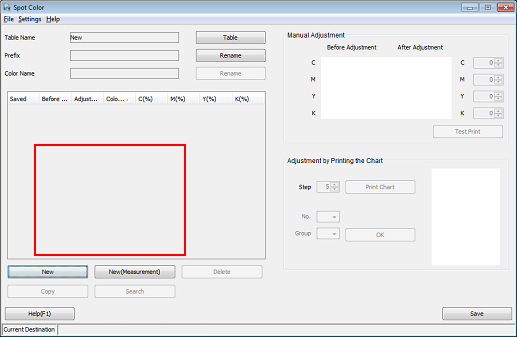
The new creation screen is displayed.
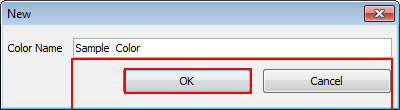
Enter the name of the spot color you want to create, and click OK.
Example: The spot color is named "Sample Color."
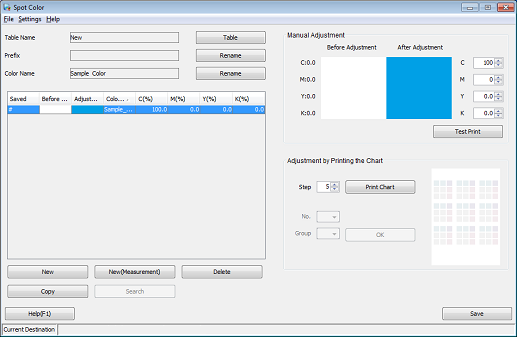
The added spot color name is displayed on the Spot Color screen.
Set the spot color's CMYK value and click Save.
The colors being adjusted are displayed in the After Adjustment column.
Example: The spot color's CMYK value is set to "C100%."
Item
Setting
C
[100]
MYK
[0.0]
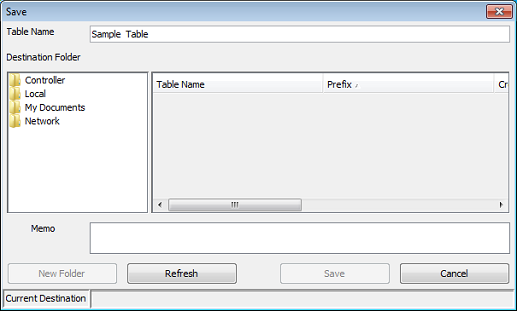
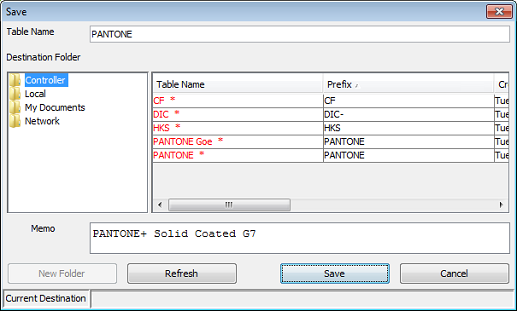
The Spot Color Table Save screen is displayed.
Enter the name of the spot color table in which you want to save the spot color.
Example: The name of the spot color table is "Sample Table."
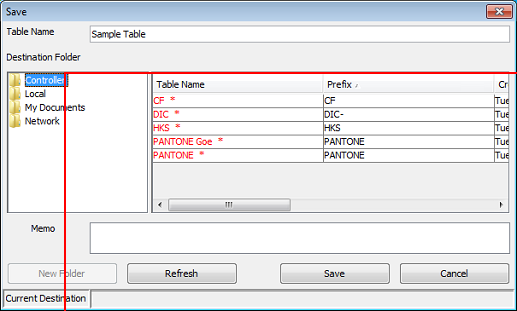
supplementary explanationThe default spot color table has an asterisk (*) at the end of its name.
supplementary explanationIf you edit and save the default spot color table, it is saved with a name without the asterisk.
supplementary explanationYou can save multiple spot color tables with the same name.
supplementary explanationWhen printing, the spot color tables are searched from the top of the table on the Spot Color screen. If the same spot color is saved in more than one spot color table, the first spot color found is applied.
Select Controller as the Destination Folder and click Save.
Selecting Controller saves the spot color to the image controller.
After checking that the spot color is saved, close the screen by selecting Close from the File menu.

Editing Spot Color Information with Color Centro
Start Color Centro, and edit a spot color.
Start Color Centro and log in to the machine. (Refer to Start Color Centro.)
The Color Centro top screen is displayed.
Click Spot Color on the top screen.
The Spot Color screen is displayed.
Click Table.

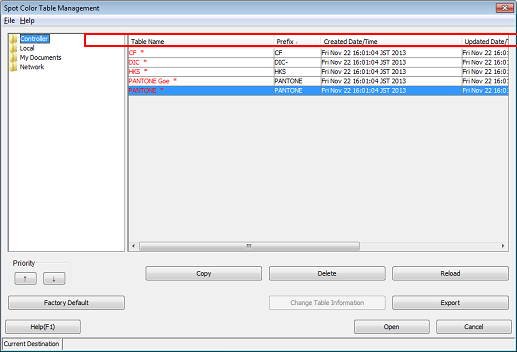
The Spot Color Table Management screen is displayed.
Select Controller from the tree on the left side of the screen. From the right side of the screen, select the spot color table that you want to edit, and click Open.
Example: Controller is selected to open the color table PANTONE.
supplementary explanationThe default spot color table has an asterisk (*) at the end of its name.
The spot colors in the spot color table are listed on the Spot Color screen.
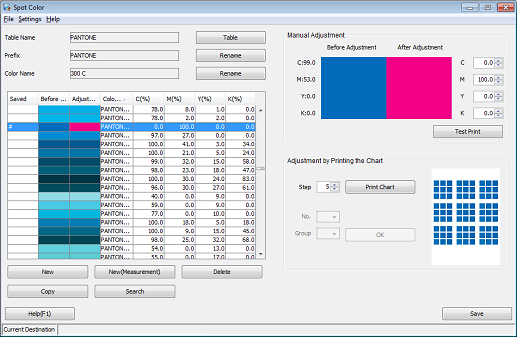
From the list, select the spot color that you want to edit.
Example: "PANTONE 300C" is selected.
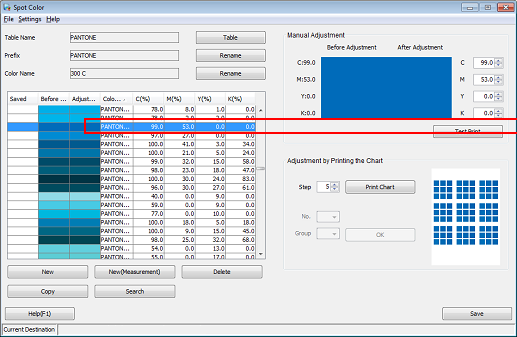
The selected spot color name is displayed on the Spot Color screen.
Set the spot color's CMYK value. Check the Prefix and Color Name, and click Save.
The colors being adjusted are displayed in the After Adjustment column.
Example: The spot color's CMYK value is set to "M100%."
Item
Setting
CYK
[0.0]
M
[100]
supplementary explanationWhen printing, the spot color name is presented as Prefix + Color Name, for example, like "PANTONE 300C" displayed in Color Name on the spot color list. For this reason, you need to match the color name to be specified on the application side with the machine's "Prefix + Color Name." If the two names are not the same, the specified spot color cannot be used.
supplementary explanationThe Table Name can be different from the Prefix.
supplementary explanationThe same Prefix can be used for multiple spot color tables. If the same color name existed among multiple spot color tables, the spot color table that is listed higher on the Spot Color Table Management screen (Step 4) is prioritized.
The Spot Color Table Save screen is displayed.
After checking the spot color table name, select a Destination Folder and click Save.
To use the edited spot color, save the spot color table to Controller. Selecting Controller saves the spot color to the image controller.
Example: The name of the spot color table is "PANTONE" (unchanged).
supplementary explanationIf you edit and save the default spot color table, it is saved with a name without the asterisk.
supplementary explanationYou can save multiple spot color tables with the same name.
supplementary explanationYou can change the priority of tables on the Spot Color Table Management screen (Step 4). After selecting a table from the list, click
 /
/  under Priority at the bottom left.
After checking that the spot color is saved, close the screen by selecting Close from the File menu.

Applying Spot Colors for Printing Using the Printer Driver
You can apply the registered spot colors for printing.
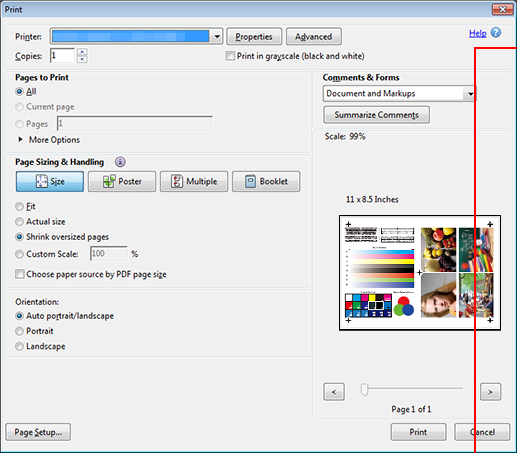
Open the original data with the application, and then click Print on the File menu.
Example: Sample B (B_sample.pdf) is used.
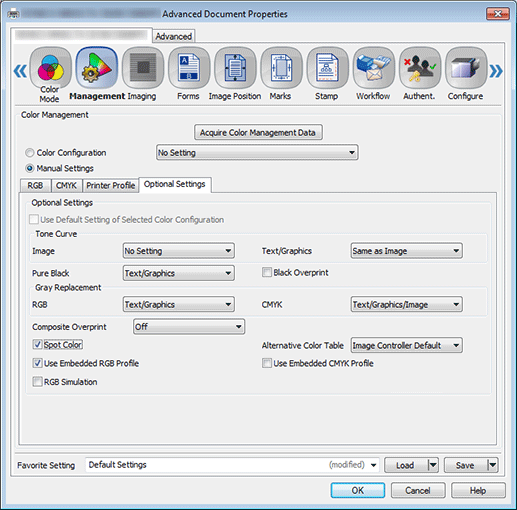
Select the printer to use for printing and click Properties.

Click the Management tab, and then click Manual Settings.
supplementary explanationIf the Management tab is not displayed, click
 to switch the tab display.
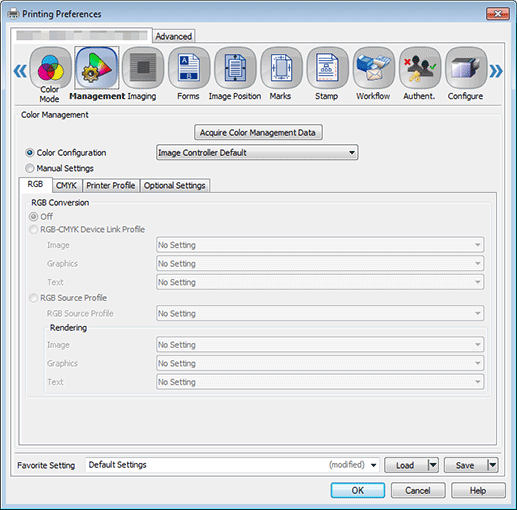
Click Optional Settings and select Spot Color. Click OK.
On the Print screen, enter the Copies and click Print. After printing, check the results.
Check that the original color has been replaced by the specified color (spot color) according to the spot color table.