
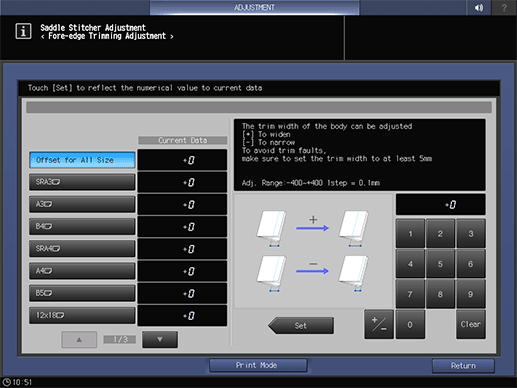
Fore-edge Trimming Adj.
Adjust the cut edge trimming width for Saddle Stitcher SD-513. The trimming width should be more than 5 mm, otherwise the trimming operation may not performed properly.
Objects of Adjustment: Offset for All Size, SRA3 short edge feed, A3 short edge feed, B4 short edge feed, SRA4 short edge feed, A4 short edge feed, B5 short edge feed, 12 18 short edge feed, 11 17 short edge feed, 8.5 14 short edge feed, 8.5 11 short edge feed, 8 13 short edge feed, 8K short edge feed, 16K short edge feed, Custom (380 to 488 mm), Custom (257 to 379 mm), 13 19 short edge feed
NOTICE
If a numeric value is specified for Offset for All Size, it is applied to all paper sizes. With a specific paper size selected, the set value becomes the sum of the entered value and the value previously specified for Offset for All Size.
Press Adjustment on the MACHINE screen to display the Adjustment Menu screen.
Press Finisher Adjustment, Saddle Stitcher Adjustment, and Fore-edge Trimming Adj. in sequence.

Select the size to be adjusted using down or up.
Press Print Mode.
Load the paper with the size to be adjusted, then select that tray.
Press Start on the control panel.
A sample pattern will be output.
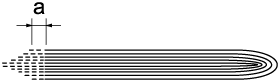
Check the trim (a) of the printed paper.
Allowance: a = 5 mm or more
If any adjustment is required, press Exit PrintMode to return to the Fore-edge Trimming Adjustment screen.
Use the touch panel keypad to enter the set value.
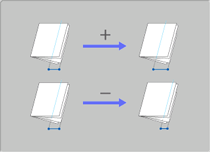
supplementary explanationUse +/- to specify the value to be positive or negative.
supplementary explanationPress Set to change the Current Value.
supplementary explanationAdjustment Range: -400 (To narrow) to +400 (To widen) (1 step = 0.1 mm)
supplementary explanationEnter the value so that the cover paper should be cut by 5.0 mm or more. If the trimming width is less than 5.0 mm, the trimming operation may not be performed properly. Therefore, even if the trimming width is less than 5.0 mm, the actual one is automatically controlled to 5.0 mm or more.
Repeat steps 4 to 9 until the desired result is obtained.
Press Return.
The screen returns to the Saddle Stitcher Adjustment Menu screen.