
Advanced Controller Calibration (G7)
Overview
In addition to the regular controller calibration (refer to Controller Calibration), measure the accuracy and check the Gray Step (gray balance) measurement result as necessary. Based on the values for gray color standard state, execute the advanced controller calibration (G7) as necessary.
• Meaning and Purpose of Advanced Controller Calibration
While the regular controller calibration (refer to Controller Calibration) adjusts the output density of C, M, Y, and K colors, the advanced controller calibration uses primary colors (C, M, Y, and K) as a one-dimensional curve and adjusts gray balance for enhanced color reproduction accuracy. For details, refer to What is calibration?.
Exact Color is the default setting in Color Centro. When Color Centro is set to Exact Color, G7 calibration cannot be added and used side-by-side. When you want to change Exact Color to G7 calibration, contact your service representative.
•When to perform
Any time (If the accuracy measurement result presented a greater ΔCh value (saturation difference), etc. than the preferred value)
•Intended Environment
Operating system | Windows 7 |
Application | Color Centro 2.1 |
Image Controller | Image Controller IC-604 |
Color Density Control | Off |
Instrument | i1Pro |
Paper type/thickness | Coated GL (A3), 128 g/m2 / 33 lb Bond |
* The sample screen may be different from the actual display depending on your system environment and application version/revision.
•Workflow
Measuring the Calibration Accuracy and Checking the Results
Executing G7 Calibration
•Precautions
To reproduce stable colors, make other image quality adjustments as necessary, such as when changing screens or papers or when hue is important. For details, refer to Image quality adjustment using image controller.
If neither the G7 function nor Image quality adjustment using image controller improves color stability, creating a profile may resolve the problem.
Measuring the Calibration Accuracy and Checking the Results
After executing controller calibration, measure the calibration accuracy.
After measurement, check the CMYK density, gray balance, and other results to determine whether advanced controller calibration is necessary.
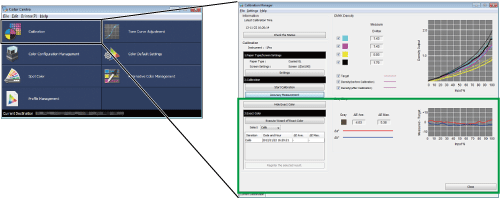
Execute the controller calibration with Color Centro.
supplementary explanationFor details about the controller calibration operation, refer to Controller Calibration.
supplementary explanationIf you are using registered calibration data or current calibration data without executing calibration, start from Step 2.
On the Calibration Manager screen, click Accuracy Measurement under 2. Calibration.
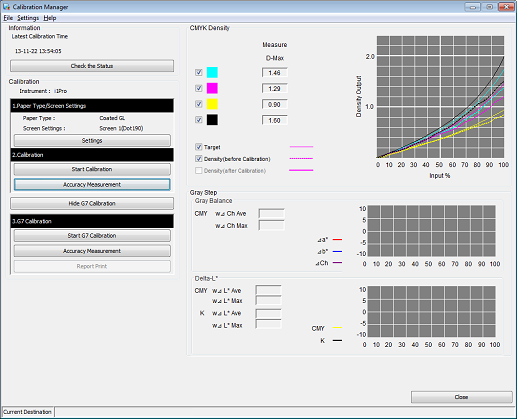
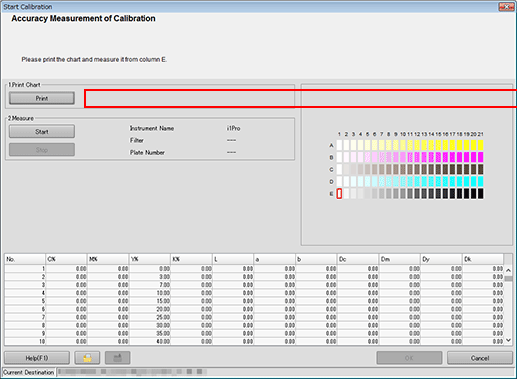
The Accuracy Measurement of Calibration screen is displayed.
Click Print.
Print the color chart that is to be measured using the instrument.
On the Print Chart screen, set the Copies and Paper Tray. After setting, click Print.
Example:
Item
Setting
Copies
1
Paper Tray
Tray 1
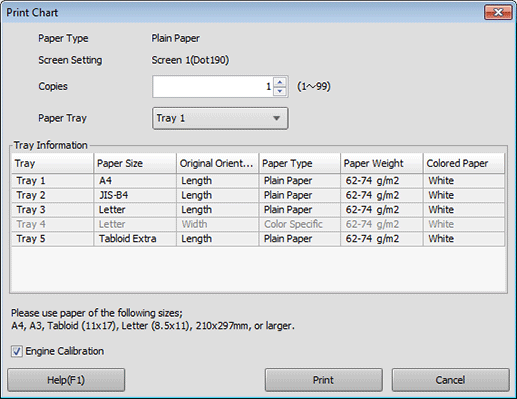
A test chart is printed. On the chart, Print Date, Output Number of Sets, and No. are printed.
Connect the instrument to the computer and click Start.
Example: The i1Pro is connected.
supplementary explanationThe device driver for the instrument must be installed on your computer beforehand. For details, refer to the instrument's manual.
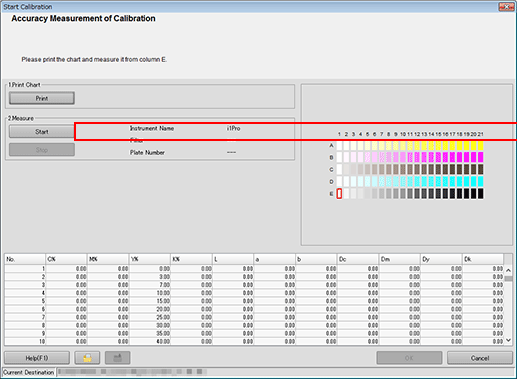
Calibration accuracy measurement starts.
Measure the chart using the instrument.
For details about the chart measurement operation, refer to Controller Calibration.
Check the measurement results (CMYK density and Gray Step) on the Calibration Manager screen.
CMYK Density:
Check whether the D-Max (maximum density) under Measure is in its appropriate range. Check whether the Target and Density (after Calibration) in the graph are close.
Gray Step:
Based on the Gray Balance, Delta-L*, Δa*, Δb*, and ΔCh values, check the gray reproducibility.
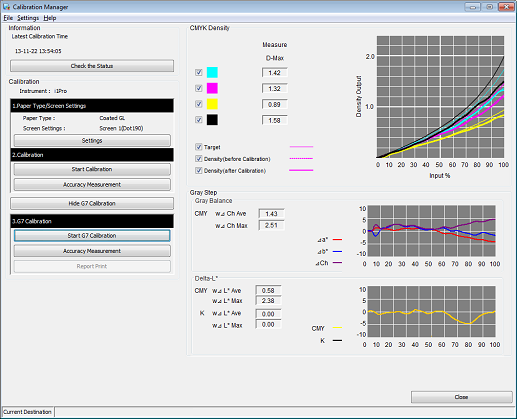
supplementary explanationCheck the measurement results, and if necessary, proceed to advanced controller calibration (Executing the G7 Calibration).
Executing the G7 Calibration
By executing the G7 calibration, you can apply the correction to the controller for enhanced color reproduction accuracy.
On the Calibration Manager screen, click Start G7 Calibration under 3. G7 Calibration.

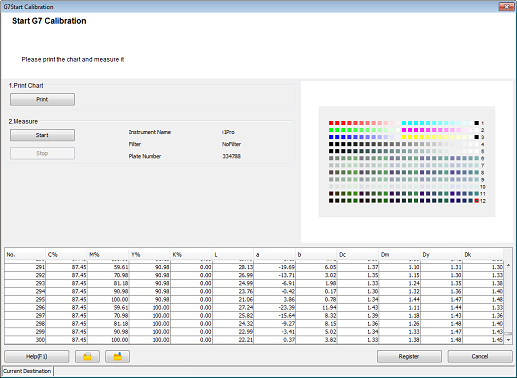
The Start G7 Calibration screen is displayed.
Click Print.
Print the color chart that is to be measured using the instrument.
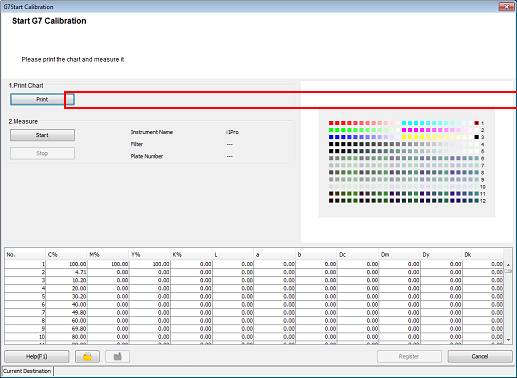
A test chart is printed.
Click Start.
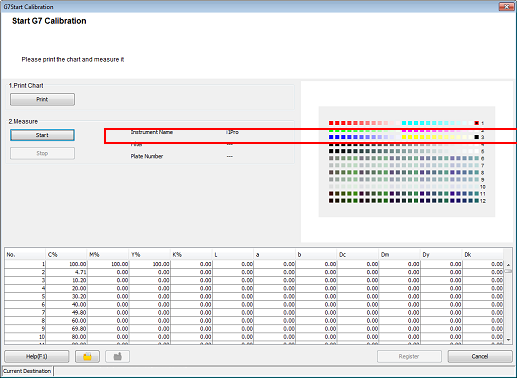
Measure the chart using the instrument. After you finish the chart measurement, click Register.
Example: Measurement is performed using i1Pro.
supplementary explanationBy registering the acquired calibration data in the image controller, this data can be applied when printing.
Click OK on the Information screen.
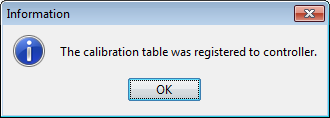
The calibration table is registered in the image controller.
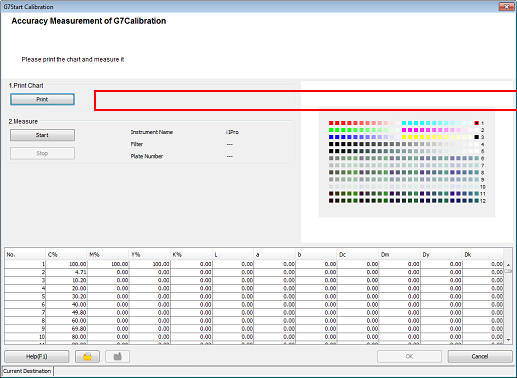
On the Calibration Manager screen, click Accuracy Measurement under 3. G7 Calibration.
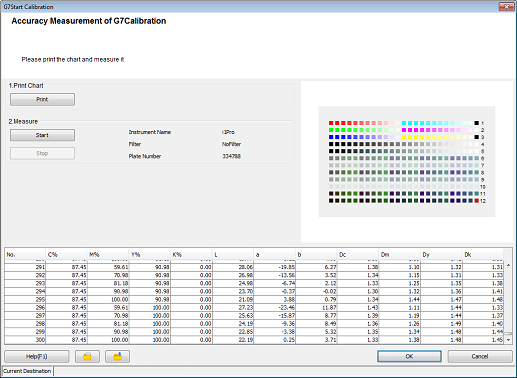
The Accuracy Measurement of G7Calibration screen is displayed.
Click Print.
Print the color chart that is to be measured using the instrument.
A test chart is printed.
Click Start.
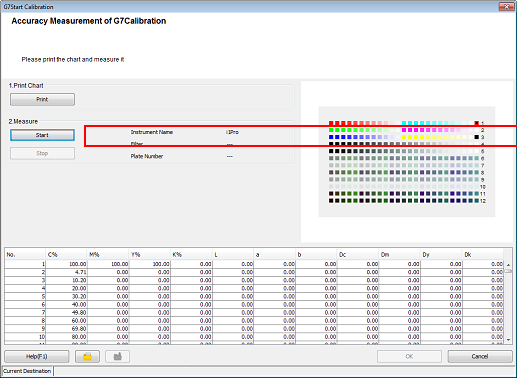
Measure the chart using the instrument. After you finish the chart measurement, click OK.
supplementary explanationWhen the values of ΔCh and ΔE* are not standard as the result of the accuracy check, the dialogue is displayed. You can choose to recalculate and register the calibration table to fit in the target range or register as is in the dialogue. When you recalculate, you can print the report about the current correction data before executing.
supplementary explanationWhen you recalculate, you are recommended to return to Step 6 to measure the accuracy after executing.
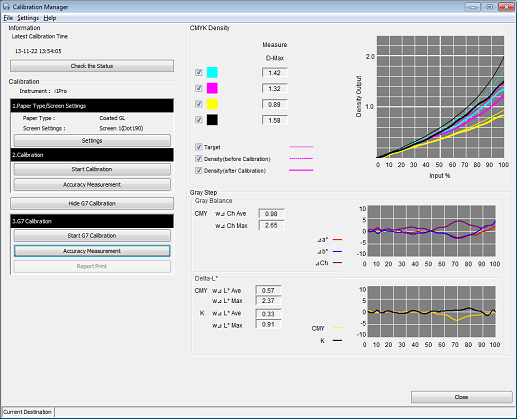
Check the measurement results (CMYK density and Gray Step) on the Calibration Manager screen.
When the calibration accuracy measurement is completed, the measurement results for CMYK density and Gray Step (gray balance) are displayed.
CMYK Density:
Check whether the D-Max (maximum density) under Measure is in its appropriate range. Check whether the Target and Density (after Calibration) in the graph are close.
Gray Step:
Based on the Gray Balance, Delta-L*, Δa*, Δb*, and ΔCh values, check the gray reproducibility.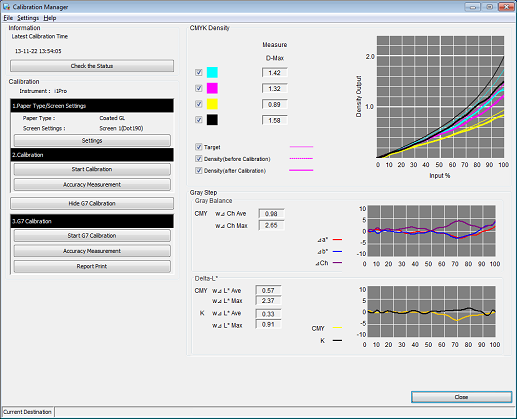
supplementary explanationWhen Report Print is clicked, the measurement results for G7 calibration is printed.