
Entering New Density Balance Adjustment Data for Manual Adjustment
Enter new density balance adjustment data to adjust the balance manually.
Objects of Adjustment: All x 9 points mode: 9 points, 16 x 32 points mode: 512 points
Adjustment Range: -128 to +127For manual setting of the density balance adjustment, the following two modes, [All x 9 points] and [16 x 32 points], are provided.
Use [All x 9 points] to enter the density value into 9 points out of 32 points dividing the crosswise direction, so that the machine automatically determines the density value in surrounding area.
Use [16 x 32 points] to manually enter the adjustment data into a total of 512 points; 32 points in crosswise direction, and 16 points in feeding direction.
This setting can be made individually for each of predefined screen types.

The screen type can be changed in UTILITY. For details, refer to Custom Screen: Selecting the Screen Type.
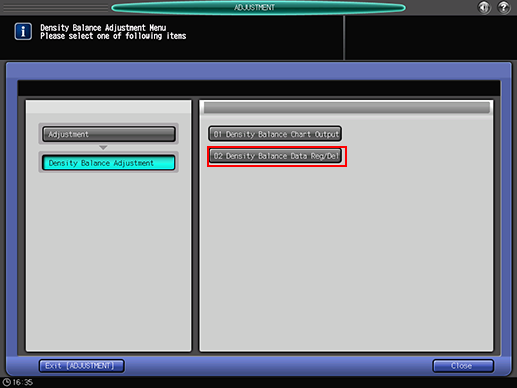
Press [Adjustment] on the [MACHINE] screen to display the [Adjustment Menu] screen.
Press [Density Balance Adjustment] and [Density Balance Data Reg/Del] in sequence.
Select any one row in the list, and press [Manual Setting].


No more than 10 pieces of data can be registered, however, the data can be overwritten. If desired, select the data to be overwritten.
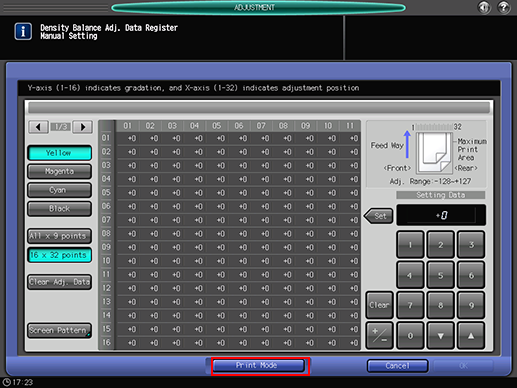
The [Density Balance Adj. Data Register] screen is displayed.
If the existing data is selected, the registered density balance adjustment data is displayed.
Press [Screen Pattern].

Select the screen to apply density balance data to, and press [OK].

Press [Print Mode].
Select the paper size.
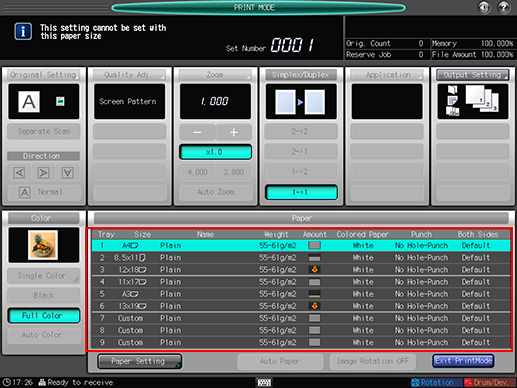
Load 12
 18
18  , SRA3 , 11 17 , or A3 paper in a tray, then select that tray.
Press Start on the control panel.
The machine outputs a chart with its density balance adjusted.
Review the chart.
Press [Exit PrintMode] to return to the [Density Balance Adj. Data Register] screen.
Select a color to be adjusted from [Yellow], [Magenta], [Cyan], and [Black].

Select either [All x 9 points] or [16 x 32 points].
When [All x 9 points] is selected

In case of [All x 9 points] selected in step 12, enter the desired adjustment value in the following 9 points taken out from 01 to 32 on the X-axis: [01], [05], [09], [13], [17], [21], [25], [29], [32].
In case of [16 x 32 points] selected in step 12, enter the adjustment value into your desired points selected from a total of 512 points; 32 points in the crosswise direction, and 16 points in the paper feed direction.Use [
 ] and [
 ] as needed to display the desired point on the X-axis.
If [16
32 points] is selected, pressing the top row of the X-axis can select all the lower columns, and you can enter the same value collectively.
Use [+/-] to specify the value to be positive or negative. Press [Clear] to set the value at "0."
Press [Set].
Repeat steps 11 to 13 to adjust the density balance for all the desired colors.
To clear the adjustment data, press [Clear Adj. Data]. The adjustment data return to "0" at all points.
[Clear Adj. Data] sets "0" for the adjustment data at the selected point as well as for the adjustment data for all points in the particular color you are adjusting. Be careful when using this key.
Press [Print Mode].

Select the paper size.
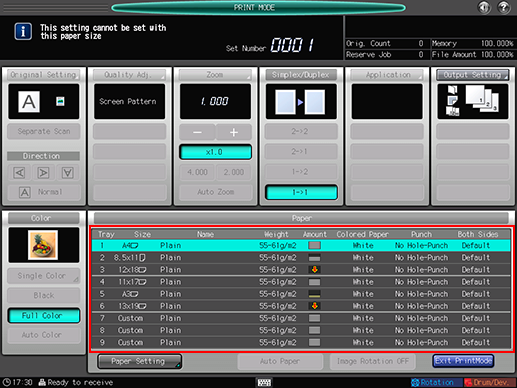
Load 12
18 , SRA3 , 11 17 , or A3 paper in a tray, then select that tray.
Press Start on the control panel.
The machine outputs a chart with its density balance adjusted.
Review the chart.
Press [Exit PrintMode] to return to the [Density Balance Adj. Data Register] screen.
Repeat steps 11 to 19 to adjust the density balance for all the desired colors.
To clear the adjustment data, press [Clear Adj. Data]. The adjustment data return to "0" at all points.
[Clear Adj. Data] sets "0" for the adjustment data at the selected point as well as for the adjustment data for all points in the particular color you are adjusting. Be careful when using this key.
When the adjustment is completed, press [OK] on the [Density Balance Adj. Data Register] screen.
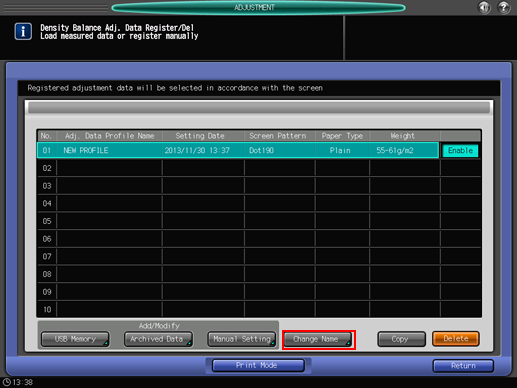
The screen returns to the [Density Balance Adj. Data Register/Del] screen and [NEW PROFILE] in [Adj. Data Profile Name] is displayed.
If a chart for confirmation is not output, the density balance adjustment data is not changed or registered even if the [OK] on the [Density Balance Adj. Data Register] screen. Be sure to output a chart after making an adjustment, then press [OK].
Press [Change Name].
The [Change Profile Name] screen is displayed.
Enter the desired profile name, then press [OK].
Press [Return].
The screen returns to the [Density Balance Adjustment Menu] screen.