
Registering Colorimetric Data in the Machine
Register colorimetric data in the machine.
Two methods are available to register colorimetric data.
Registering colorimetric data using a USB flash drive
Registering colorimetric data via Web
Maximum 10 colorimetric data items can be registered.
If necessary, you can overwrite, synthesize, or delete existing data. When overwritten, the existing data (former data) is replaced by newly created colorimetric data (new data). When synthesized, the new data is merged with the former data to be registered. To synthesize data, the new data and former data must have the same screen type, paper type, and weight. You can adjust the percentages of the new data and former data to be synthesized. Contact your service representative.
When registering colorimetric data, the following error messages may be displayed.
Deal with problems as instructed in the messages.
Error Message | Error Message |
|---|---|
Data Error | File Name Error |
Number-of-Data Error | File Data Error |
Data Saving Error |
Registering Colorimetric Data Using a USB Flash Drive
Use the spectrophotometer to read the density balance chart that has been output in accordance with the procedure Outputting the Density Balance Chart so that colorimetric data is created.
Specify the desired name to the colorimetric data.
Enter [(Up to 14 characters of identifying information printed on the chart)_(up to 22 characters of user-customized information).txt] as a file name.
Set the path [\C1100\ADJUST _DATA] to a USB flash drive, and save the measured data in the lowest folder.

The colorimetric data cannot be recognized on the machine with any path other than that specified. Be sure to set the designated path to save the data. If [Type 2] is selected to measure colorimetric data using the Spectrophotometer i1iSis XL, two sheets of chart are output. After the first chart is measured, save the colorimetric data, and then measure the second chart to save the colorimetric data. Use the same user-customized information for the first and second charts to enter the file name.
Press [Density Balance Data Reg/Del] on the [Density Balance Adjustment Menu] screen to display the [Density Balance Adj. Data Register/Del] screen.
Select any one row in the list of 10 profiles, and press [USB Memory].

A dialog is displayed to prompt you to connect the USB flash drive.
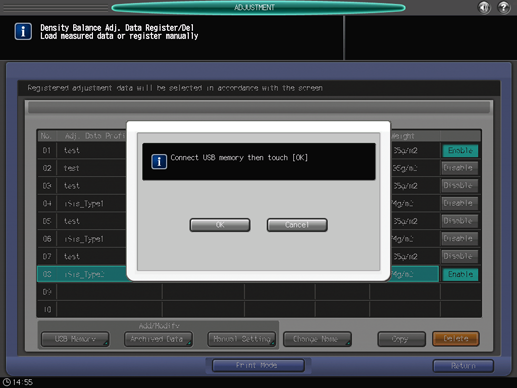
No more than 10 pieces of data can be registered, however, the data can be overwritten. If desired, select the data to be overwritten.
The colorimetric data can be synthesized and registered. To synthesize data, select the row having the same screen type, paper type, and weight.
Connect the USB flash drive, in which the colorimetric data is stored, to the USB port of the machine.
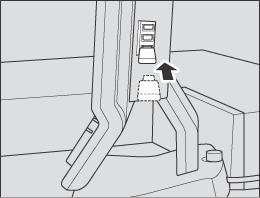
This port is available for low-power devices only. Please provide an external supply of power for devices that require a large amount of power.
Press [OK].
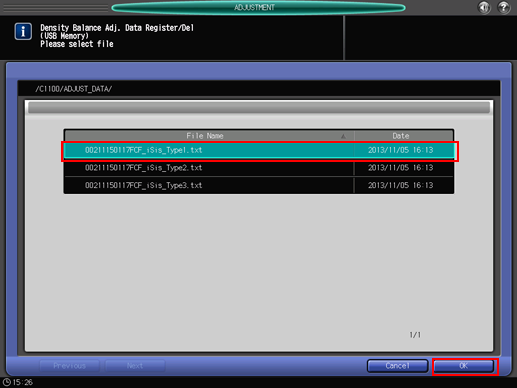
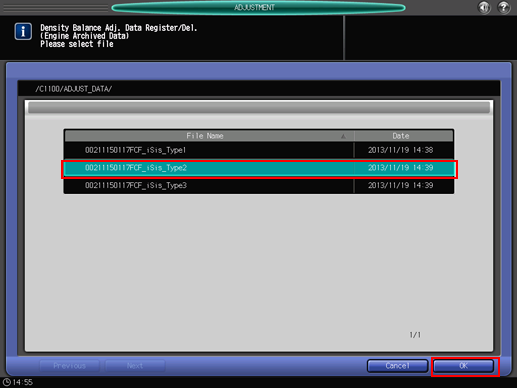
The file name of the measured data is displayed on the Density Balance Adjustment Data Register/Delete screen.
Select the file name of the data to be registered, then press [OK].
With a row of the existing data selected in step 5, a confirmation dialog is displayed.
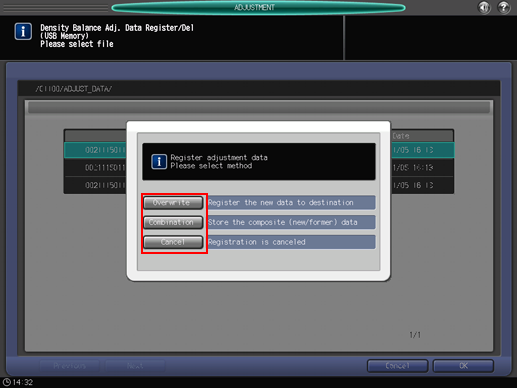
To select a row of the existing data to replace it with the new data, press [Overwrite].
To synthesize the selected data with the new data, press [Combination]. If conditions for screen type, paper type, or weight do not correspond to each other, [Combination] dims.
To stop overwriting or synthesizing the data, press [Cancel].
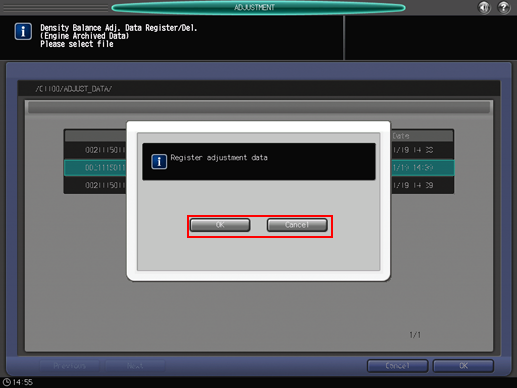
To register the adjustment data, press [OK].
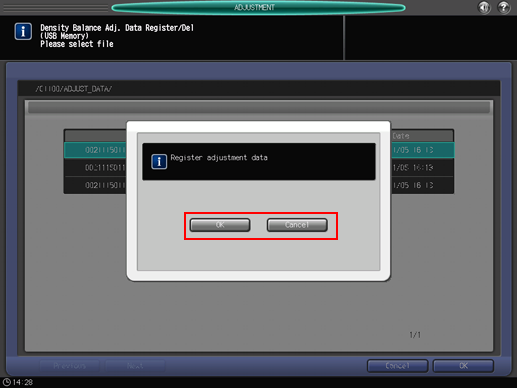
To cancel the registration, press [Cancel].
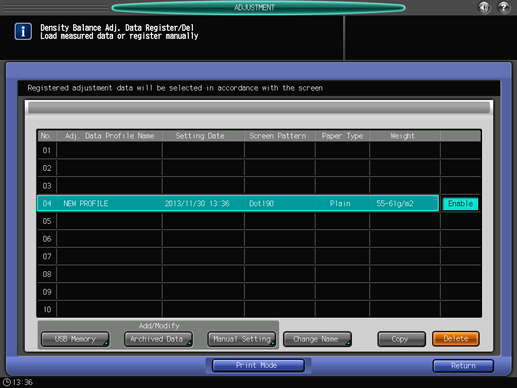
The [Density Balance Adj. Data Register/Del] screen is displayed, showing (up to 22 characters of user-customized information) specified in step 2 as Adj. Data Profile Name.
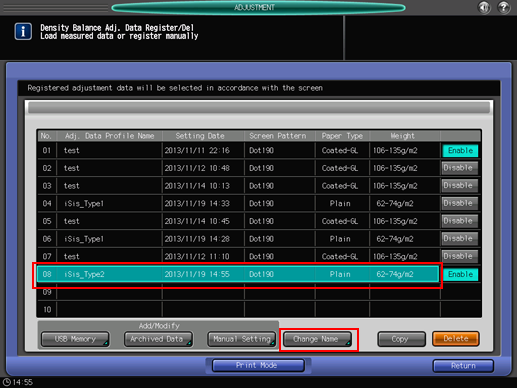
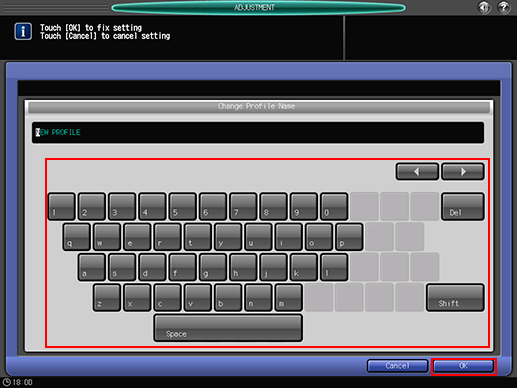
You can change the Adj. Data Profile Name, if desired. Press [Change Name] to display the [Change Profile Name] screen. Enter the desired profile name, then press [OK].
Press [Return].
The screen returns to the [Density Balance Adjustment Menu] screen.
Registering Colorimetric Data via Web
To register colorimetric data in the machine via Web, configure a setting to access to Web Utilities from the computer connected to the machine via the network.
Do not turn the power off or on during this work.

If you are registering the colorimetric data via Web using Color Care measure, some procedures are different from the ones listed below (Steps 2 to 7).
For details about the procedure, refer to the user's guide included with Color Care measure.
Use the spectrophotometer to read the density balance chart that has been output in accordance with the procedure Outputting the Density Balance Chart so that colorimetric data is created.
Specify the desired name to the colorimetric data.
Enter [(Up to 14 characters of identifying information printed on the chart)_(up to 22 characters of user-customized information).txt] as a file name.
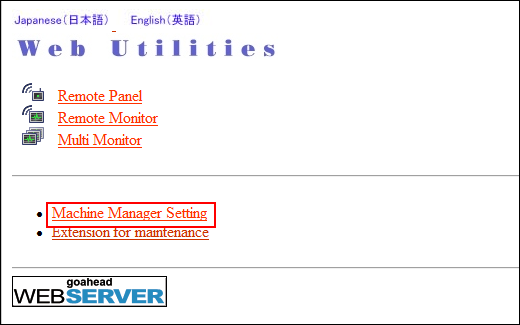
Access to Web Utilities (URL shown below) from the computer connected to the machine via the network.
For Image Controller IC-602: http://a.b.c.d:30091/
For Image Controller IC-308 or Image Controller IC-310: http://a.b.c.d/Enter the IP address of the machine into a.b.c.d.
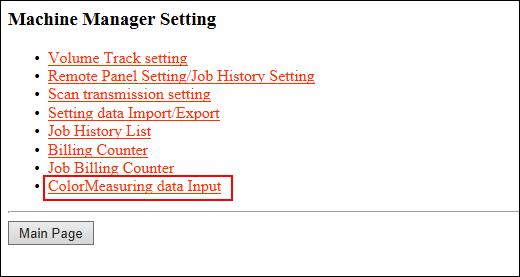
Click [Machine Manager Setting], and enter the administrator ID and password.
Click on [Color Measuring data Input].
Enter the file name for colorimetric data into [File Name], click [Browse] on the side of the file path, and select the colorimetric data saved in the computer.
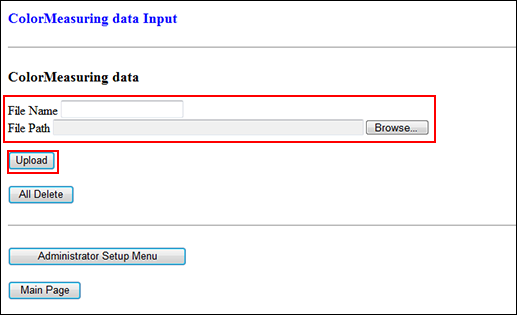
Click [Upload].
Colorimetric data is saved in the machine.
If there are two or more sets of colorimetric data, repeat step 6 and 7.
Press [Density Balance Data Reg/Del] on the [Density Balance Adjustment Menu] screen to display the [Density Balance Adj. Data Register/Del] screen.
Select any one row in the list of 10 profiles, and press [Archived Data].
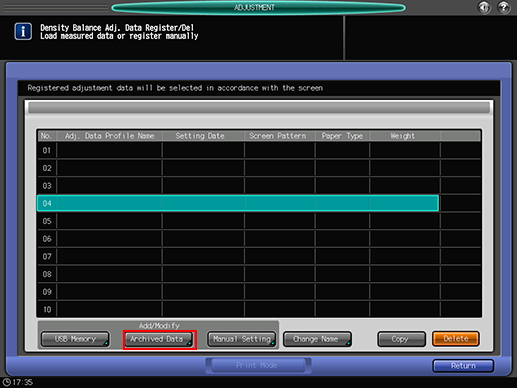
No more than 10 pieces of data can be registered, however, the data can be overwritten. If desired, select the data to be overwritten.
The colorimetric data can be synthesized and registered. To synthesize data, select the row having the same screen type, paper type, and weight.
The file name of the colorimetric data is displayed.
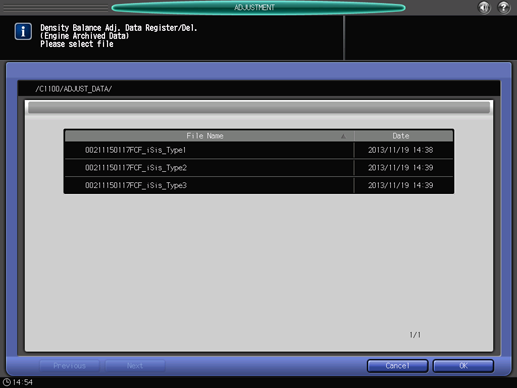
Select the file name of the data to be registered, then press [OK].
To register the adjustment data, press [OK].
To cancel the registration, press [Cancel].
The adjustment data is registered.
Press [Return].
The screen returns to the [Density Balance Adjustment Menu] screen.