
Paper Length Adjustment: Adjusting the Misalignment of the Printed Papers in the Paper Feed Direction on the Relay Stacker
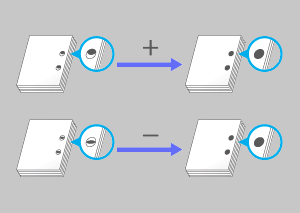
Adjust the position of the exit guides in the paper feed direction of the Relay Unit RU-510. This adjustment is provided if paper is misaligned while being delivered to a device succeeding to Relay Unit RU-510. For a specific example, if any punch holes are misaligned in the paper feed direction, make this adjustment.
Objects of Adjustment: Offset for All Size
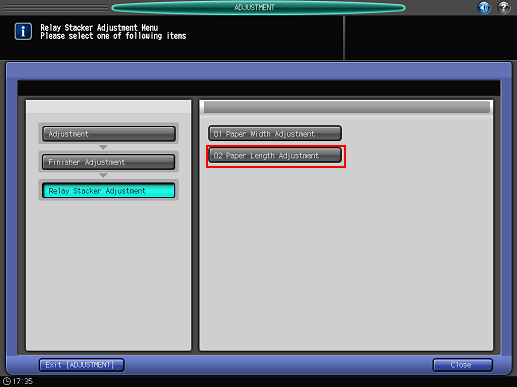
Press [Adjustment] on the [MACHINE] screen to display the [Adjustment Menu] screen.
Press [03 Finisher Adjustment], [06 Relay Stacker Adjustment], and [02 Paper Length Adjustment] in sequence.
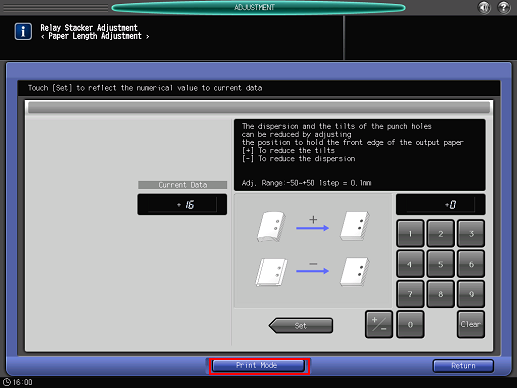
Press [Print Mode].
Load the desired paper into a tray, then select that tray.
Set the print quantity to 10, then press Start on the control panel.
A punched sample pattern is printed.
Check for any misalignment or inconsistency of punch holes in the paper feed direction.
Press [Exit PrintMode] to return to the [Paper Length Adjustment] screen.
If any adjustment is required, use the touch panel [keypad] to enter the set value.
Adjustment Range: -50 ([To reduce the dispersion]) to +50 ([To reduce the tilts]) (1 step = 0.1 mm)
Use [+/-] to specify the value to be positive or negative.
Press [Set] to change the setting with the Current Data.
Repeat steps 3 to 9 until the desired result is obtained.
Press [Return].
The screen returns to the [Relay Stacker Adjustment Menu] screen.