
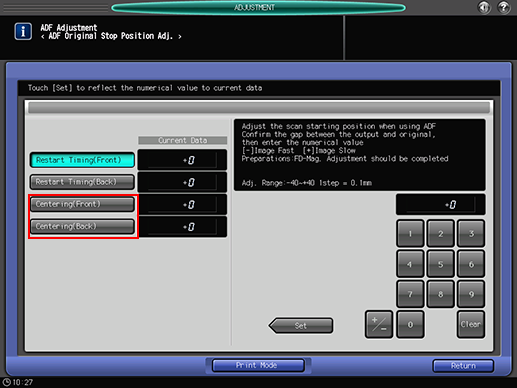
ADF Original Stop Pos. Adj.: Adjusting the Position to Start Scanning on the ADF and the Image Position in the Crosswise Direction
Adjust the position to start scanning on the ADF and the image position in the crosswise direction.
Objects of Adjustment: Restart Timing (Front), Restart Timing (Back), Centering (Front), Centering (Back)

Adjust the scanning start position after you have completed [Adjustment] - [ADF Adjustment]-[FD-Mag. Adjustment]. Adjust the image position in crosswise direction after completing [Adjustment] - [Machine Adjustment] - [Printer Adjustment] - [Centering Adjustment].
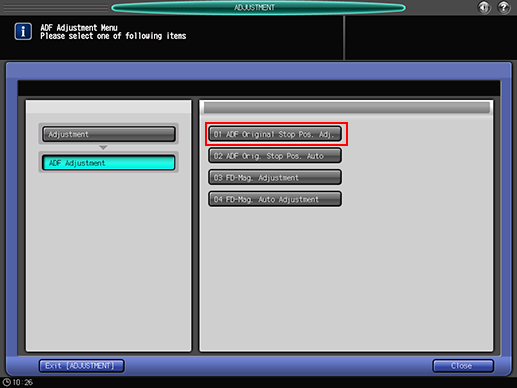
Press [Adjustment] on the [MACHINE] screen to display the [Adjustment Menu] screen.
Press [ADF Adjustment] and [ADF Original Stop Pos. Adj.] in sequence.
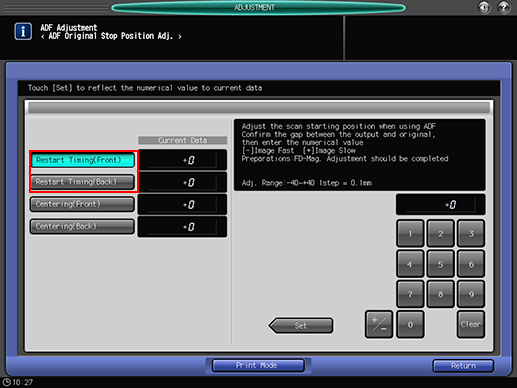
Adjust the position to start scanning the test chart.
Select [Restart Timing(Front)] or [Restart Timing(Back)].
Press [Print Mode].
Do not change [Simplex/Duplex] setting because it is selected automatically.
Load A4 paper in a tray, and select that tray.
Place the test chart on the ADF tray, and press Start on the control panel.
A sample pattern will be output.
If you selected [Restart Timing(Front)] in step 3, face the test chart surface upward and place it in the ADF tray.
If you selected [Restart Timing(Back)] in step 3, face the test chart surface downward and place it in the ADF tray.
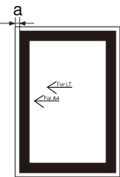
Make sure that the difference between the lengths (a) of the output paper and test chart is within the allowance range.
Allowance: 0 mm ± 2.0 mm
If any adjustment is required, press [Exit PrintMode] to return to the [ADF Original Stop Position Adj.] screen.
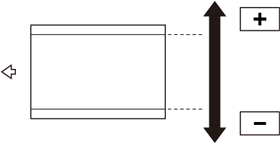
Use the touch panel keypad to enter the set value.
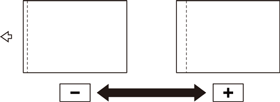
Use [+/-] to specify the value to be positive or negative.
Press [Set] to change the Current Data.
Adjustment Range: -40 ([Image Fast]) to +40 ([Image Slow]) (1 step = 0.1 mm)
Repeat steps 4 to 9 until the desired result is obtained.
Adjust the image position in the crosswise direction when the test chart is scanned.
Select [Centering(Front)] or [Centering(Back)].
Output the sample pattern. Follow steps 4 to 6.
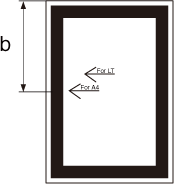
Make sure that the difference between the lengths (b) of the output paper and test chart is within the allowance range.
The length of (b) varies depending on the paper size.
Allowance: 0 mm ± 2.0 mm
If any adjustment is required, press [Exit PrintMode] to return to the [ADF Original Stop Position Adj.] screen.
Use the touch panel keypad to enter the set value.
Use [+/-] to specify the value to be positive or negative.
Press [Set] to change the Current Data.
Adjustment Range: -44 ([Front]) to +44 ([Back]) (1 step = 0.1 mm)
Repeat steps 12 to 15 until the desired result is obtained.
Press [Return].
The screen returns to the [ADF Adjustment Menu] screen.