Restart Timing Adjustment: Adjusting the Image Position of Lead Edge in Paper Feed Direction in the Printer
Adjust the image position of lead edge in paper feed direction in the printer engine.
Objects of Adjustment: Restart Timing (Tray 1 to Tray 9), Restart Timing (Back), Tray Large Plain Offset, Tray Large Thick Offset, Tray Small Plain Offset, Tray Small Thick Offset, Large Plain Offset (ADU), Large Thick Offset (ADU), Small Plain Offset (ADU), Small Thick Offset (ADU)
Make this adjustment after completing [FD-Mag. Adjustment].
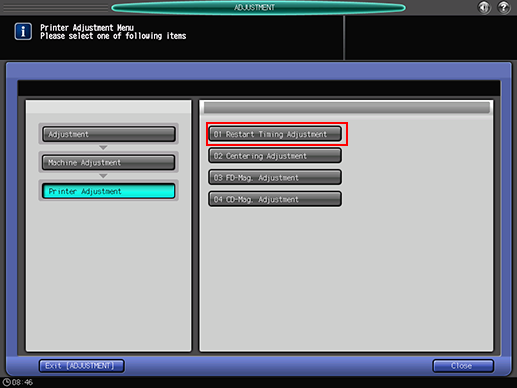
Press [Adjustment] on the [MACHINE] screen to display the [Adjustment Menu] screen.
Press [Machine Adjustment], [Printer Adjustment], and [Restart Timing Adjustment] in sequence.

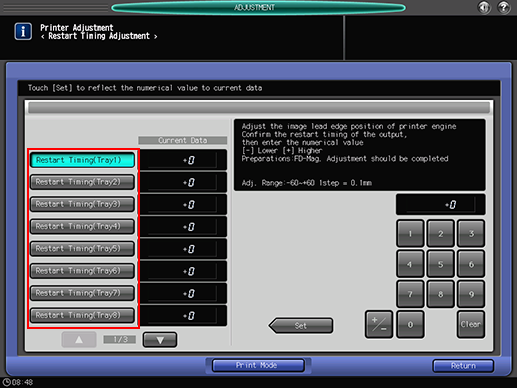
Press the key of the object to be adjusted.

Press [Print Mode].
Load A3
 paper into the tray to be adjusted, then select that tray.
Press Start on the control panel.
A sample pattern will be output.
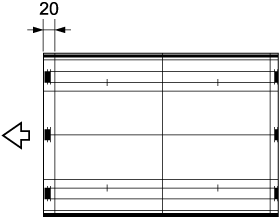
Measure the resultant restart timing.
Allowance: 20 mm ± 0.5 mm

If any adjustment is required, press [Exit PrintMode] to return to the [Restart Timing Adjustment] screen.
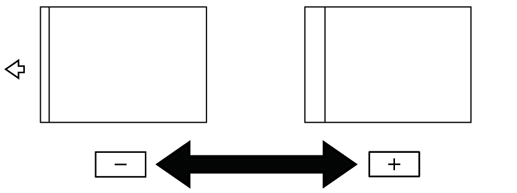
Use the touch panel keypad or the keypad on the control panel to enter the setting data.
Use [+/-] to specify the value to be positive or negative.
Press [Set] to change the current value.
Adjustment Range: -60 ([Lower]) to +60 ([Higher]) (1 step = 0.1 mm)

Repeat steps 4 to 9 until the desired result is obtained.
Press [Return].
The screen returns to the [Printer Adjustment Menu] screen.

