
Removing Paper Jam inside the Main Body
Cut the paper on the workbench on Roll Winder RW-201.
Fix the paper on the workbench using the supplied magnet bars before cutting.

When cutting the paper, be careful not to injure your hands or fingers.
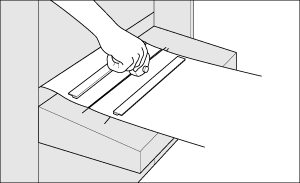
Open the top cover of the leading section, slightly loosen the media, and cut media with scissors.
When cutting the paper, be careful not to injure your hands or fingers.


If any glue sticks to the guide plate, clean it. For details, refer to Cleaning the Leading Section.
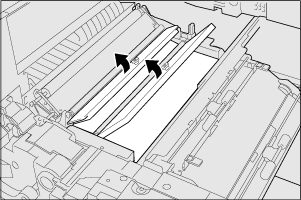
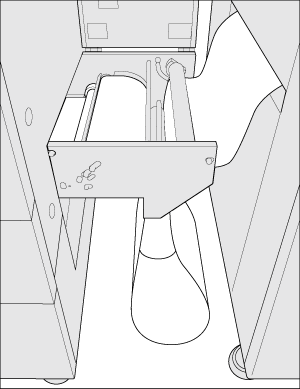
Pull out media from the delivering section.
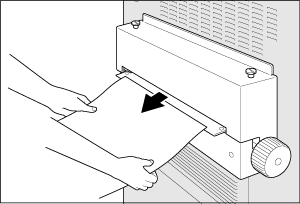
When pulling out media, do not apply excessive force and pull it out straight.
If JAM code [J-3105] is displayed, paper may coil around the fusing unit. If the paper cannot be pulled out from the delivering section, contact your service representative. Pulling out paper with excessive force may cause machine troubles.
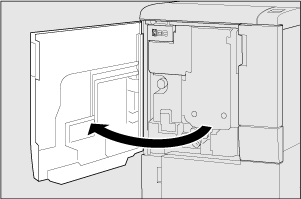
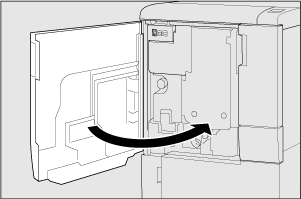
Open the front door of the main body.
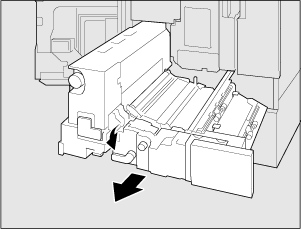
Pull the lever [M1] turn to the left and pull out the ADU.
Open the cover [M2] and cover [M3] and check for glue adhering or paper remaining inside the machine.
If any glue sticks to the parts, clean inside the machine.
Check if glue peeled from the pasted part and attached to the guide plate as well as glue running off the edge of the media.
If paper remains, remove it.
If the JAM code [J-3112] is displayed, check if the centering sensor located behind the cover [M3] is clean.
Confirm that the leaf spring (back) and leaf spring (front) do not come off.
If they come off, refer to Cleaning the Interior of the Main Body and reattach them.

DO NOT put your hand into the fusing part of the conveyance fusing unit.
Otherwise, you may get burned. Be especially careful when pulling out the conveyance fusing unit or opening the fusing part.
DO NOT put your hand or arm between the main body and conveyance fusing unit.
Touching a connection terminal or other electric parts may damage the machine or cause unexpected trouble. Please do not try to work yourself, but contact your service representative.
Insert the ADU and return the lever [M1] to the original position.
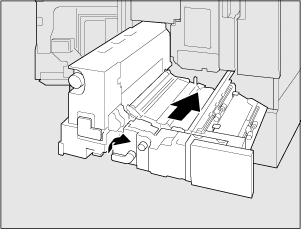
Gently insert the ADU to avoid strong shock. Note that applying a strong impact to the main body affects the setting position of the main body and may cause a meandering.
Close the front door of the main body.
Cut the tips of the media in the leading section into triangle strips.
Set the media to leading section.
Pull out the media underneath the leading section.
Be careful not to let the pulled media be touched on the floor.
Set the media on the machine.
For details, refer to the following page.
Adhere the joint of the media on the workbench.
For details, refer to the following page.
