
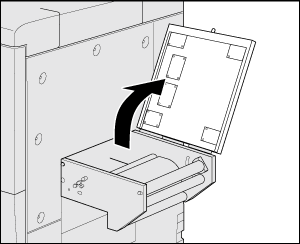
Cleaning the Leading Section
Open the top cover of the leading section.
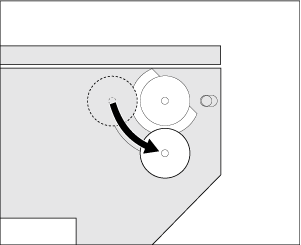
If the tension roller 2 is set to "Top", change it to "Bottom"
For details about changing the position, Setting the tension according to the paper type and thickness (weight).
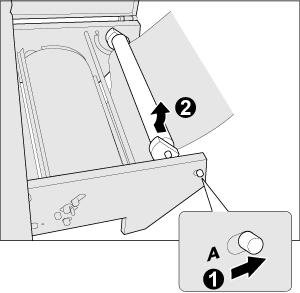
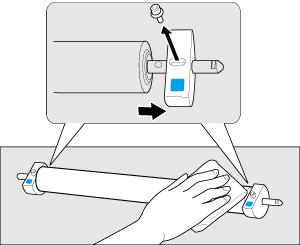
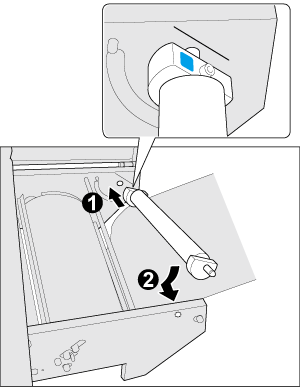
Slide the knob on the tension roller 1 right to unlock and push the tension roller 1 back to remove.
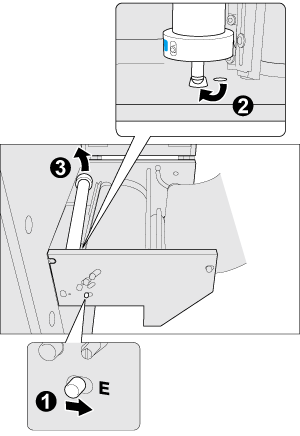
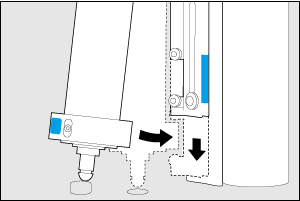
Slide the knob on the restriction roller right to unlock and remove the restriction roller.
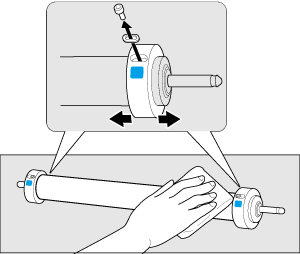
Push the restriction roller forward to eject the shaft on the front side, insert the front side shaft of the restriction roller in the bigger hole next to the hole previously inserted, and remove the shaft on the back side of the restriction roller.
When removing the restriction roller, shift the protective cover backward to align the restriction guide of the restriction roller.
Use isopropyl alcohol to clean glue sticking to both ends of the tension roller 1.
Keep in mind that the shaft with a groove is for the front side.

If it is hard to remove glue, use the supplied hexagonal wrench to detach the media guides on both ends of the roller before cleaning. When attaching the media guides, make sure that the green ICP- film-affixed faces are set on the inner side (close to the media).
After attaching the media guides, adjust the position. For details, refer to Adjusting the Positions of the Media and Parts.
Clean glue sticking to both ends of the restriction roller.
Keep in mind that the shaft with a groove is for the front side.
If it is hard to remove glue, use the supplied hexagonal wrench to detach the restriction guides and clean one by one. When removing the screws, be careful not to lose the washers.
When attaching the restriction guides, make sure that the fluororesin-coated faces are set on the inner side.
After attaching the restriction guides, adjust the position. For details, refer to Adjusting the Positions of the Media and Parts.
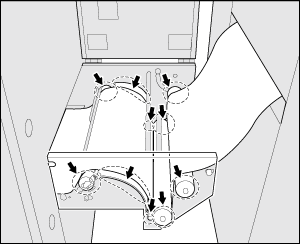
Clean the tension roller 2, tension roller 3, tension roller 4, aligning roller, and guide plate.
While shifting paper forward and backward or lifting it up, clean the sides and central portions of the parts with isopropyl alcohol. If the aligning roller is set to "fixed", set to "rotating" and clean while spinning the roller.
 For details on how to change the setting of the aligning roller (fix/rotate), refer to Setting the tension according to the paper type and thickness (weight).
To prevent injuries, pay attention to the protrusions on the guide plate during cleaning.
Install the restriction roller.
Insert the shaft on the front side of the restriction roller in the bigger hole next to the shaft hole first, then insert the restriction roller to the back side. Pull the restriction roller from the front side and insert in the correct position.
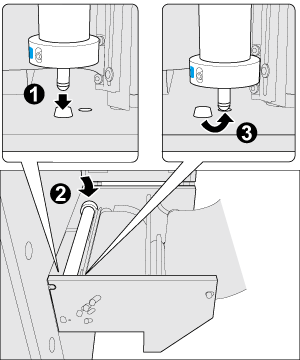
Make sure that it clicks when attaching.
When attaching the restriction roller, shift the protective cover forward to align the restriction guide of the restriction roller.
Install the tension roller 1.
Insert the back side shaft of the tension roller 1, align the angle of the media guide with the guide line on the guide plate on the back side, and then insert the front side shaft of the roller.
Make sure that it clicks when attaching.
If the position of the tension roller 2 is changed in step 2, place it back in place.