
Cleaning the Interior of the Main Body
Use the two supplied magnet bars to hold the media on the workbench of Roll Winder RW-201 and cut it.
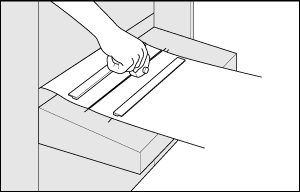
Put the two supplied magnet bars on the workbench so that they surround the cutter groove and cut the media with a cutter.

When cutting the paper, be careful not to injure your hands or fingers.
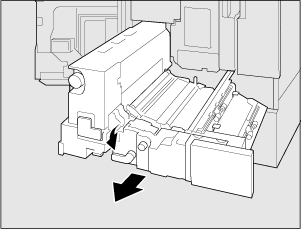
Remove the magnet on the main body side.
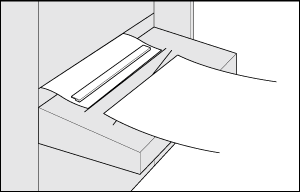
Slowly pull out the media by hand from the leading section side.

Pull the media out straight. Pulling out the media diagonally can cause it to remain in the main body, resulting in a feeding error.
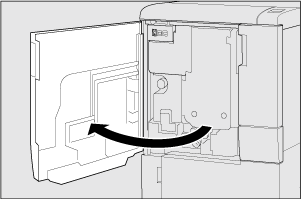
Turn ON the sub power switch of the main body.
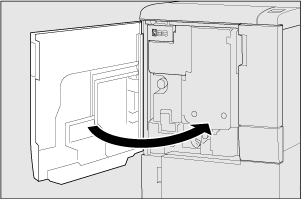
Open the front door of the main body.
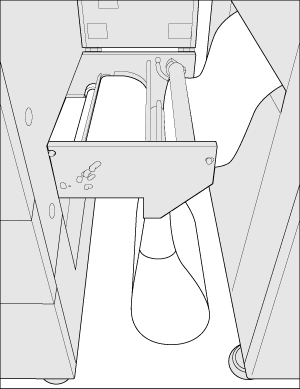
Turn the lever [M1] to the left and pull out the ADU.
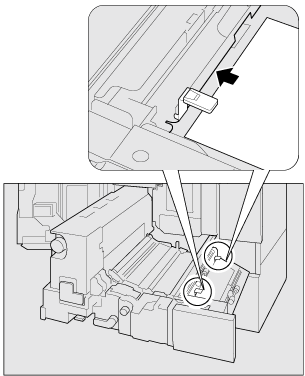
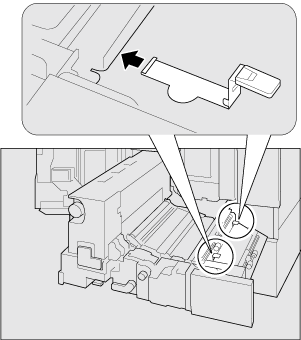
Insert paper under the leaf spring (front) and the leaf spring (back).
Glue may stick on the bottom of the leaf springs. Inserting paper prevents glue from sticking to the conveyance section.
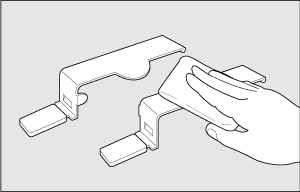
Detach the leaf spring (front) and the leaf spring (back).
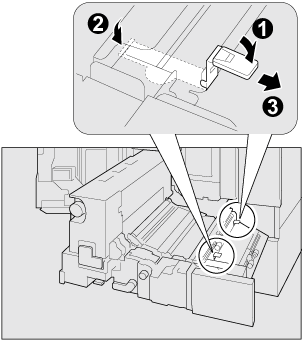
To detach the leaf spring (front) and the leaf spring (back), unlock the hooks near the knobs first.
After unlocking the hooks near the knobs, open the cover [M2], and then unlock the hooks on the other side.
Be careful not to cut your hand when attaching or detaching the leaf spring (front) and the leaf spring (back).
Glue sticking to the conveyance section can cause a feeding error. Be sure to insert paper first.
The leaf spring (front) has a round protrusion, while the leaf spring (back) does not. Make sure to use the correct springs when attaching them.
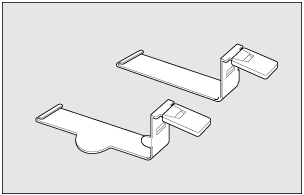
Do not apply too much force when attaching or detaching the leaf spring (front) or the leaf spring (back). Doing this can cause deformation of the springs.
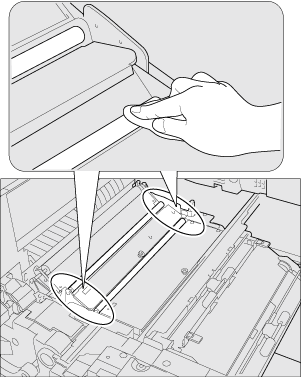
Clean the leaf spring (front) and the leaf spring (back).
Firmly clean the springs as glue easily sticks to them.
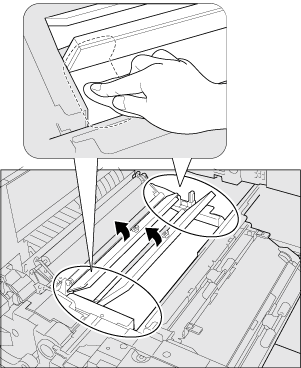
Follow the reverse procedure to detaching the leaf springs, attach the leaf spring (front) and leaf spring (back).
After attaching, make sure that both leaf springs are hooked up.
Clean the pre-transfer roller 1, pre-transfer roller 2, cover [M2], and cover [M3].
Firmly clean the pre-transfer roller 1, pre-transfer roller 2, cover [M2], and cover [M3] as glue easily sticks to the both ends of the parts.
Clean the secondary transfer roller.
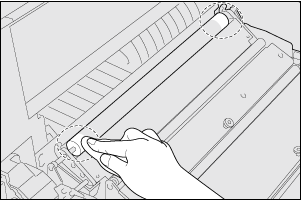
Clean the secondary transfer roller while spinning it.
Clean only both ends of the secondary transfer roller. Touching other parts may cause the deterioration of the print quality.
Insert the ADU and return the lever [M1] to the original position.
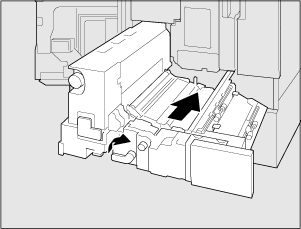
Gently insert the ADU to avoid strong shock. Note that applying a strong impact to the main body affects the setting position of the main body and may cause a meandering.
Close the front door of the main body.
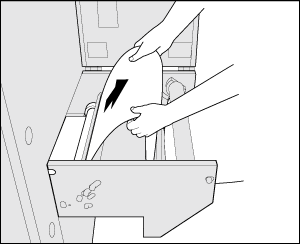
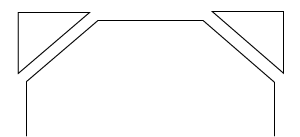
Cut the tips of the media in the leading section into triangle strips.
Set the media to leading section.
Set the media so that it is pulled under the leading section.
Be careful not to let the pulled media be touched on the floor.
Set the media on the machine.
For details, refer to the following page.
Adhere the joint of the media on the workbench.
For details, refer to the following page.
