
Setting media to the main body
This section describes how to set the media to the main body.
Turn on the main power switch and sub power switch of the main body and turn on Roll Winder RW-101/Roll Winder RW-201 beforehand.
When setting media to the main body, set the tension as follows. For details about the setting procedure, refer to Setting the tension according to the paper type and thickness (weight).
 Position of the tension roller 2: Top State of the aligning roller: Rotate Air flow of the paper feed loop fan: Auto
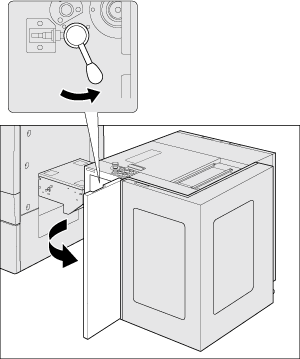
Open the front door of Roll Winder RW-101 and move the lever to press the rubber roller.
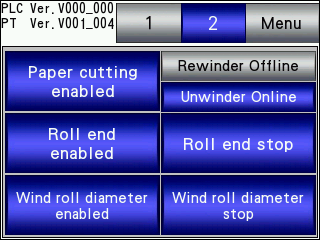
On the touch panel on Roll Winder RW-201, select [Main menu] - [1,Machine state/2,Machine setting] - [2]to set [Unwinder Online], [Rewinder Offline].
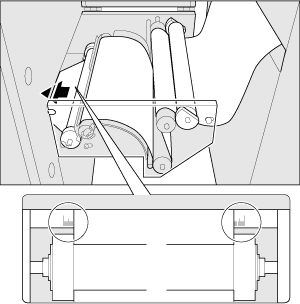
Set the lead edge of the media to the main body.
Make sure that the media is centered against the scale marks indicated on the main body.

Do not set the lead edge of the media to the main body before turning ON the machine. If the lead edge of the media is set before the machine is turned ON, The J-1755 JAM code is displayed when the machine is turned ON.
Feed the media into the inside of the main body until [Start Convey] on the [MACHINE] screen on the touch panel on the main body lights.
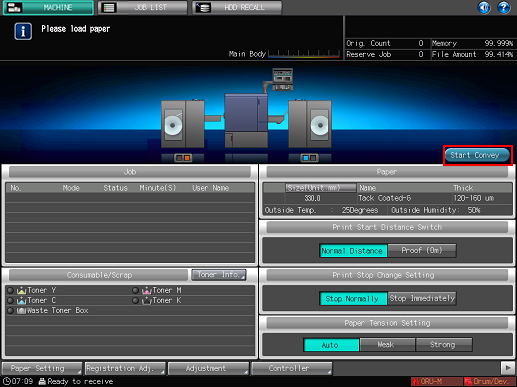
Stop feeding the media when [Start Convey] lights. Auto stop may not work after pressing [Start Convey] if the lead edge of the media reaches near the main body exit.
Press [Start Convey].
The media goes through the main body and stops automatically.
When the status indicator under Roll Winder RW-101 on the [MACHINE] screen on the touch panel of the main body lights in red, it indicates that an error occurred. Check the error and solve the problem.
For details, refer to Error Screen.Using a hard thick media with the tension roller 2 set to "Top" may cause paper jams. If jams occur frequently, change the position of the tension roller 2 to "Bottom". For details about changing the position, Setting the tension according to the paper type and thickness (weight).
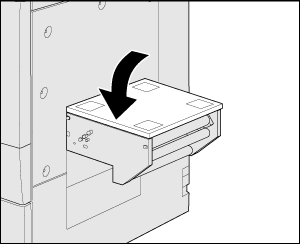
Close the top cover of the leading section.
Before closing the top cover, confirm that the edge of the media is not out of the guide.
For setting the media, refer to Loading media to Roll Winder RW-201.
For weekly cleaning or clearing a paper jam, refer to Splicing the media (For cleaning/clearing paper jam).