
Description of Setup Buttons
Date/Time[Scan/Fax]
To display:
- [Scan/Fax]
- [Application]
- [Stamp/Composition]
- [Date/Time]
- [Stamp/Composition]
- [Application]
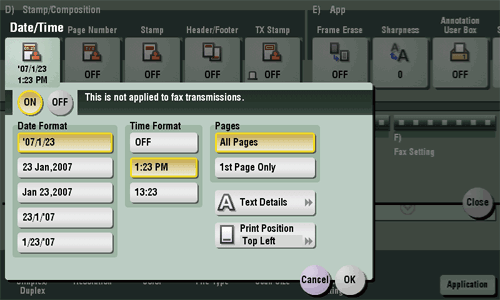
Select the stamping position and representation, and add the date and time the original is scanned. The date and time can either be printed on all pages or only on the first page.
Date/Time
To display:
- [Scan/Fax]
- [Application]
- [Stamp/Composition]
- [Date/Time]
- [Stamp/Composition]
- [Application]
Select the stamping position and representation, and add the date and time the original is scanned. The date and time can either be printed on all pages or only on the first page.
| Settings | Description |
|---|---|
[ON]/[OFF] | Select [ON] to print the date/time. |
[Date Format] | Select the date format. |
[Time Format] | Select the time format. If you do not want to print time, select [OFF]. |
[Pages] | Select the range of pages to print. |
[Text Details] | If necessary, select the print size, font, and text color. |
[Print Position] | If necessary, select the print position of the text. You can more finely adjust the print position in [Adjust Position]. |
Date/Time[Copy]
To display:
- [Copy]
- [Application]
- [Stamp/Composition]
- [Date/Time]
- [Stamp/Composition]
- [Application]
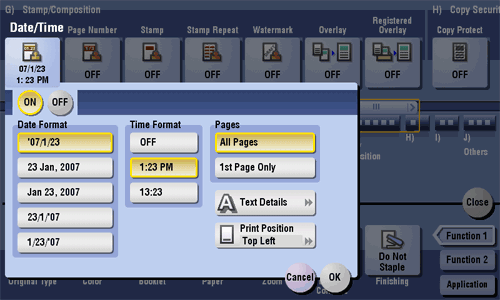
Select the stamping position and format, and add the date and time on copied sheets. The date and time can be printed either on all pages or only on the first page.
Date/Time
To display:
- [Copy]
- [Application]
- [Stamp/Composition]
- [Date/Time]
- [Stamp/Composition]
- [Application]
Select the stamping position and format, and add the date and time on copied sheets. The date and time can be printed either on all pages or only on the first page.
| Settings | Description |
|---|---|
[ON]/[OFF] | Select [ON] to print the date/time. |
[Date Format] | Select the date/time format. |
[Time Format] | Select the time format. When you do not want to print time, select [OFF]. |
[Pages] | Select the range of pages to print. |
[Text Details] | If necessary, select the print size, font, and text color. |
[Print Position] | If necessary, select the print position of the text. You can adjust the print position in [Adjust Position] more closely. |
Date/Time [Box]
Delete [Box]
Density[Scan/Fax]
To display:
- [Scan/Fax]
- [Application]
- [Quality/Density]
- [Density]
- [Quality/Density]
- [Application]
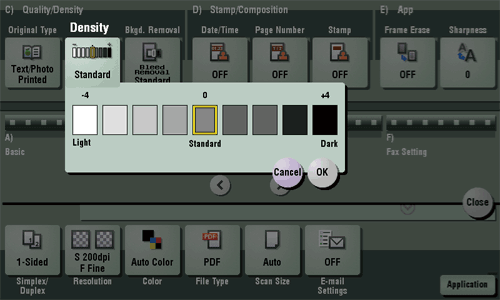
Scan originals by adjusting the density according to the original.
Density[Copy]
To display:
- [Copy]
- [Density]
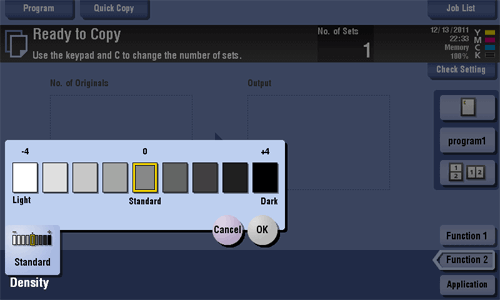
Adjust the density of a copy image.
Density [Box]
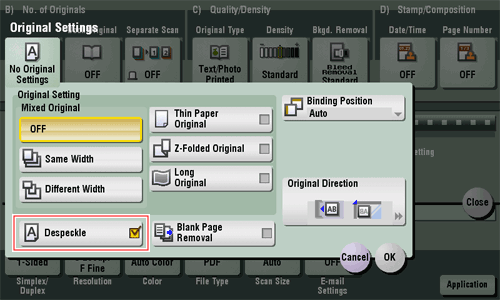
Despeckle[Scan/Fax]
To display:
- [Scan/Fax]
- [Application]
- [No. of Originals]
- [Original Settings]
- [Despeckle]
- [Original Settings]
- [No. of Originals]
- [Application]
Scan an original using the ADF while removing dust from the Slit Scan Glass.
It takes longer to finish scanning, compared to the normal operation.
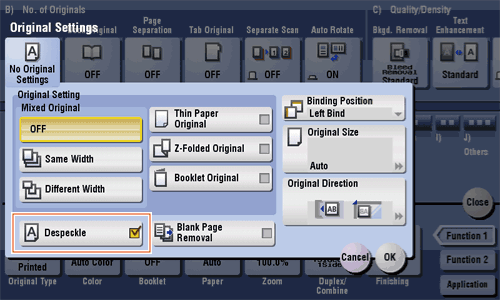
Despeckle[Copy]
To display:
- [Copy]
- [Application]
- [No. of Originals]
- [Original Settings]
- [Despeckle]
- [Original Settings]
- [No. of Originals]
- [Application]
Scan originals using the ADF while removing dust on the Slit Scan Glass.
It takes longer to finish scanning, compared to the normal operation.
Despeckle [Box]
Details [Box]
Details..[Box]
To display:
- [Box]
- [System]
- [File Re-TX]
- Select the file
- [Proof Print]
- [Details..]
- [Proof Print]
- Select the file
- [File Re-TX]
- [System]
You can rotate a page or delete a page by checking the file preview.
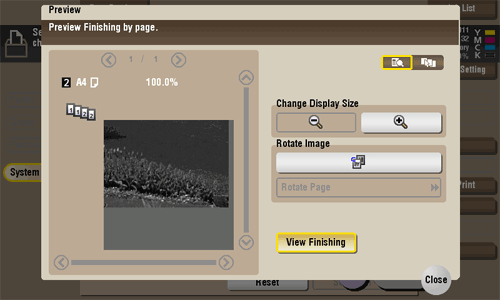
Details..
To display:
- [Box]
- [System]
- [File Re-TX]
- Select the file
- [Proof Print]
- [Details..]
- [Proof Print]
- Select the file
- [File Re-TX]
- [System]
You can rotate a page or delete a page by checking the file preview.
| Settings | Description |
|---|---|
[Change Display Size] | Enlarges or reduces the preview image. |
[Rotate Image] | Rotates a selected page 90 degrees in the counterclockwise direction.
|
[View Finishing] | Displays the finishing in the preview area. |
Digital Signature[Scan/Fax]
To display:
- [Scan/Fax]
- [Application]
- [App]
- [Digital Signature]
- [App]
- [Application]
Add a digital signature to an E-mail to be sent from this machine when using S/MIME.
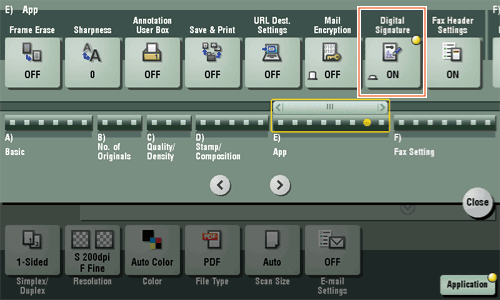
Digital Signature
To display:
- [Scan/Fax]
- [Application]
- [App]
- [Digital Signature]
- [App]
- [Application]
Add a digital signature to an E-mail to be sent from this machine when using S/MIME.
Tips
- If you cannot change the [ON] or [OFF] state, it is assumed that whether or not a digital signature is always added is specified by the administrator.
Digital Signature [Box]
Direct Input[Scan/Fax]
To display:
- [Scan/Fax]
- [Direct Input]
Enter destination information according to the saving and transmission mode.
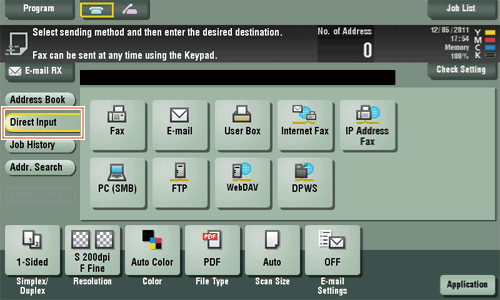
Direct Input
To display:
- [Scan/Fax]
- [Direct Input]
Enter destination information according to the saving and transmission mode.
| Settings | Description |
|---|---|
[Fax] | Enter a destination fax number when scanned original data is sent by fax. |
[E-mail] | Enter a destination E-mail address when scanned original data is sent by E-mail attachment. |
[User Box] | Select a user box to save scanned original data in the user box of this machine. |
[Internet Fax] | Enter a destination E-mail address when scanned original data is sent by Internet fax. |
[IP Address Fax] | Enter a destination IP address or E-mail address when scanned original data is sent by IP address fax. |
[PC (SMB)] | Enter a destination computer name (host name) or IP address when scanned original data is sent to a share folder of a computer on the network. |
[FTP] | Enter a destination FTP server host name or IP address when scanned original data is sent to a FTP server. |
[WebDAV] | Enter a destination WebDAV server host name or IP address when scanned original data is sent to a WebDAV server. |
[DPWS] | Enter a destination computer when scanned original data is sent to a computer detected by the Web service. |
[Scan Server] | Forward scanned original data to another location (secondary delivery) via a scan server. When selecting a destination, select an arbitrary PSP (Post-Scan-Process). In PSP, destinations for secondary delivery etc. are registered. |
Reference
- You can register the destination that you have entered directly into the address book. For details on how to register, refer to Here.
Direct Input [Box]
DPWS[Scan/Fax]
To display:
- [Scan/Fax]
- [Direct Input]
- [DPWS]
- [Direct Input]
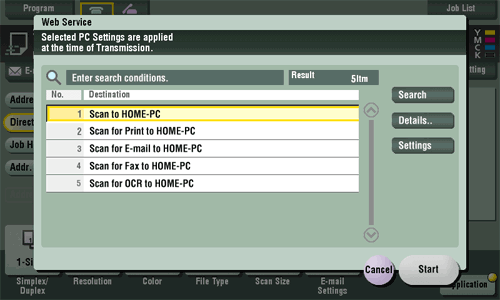
Enter a destination computer when scanned original data is sent to a computer detected by the Web service.
If it is hard to find a target because there are too many destinations, tap [Search]. Select a destination, and tap [Details..] to check destination information. To select an option setting, tap [Settings].
DPWS
To display:
- [Scan/Fax]
- [Direct Input]
- [DPWS]
- [Direct Input]
Enter a destination computer when scanned original data is sent to a computer detected by the Web service.
If it is hard to find a target because there are too many destinations, tap [Search]. Select a destination, and tap [Details..] to check destination information. To select an option setting, tap [Settings].
| Settings | Description |
|---|---|
[Search] | Searches for a computer that enables file sending using the Web Service. |
[Details..] | If necessary, check the registered name and URL of the destination. |
[Settings] | Configure Scan option settings as necessary. |
Duplex/Combine[Copy]
To display:
- [Copy]
- [Duplex/Combine]
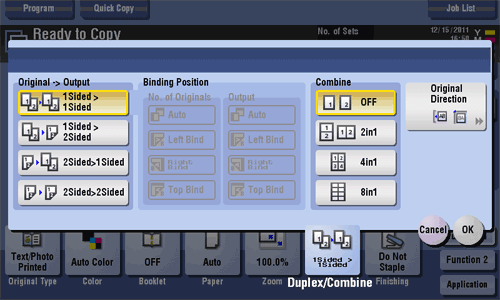
Copy an original onto both sides of paper. A multi-page original can be reduced and copied on the same side of a single sheet of paper.
Duplex/Combine
To display:
- [Copy]
- [Duplex/Combine]
Copy an original onto both sides of paper. A multi-page original can be reduced and copied on the same side of a single sheet of paper.
| Settings | Description |
|---|---|
[Original > Output] | Select a combination of the original to be loaded (1-sided original or 2-sided original) and the copy method (1-sided copy or 2-sided copy). For details, refer to Here. |
[Combine] | Select the number of original pages to be copied on a single page. For details, refer to Here. |