
Description of Setup Buttons
ID & Print[Box]
To display:
- [Box]
- [System]
- [ID & Print]
- [System]
When you print a document from the PC in the user authentication system environment, the files transferred with the ID & Print function are stored in the ID & Print User Box. When a user who has sent the print data logs in to this machine and opens the User Box, he/she can preview, print out, or delete the stored file.
Because user authentication is required in order to use a file, this box is useful for handling documents containing private information.
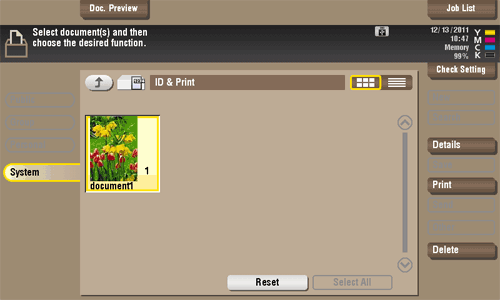
Image Adjust[Copy]
To display:
- [Copy]
- [Application]
- [Layout]
- [Image Adjust]
- [Layout]
- [Application]
Specify how to arrange the original image on the paper. You can enlarge a part of the original to the maximum limits of the paper, or arrange the original image at the center of the page without enlarging it.

Image Adjust
To display:
- [Copy]
- [Application]
- [Layout]
- [Image Adjust]
- [Layout]
- [Application]
Specify how to arrange the original image on the paper. You can enlarge a part of the original to the maximum limits of the paper, or arrange the original image at the center of the page without enlarging it.
| Settings | Description |
|---|---|
[ON]/[OFF] | Select [ON] to specify the image arrangement method. |
[Image Adjust Setting] | Select the image arrangement method.
|
[Original Size] | If the size of the original is not detected correctly, select a key indicating the size of the original to be scanned. If the machine cannot detect the size of irregular sized originals or photos, manually specify the size. |
Image Repeat[Copy]
To display:
- [Copy]
- [Application]
- [Layout]
- [Image Repeat]
- [Layout]
- [Application]
An original image is repeatedly copied on the same side of a single sheet.
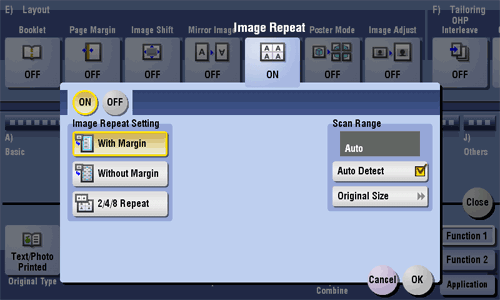
Image Repeat
To display:
- [Copy]
- [Application]
- [Layout]
- [Image Repeat]
- [Layout]
- [Application]
An original image is repeatedly copied on the same side of a single sheet.
| Settings | Description |
|---|---|
[ON]/[OFF] | Select [ON] to specify Image Repeat. |
[Image Repeat Setting] | Select the copy method on the paper.
|
[Scan Range] | You can either to set the machine to automatically detect the scan range (original size), or specify the scan range manually. If the original is of a standard size, selecting [Auto Detect] causes the machine to automatically detect the size. If the machine cannot detect the size of irregular sized originals or photos, manually specify the size. |
Image Shift[Copy]
To display:
- [Copy]
- [Application]
- [Layout]
- [Image Shift]
- [Layout]
- [Application]
You can fine tune the image position by shifting it in a horizontal or vertical direction according to the paper size. When an image is printed on the back side, you can also fine tune its position.
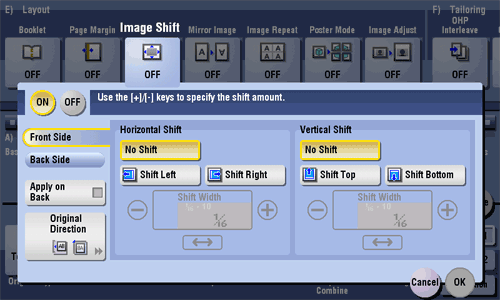
Image Shift
To display:
- [Copy]
- [Application]
- [Layout]
- [Image Shift]
- [Layout]
- [Application]
You can fine tune the image position by shifting it in a horizontal or vertical direction according to the paper size. When an image is printed on the back side, you can also fine tune its position.
| Settings | Description |
|---|---|
[ON]/[OFF] | Select [ON] to shift an image. |
[Front Side]/[Back Side] | Adjust the image position on the print paper, by shifting the original image in horizontal or vertical direction.
|
[Apply on Back] | Set this item to use the same settings as used on the front side for the rear side of the print paper. |
[Original Direction] | Specify the orientation of the loaded original. |
Image Shift [Box]
Insert Image[Copy]
To display:
- [Copy]
- [Application]
- [Tailoring]
- [Insert Image]
- [Tailoring]
- [Application]
The original scanned using the Original Glass is inserted after the page you have specified in the original scanned using the ADF.
Insert Image
To display:
- [Copy]
- [Application]
- [Tailoring]
- [Insert Image]
- [Tailoring]
- [Application]
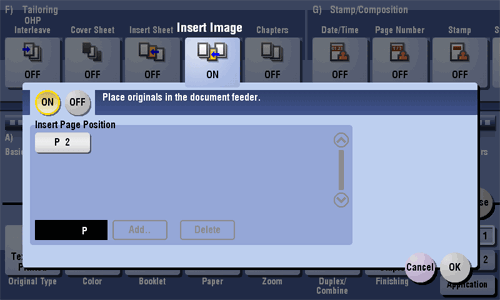
The original scanned using the Original Glass is inserted after the page you have specified in the original scanned using the ADF.
| Settings | Description |
|---|---|
[ON]/[OFF] | Select [ON] to specify Insert Image. |
[Insert Page Position] | Specify a page number you want to insert a sheet into. The original is inserted after the page you have specified.
|
Reference
- For details on how to operate [Insert Image], refer to Here.
Insert Sheet[Copy]
To display:
- [Copy]
- [Application]
- [Tailoring]
- [Insert Sheet]
- [Tailoring]
- [Application]
You can insert a sheet that is of a different type from other pages (such as color and thick papers) for a specified page.
Insert Sheet
To display:
- [Copy]
- [Application]
- [Tailoring]
- [Insert Sheet]
- [Tailoring]
- [Application]
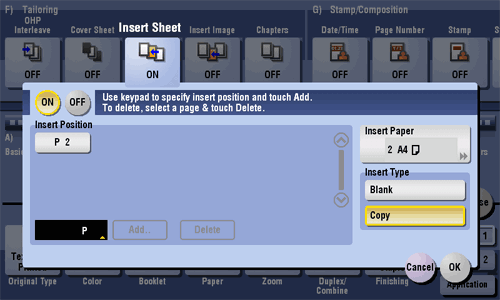
You can insert a sheet that is of a different type from other pages (such as color and thick papers) for a specified page.
| Settings | Description |
|---|---|
[ON]/[OFF] | Select [ON] to specify Insert Sheet. |
[Insert Position] | Set a page number where you wish to insert a different sheet.
|
[Insert Paper] | Select the paper tray containing insertion paper. Use the same size insertion sheets and body sheets, and stack them in the same orientation. You can select the paper tray of the Post Inserter when [Blank] is selected while the Post Inserter is installed in bizhub C554. |
[Insert Type] | Select whether or not to copy on the insertion paper. |
Insert Sheet [Box]
Internet Fax[Box]
To display:
- [Box]
- Select a User Box
- [Open]
- Select the file
- [Send]
- [Direct Input]
- [Internet Fax]
- [Direct Input]
- [Send]
- Select the file
- [Open]
- Select a User Box
Enter the destination mail address to send an Internet fax to. Also, select the properties of original data that the recipient machine can receive.
Tap [Next Dest.] to add a destination.
Internet Fax
To display:
- [Box]
- Select a User Box
- [Open]
- Select the file
- [Send]
- [Direct Input]
- [Internet Fax]
- [Direct Input]
- [Send]
- Select the file
- [Open]
- Select a User Box
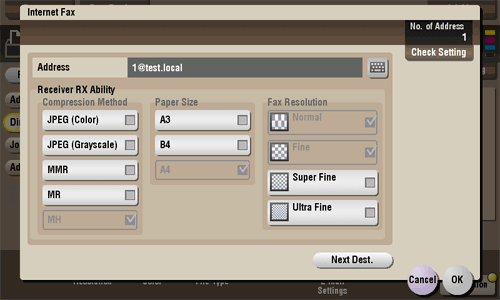
Enter the destination mail address to send an Internet fax to. Also, select the properties of original data that the recipient machine can receive.
Tap [Next Dest.] to add a destination.
| Settings | Description |
|---|---|
[Address] | Enter the destination mail address. |
[Receiver RX Ability] | Sets the [Compression Method], [Paper Size], and [Fax Resolution] properties of original data that the destination machine can receive. |
Internet Fax[Scan/Fax]
To display:
- [Scan/Fax]
- [Direct Input]
- [Internet Fax]
- [Direct Input]
Enter a destination E-mail address when scanned original data is sent by Internet fax. Also, select the specification of original data that the recipient machine can receive.
Tap [Next Dest.] to add a destination.
If E-mail address prefixes and suffixes are registered, you can recall a registered domain name etc. to complement entry.
Internet Fax
To display:
- [Scan/Fax]
- [Direct Input]
- [Internet Fax]
- [Direct Input]
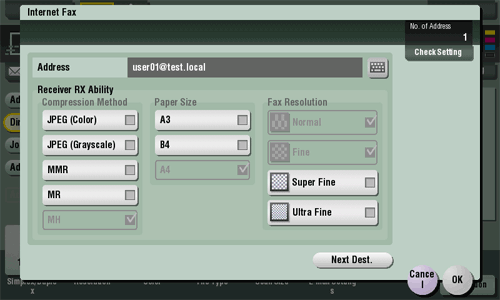
Enter a destination E-mail address when scanned original data is sent by Internet fax. Also, select the specification of original data that the recipient machine can receive.
Tap [Next Dest.] to add a destination.
| Settings | Description |
|---|---|
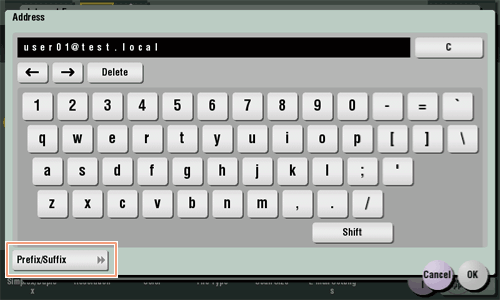
[Address] | Enter a destination E-mail address. |
[Receiver RX Ability] | Select the specifications of original data that the recipient machine can receive in [Compression Method], [Paper Size] and [Resolution]. |
If E-mail address prefixes and suffixes are registered, you can recall a registered domain name etc. to complement entry.
IP Address Fax[Box]
To display:
- [Box]
- Select a User Box
- [Open]
- Select the file
- [Send]
- [Direct Input]
- [IP Address Fax]
- [Direct Input]
- [Send]
- Select the file
- [Open]
- Select a User Box
Enter the IP address or mail address of destination to send an IP address fax to. Also, select whether the recipient machine supports color print.
When specifying multiple destinations, tap [Next Dest.] to add destinations.
IP Address Fax
To display:
- [Box]
- Select a User Box
- [Open]
- Select the file
- [Send]
- [Direct Input]
- [IP Address Fax]
- [Direct Input]
- [Send]
- Select the file
- [Open]
- Select a User Box
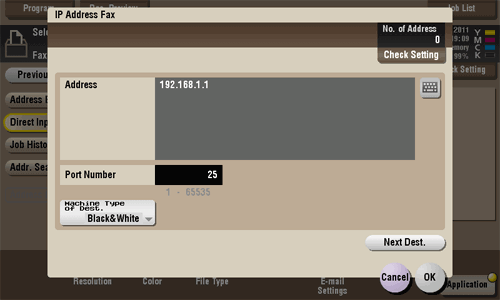
Enter the IP address or mail address of destination to send an IP address fax to. Also, select whether the recipient machine supports color print.
When specifying multiple destinations, tap [Next Dest.] to add destinations.
| Settings | Description |
|---|---|
[Address] | Enter the destination IP address or host name.
You can also specify a destination by E-mail address. To specify a destination by E-mail address, enter the destination IP address or host name following "ipaddrfax@". To enter an IP address following the @ symbol, put the IP address in brackets "[ ]".
To enter an IP address (IPv6), enter "IPv6:" following left bracket "[".
To enter a host name following the @ symbol, brackets "[ ]" are unnecessary.
|
[Port Number] | If necessary, change the port number. Normally, you can use the original port number. |
[Machine Type] | Select either of [Color] and [Monochrome] according to the recipient machine. |
IP Address Fax[Scan/Fax]
To display:
- [Scan/Fax]
- [Direct Input]
- [IP Address Fax]
- [Direct Input]
Enter a destination IP address or E-mail address when scanned original data is sent by IP address fax. Also, select whether the recipient machine supports color printing.
When specifying multiple destinations, tap [Next Dest.] to add a destination.
IP Address Fax
To display:
- [Scan/Fax]
- [Direct Input]
- [IP Address Fax]
- [Direct Input]
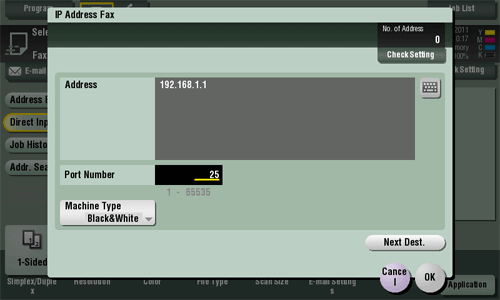
Enter a destination IP address or E-mail address when scanned original data is sent by IP address fax. Also, select whether the recipient machine supports color printing.
When specifying multiple destinations, tap [Next Dest.] to add a destination.
| Settings | Description |
|---|---|
[Address] | Enter a destination IP address or host name.
You can also specify a destination by E-mail address. To specify a destination by E-mail address, enter the destination IP address or host name following "ipaddrfax@". To enter an IP address following the @ symbol, put the IP address in brackets "[ ]".
To use an IP address (IPv6), enter "IPv6:" following the left bracket "[ ".
To enter a host name following the @ symbol, brackets "[ ]" are unnecessary.
|
[Port Number] | If necessary, change the port number. In normal circumstances, you can use the original port number. |
[Machine Type] | Select either of [Color] or [Black&White] according to the recipient machine. |