
Description of Setup Buttons
Red[Copy]
To display:
- [Copy]
- [Application]
- [Edit Color]
- [Color Adjust]
- [Red]
- [Color Adjust]
- [Edit Color]
- [Application]
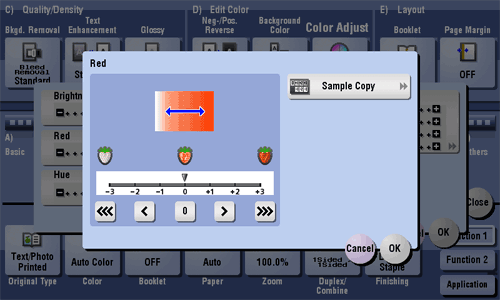
Adjust the intensity of red.
Red
To display:
- [Copy]
- [Application]
- [Edit Color]
- [Color Adjust]
- [Red]
- [Color Adjust]
- [Edit Color]
- [Application]
Adjust the intensity of red.
| Settings | Description |
|---|---|
[Sample Copy] | You can check the finishing by printing a sample copy. Place the original on the Original Glass, and tap [OK] or press Start. |
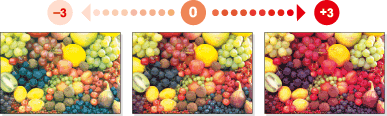
Tips
- Adjusting red changes an image as shown in the following.
Register Overlay [Box]
Registered Overlay[Copy]
To display:
- [Copy]
- [Application]
- [Stamp/Composition]
- [Registered Overlay]
- [Stamp/Composition]
- [Application]
In [Register Overlay], register original images on the hard disk of this machine as overlay image.
You can call a registered overlay image and compose it on an original scanned later.
Registered Overlay
To display:
- [Copy]
- [Application]
- [Stamp/Composition]
- [Registered Overlay]
- [Stamp/Composition]
- [Application]
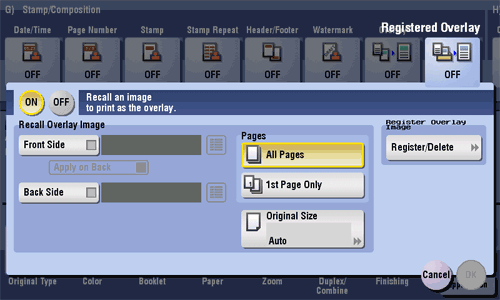
In [Register Overlay], register original images on the hard disk of this machine as overlay image.
You can call a registered overlay image and compose it on an original scanned later.
| Settings | Description |
|---|---|
[ON]/[OFF] | Select [ON] to register a new overlay image or compose a registered overlay image on the original. |
[Recall Overlay Image] | Specify which side of the paper to compose the overlay image, and select an overlay image to be composed. Check the density, composition method, color change, and preview of overlay image if necessary. If you set [Apply on Back], the image on the front side is composed on the back side of paper. |
[Pages] | Select the range of pages on which an overlay image is composed. |
[Original Size] | Specify the size of the original. If the original is of a standard size, selecting [Auto] causes the machine to automatically detect the size. If the machine cannot detect the size of irregular sized originals or photos, manually specify the size. |
[Register Overlay Image] | Register a new overlay image. If necessary, select the density and color of the overlay image when it is registered.
|
Registered Overlay [Box]
Re-order[Box]
To display:
- [Box]
- Select a User Box
- [Open]
- Select the file
- [Other]
- [Re-order]
- [Other]
- Select the file
- [Open]
- Select a User Box
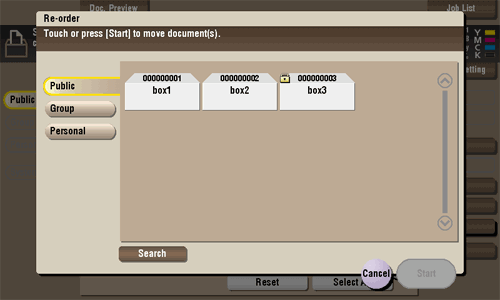
You can select a file and move it to another User Box. The destination can be a Public User Box, a Personal User Box, or a Group User Box.
Re-order
To display:
- [Box]
- Select a User Box
- [Open]
- Select the file
- [Other]
- [Re-order]
- [Other]
- Select the file
- [Open]
- Select a User Box
You can select a file and move it to another User Box. The destination can be a Public User Box, a Personal User Box, or a Group User Box.
| Settings | Description |
|---|---|
[Search] | This window is used to search for a User Box. The User Boxes are displayed based on search characters you have specified during box registration. You can also specify a User Box number directly from the Keypad. |
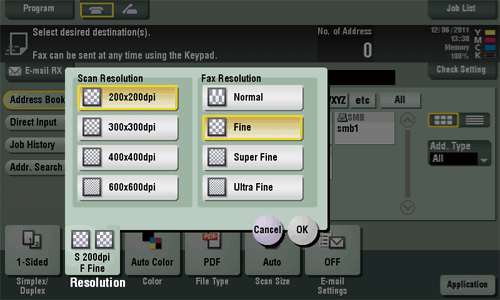
Resolution[Scan/Fax]
To display:
- [Scan/Fax]
- [Resolution]
Select the resolution of the original for scanning.
Resolution
To display:
- [Scan/Fax]
- [Resolution]
Select the resolution of the original for scanning.
| Settings | Description |
|---|---|
[Scan Resolution] | Select the resolution of the original for scan transmission. When using Scan to E-mail, SMB Send, FTP Send, WebDAV Send, or Save in User Box, select the following resolution to scan an original.
|
[Fax Resolution] | Select the resolution of the original for sending a fax. When using fax transmission, Internet fax transmission, or IP address fax transmission, select the following resolution to scan an original.
|

Tips
- The finer the scan resolution is, the larger the data volume becomes, resulting in longer transmission time. To use an E-mail as a transmission method such as Scan to E-mail or Internet fax transmission, check that the data capacity are not limited.