
WebDAV Client Settings
Click WebDAV Setting - WebDAV Client Setting on the menu of Network tab to display this screen.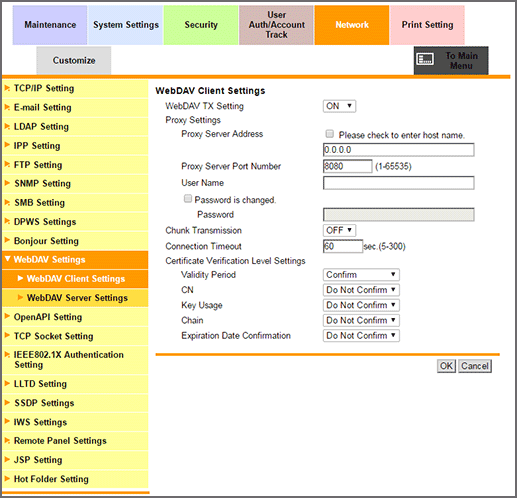
Select either ON or OFF from the WebDAV TX Setting drop-down list.
Enter Proxy Server Address. To enter the host name, select the Please check to enter host name. check box.
Enter Proxy Server Port Number.
Enter User Name.
Enter Password. If a password has already been set, Password is currently set. is displayed. To change the password, select the Password is changed. checkbox, and enter a new password.
Select either ON or OFF from the Chunk Transmission drop-down list.
Enter Connection Timeout.
Select either UTF-8 or Windows Code Page from the Server Authentication Character Code drop-down list.
Select a desired option from the drop-down lists provided for each setting item under Certificate Verification Level Settings.
Validity Period: Checks whether the certificate's validity period is still valid.
CN: Checks whether the Common Name (CN) of the certificate is identical to the address of the server.
Key Usage: Checks whether the certificate is used according to the intended usage approved by the issuer of the certificate
Chain: Checks whether or not the certificate chain (certificate pass) has a problem. The chain is verified by referring to the external certificates managed by the machine.
Expiration Date Confirmation: Checks whether or not the certificate has expired.
Click OK. Clicking Cancel cancels the setting.
Click OK on the setting complete screen.
If you have changed any setting, turn the machine power off then on.