Home >
Print > Printing in the Windows Environment > Useful Printing Functions > Using ICC Profiles (PS Only)
Using ICC Profiles (PS Only)
Specifying the ICC profiles for printing
Specify and print the ICC profiles registered in this machine with the printer driver.
1
In the [Quality] tab, click [Quality Adjustment...].
2
Click [Detail] and select the element for which the image quality is adjusted.
3
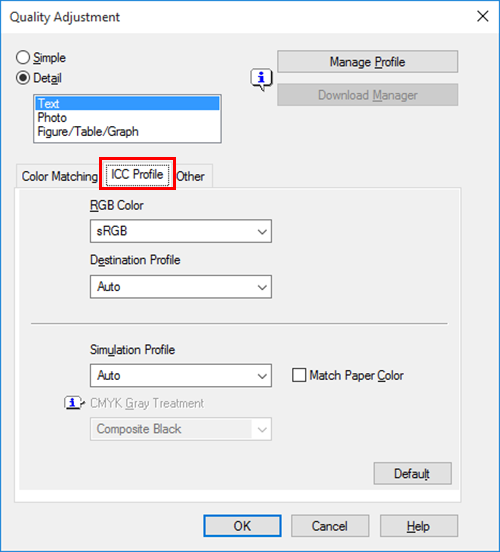
Click the [ICC Profile] tab.
4
Specify the settings for [RGB Color], [Destination Profile], and [Simulation Profile].
5
Click [OK].
Color processing is performed according to the selected ICC profiles.
Adding ICC profiles to the printer driver
To use the ICC profiles registered in this machine for printing, you need to add the ICC profiles to the printer driver in advance.
This function is available if the computer can communicate with this machine. The computer communicates with this machine and loads ICC profiles that the machine can use.
This function cannot be used when this machine is used via a USB connection.
To register ICC profiles in this machine, use Download Manager. For details on how to register ICC profiles in this machine, refer to the Help for Download Manager.
1
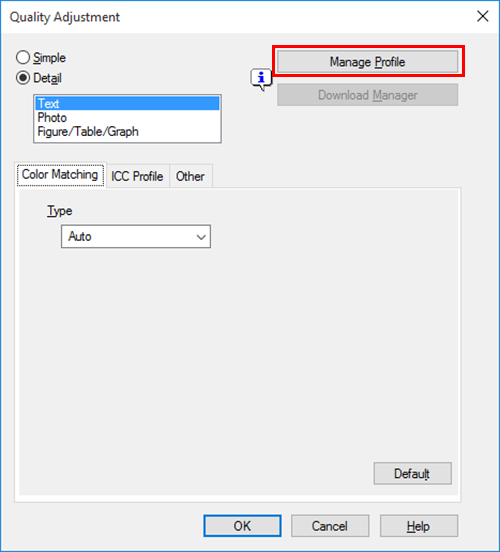
In the [Quality] tab, click [Quality Adjustment...].
3
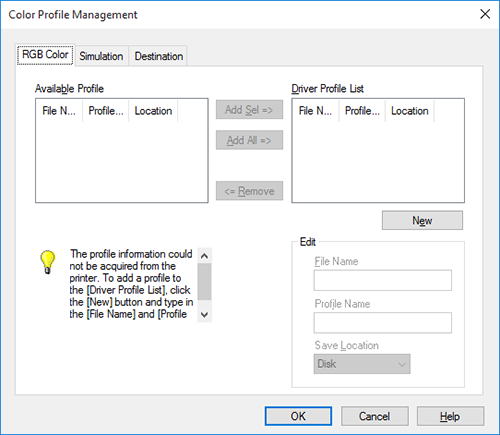
Click the tab and select a color profile type.
4
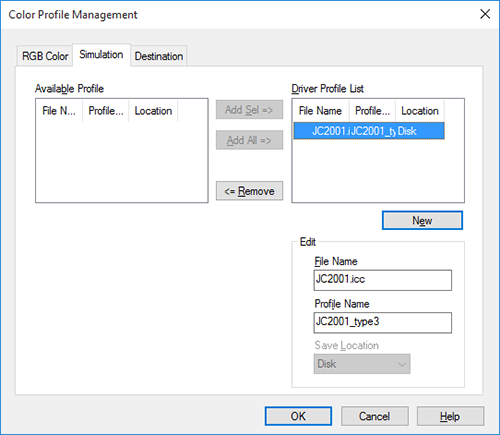
From the [Available Profile] list, select the profile you want to add to the printer driver, then click [Add Sel].
To register the current driver settings as the profile, click [New], then enter the [File Name] and [Profile Name].
To edit the profile name, click [Edit].
5
Click [OK].
The profile is added to [Driver Profile List].


 in the upper-right of a page, it turns into
  and is registered as a bookmark.