Easily Recalling Frequently Used Print Settings
Registering frequently used print settings
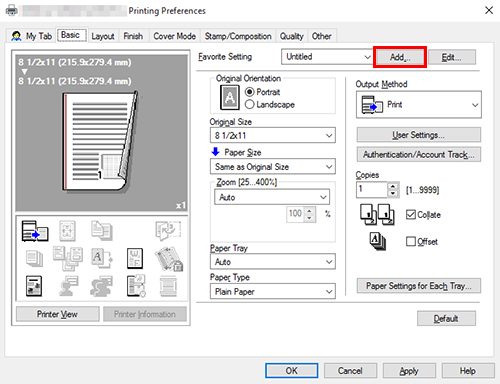
You can register the current print settings as a favorite and recall it when executing printing.
When you register a frequently used combination of print settings as a favorite, you can easily apply all of those settings just by selecting the combination from the Favorite Setting list, even if the combination is complicated as it contains settings on multiple tabs.
The following explains the procedure of favorite print setting.

When you edit an existing setting, select its name from the [Favorite Setting], then click [Edit...].

Set an icon, a comment and call options for the favorite settings if necessary. For details, refer to the [Add Favorite Setting] settings (described after this procedure).
The print settings are registered as a favorite. You can select the favorite settings from the [Favorite Setting] list when starting printing.
Settings of [Add Favorite Setting]
Setting | Description |
|---|---|
[Name] | Enter the name of the favorite to be registered. Use names that can easily be identified. |
[Icon] | Assign an icon to the favorite settings if necessary. |
[Sharing] | Select this check box when you want to share the favorite with other users. |
[Comment] | Enter a comment to the favorite settings if necessary. The comment is displayed when you place the mouse cursor over the favorite on the Favorite Setting list. |
[Restore Items (The Items Below Can Be Selected)] | The favorite settings may contain the size of original and the number of copies which are determined only when you start printing. When you call the favorite settings, these options are not set by default. However, you can define these options in the favorite settings if necessary. Select the check box of items to be retrieved. |
Customizing the setting window
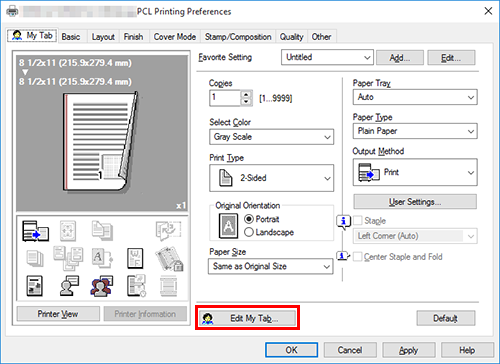
You can gather setting items from difference tabs and place them in [My Tab].
Registering frequently used setting items in [My Tab] enables you to change settings in one tab, without switching among multiple tabs.
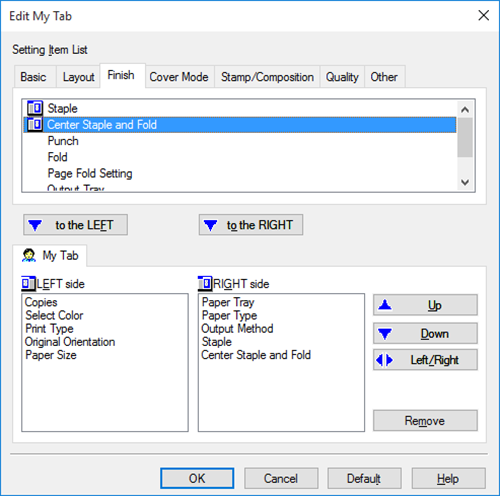
This section describes how to edit [My Tab].

You can also register a function in [My Tab] by selecting [to the LEFT] or [to the RIGHT] from the [My Tab] menu that is displayed by right-clicking the function.


Clicking [to the LEFT] places the selected function in the area to the left of [My Tab] and clicking [to the RIGHT] places it in the area to the right of [My Tab].
An icon appears to the left of each function that is registered in [My Tab].

To move a function, select the function and click [Up], [Down], or [Left/Right].
To delete a function from [My Tab], select the function and click [Remove].
This completes editing [My Tab].
- You can select [My Tab Settings...] in the [Settings] tab on the [Printer properties] screen to configure settings to display My Tab.

 in the upper-right of a page, it turns into
  and is registered as a bookmark.