Operation from Job Centro
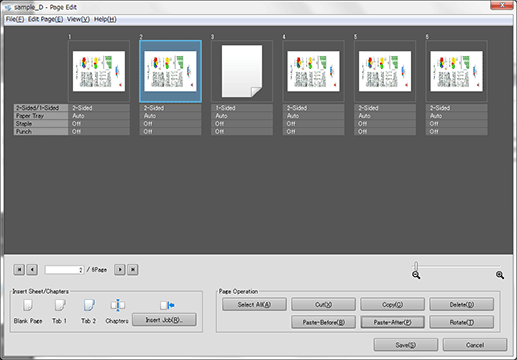
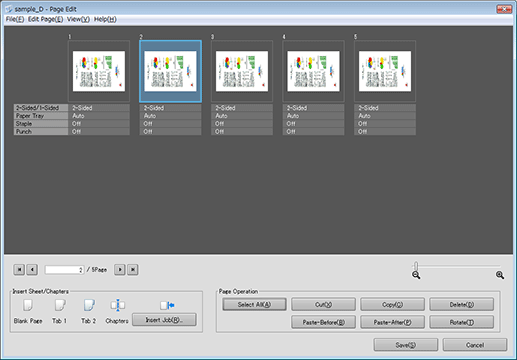
Page Edit
You can use Job Centro on a computer to edit the pages of hold jobs.
Start Job Centro and log in to the machine. For details about how to start Job Centro, refer to Start Job Centro.
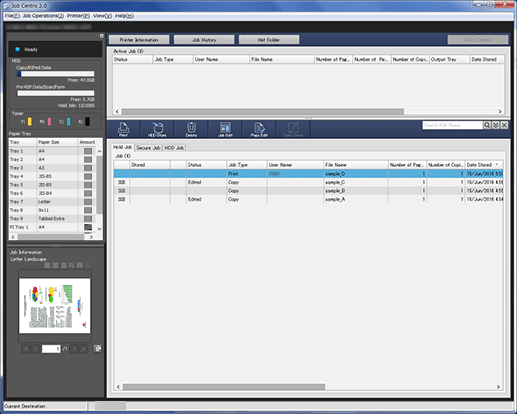
The Job Centro screen is displayed.
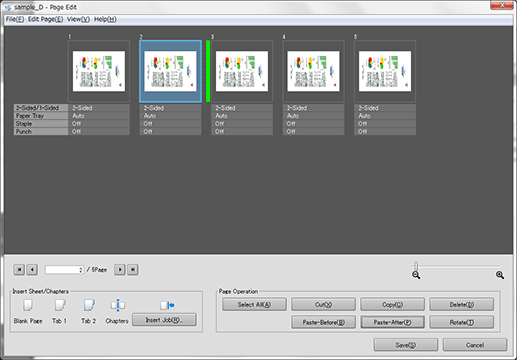
Click the Hold Job tab and select the job (one job only) to edit.

supplementary explanationIn Job Centro, you can only edit print jobs (Job Type is Print). To edit a copy job or scan job (Job Type is Copy), use the touch panel of the main body.
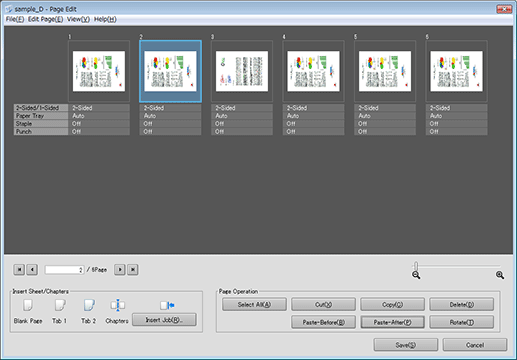
Click Page Edit.
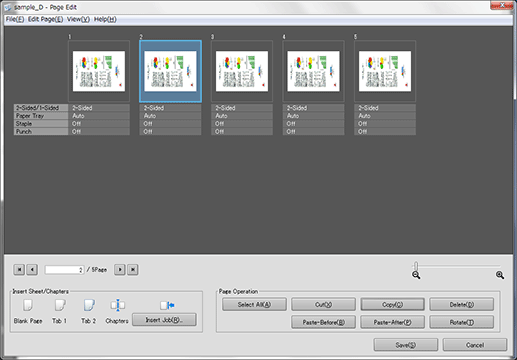
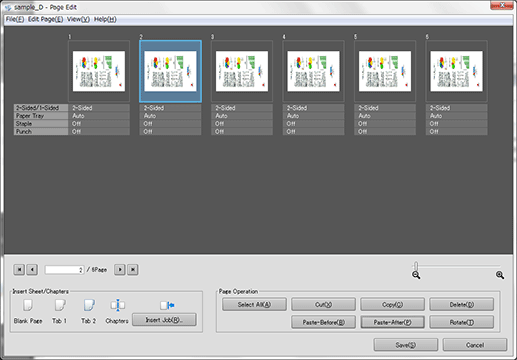
The specified job is called and the Page Edit screen is displayed.
Make edits on the pages (e.g., copy, move, delete / set chapters / insert tab papers).
For details about the editing operations, refer to the respective sections for the following items.
supplementary explanationCopying and moving pages
supplementary explanationDeleting pages
supplementary explanationRotating pages
supplementary explanationSetting chapters
supplementary explanationInserting tab papers
supplementary explanationInserting blank pages
supplementary explanationInserting pages from another job
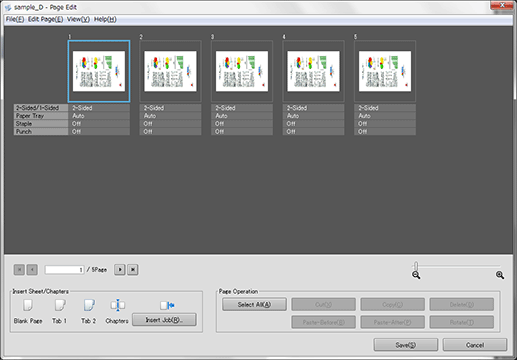
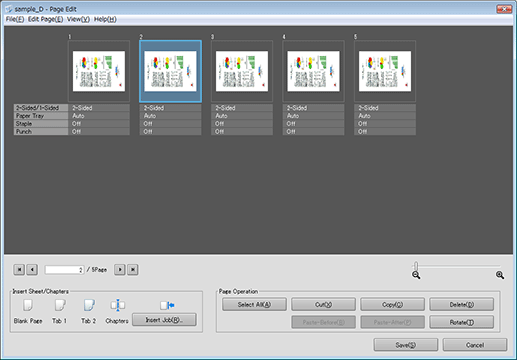
After editing, click Save.

The Page Edit screen closes and the edited content is saved. After saving, Edited is displayed in Status of the job displayed on the Hold Job screen of Job Centro.
supplementary explanationThe operations in Job Centro differ from the touch panel of the main body and you do not have the option to newly save or overwrite. To newly save as another job, copy an original job in the Hold Job screen of Job Centro and edit it.
Copying or moving pages
You can copy or move pages.
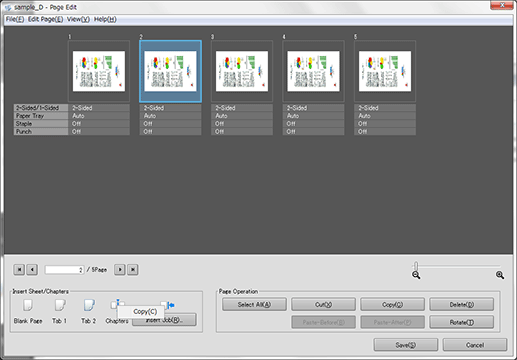
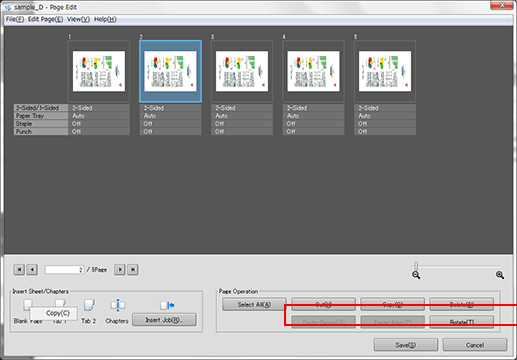
Select the page(s) you want to copy or move, then click Copy or Cut.
To copy a page, click Copy.
To move a page, click Cut.
supplementary explanationMultiple pages can be selected.
Select the thumbnail of the page of copy or move destination and click Paste-Before or Paste-After.
supplementary explanationPaste-Before: The pages to be copied/moved are inserted before the specified page.
supplementary explanationPaste-After: The pages to be copied/moved are inserted after the specified page.
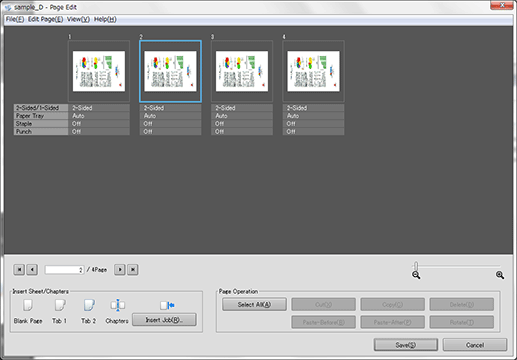
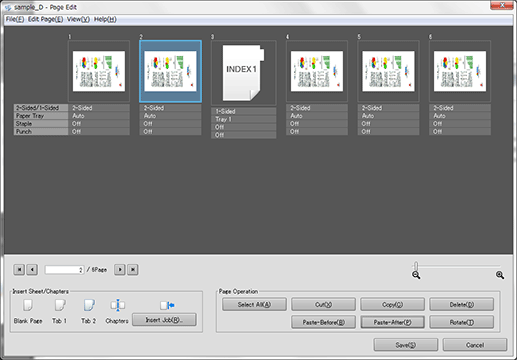
Check that the copied or moved pages have been inserted into the specified position.
Deleting pages
You can delete pages.
Select the thumbnail(s) of the page(s) you want to delete, then click Delete.
supplementary explanationMultiple pages can be selected.

Check that the selected pages have been deleted.
Rotating pages
You can rotate pages.
Press the thumbnail(s) of the page(s) you want to rotate, then click Rotate.
supplementary explanationMultiple pages can be selected.

Check that the selected pages have been rotated.
Each time you click Rotate, the selected pages are rotated 180 degrees clockwise.

Chaptering
You can insert separators to set chapters. When you set a chapter on a page, the page is set to be printed on the front side and a blank page is inserted if necessary.
Right-click the Chapters icon and select Copy from the menu.
Select the thumbnail of the page to set a chapter and click Paste-Before or Paste-After.
supplementary explanationPaste-Before: A chapter is set before the specified page.
supplementary explanationPaste-After: A chapter is set after the specified page.
Check that a chapter has been set to the page specified and a vertical line is displayed to show the insertion position.
Inserting tab papers
You can insert tab papers.
Right-click the Tab 1/Tab 2 icons and select Copy from the menu.

Select the thumbnail of the page to insert a tab paper and click Paste-Before or Paste-After.
supplementary explanationPaste-Before: A tab paper is inserted before the specified page.
supplementary explanationPaste-After: A tab paper is inserted after the specified page.

Check that the tab paper has been inserted in the specified position.
Inserting blank pages
You can insert blank pages.
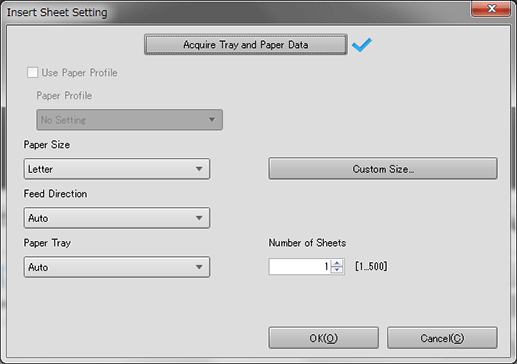
In the Page Edit screen, right-click the Blank Page icon and select Copy from the menu.
In the Insert Sheet Setting screen, specify the paper size, feed direction and paper tray and click OK.
If you click Acquire Tray and Paper Data, the tray and paper data are acquired and a blue check mark is added.
Select the thumbnail of the page to insert a blank page and click Paste-Before or Paste-After.
supplementary explanationPaste-Before: A blank page is inserted before the specified page.
supplementary explanationPaste-After: A blank page is inserted after the specified page.

Check that the blank pages have been inserted in the specified position.
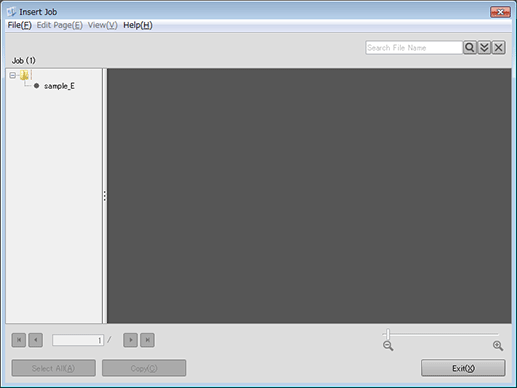
Inserting job pages
You can select and insert pages of another job.
Click Insert Job.
In the Insert Job screen, select the job to copy from the list in the left pane. In the job list screen, select the job to copy from the job list.
Select the thumbnail (or thumbnails) of the page (or pages) to insert and click Copy.
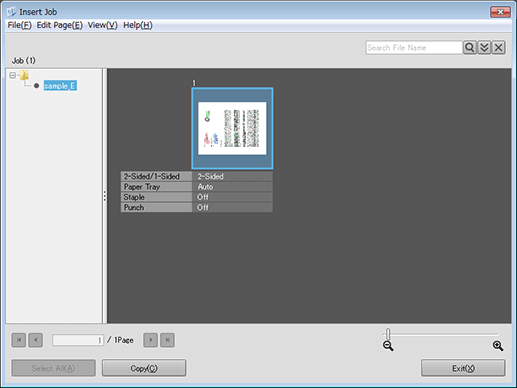
Click Exit, select the thumbnail of the page to insert another job, then click Paste-Before or Paste-After.
supplementary explanationPaste-Before: The pages of another job are inserted before the specified page.
supplementary explanationPaste-After: The pages of another job are inserted after the specified page.
Check that the pages from another job have been inserted in the specified position.