
Start Job Centro
This section describes how to start Job Centro.
You should connect Job Centro to the machine. Without being connected, Job Centro cannot start.
When there are two or more image controllers, you can switch the connection destination.
In this section, Login and User Authentication/Account Track are explained separately.
Login is a necessary operation for all users.
User Authentication/Account Track is a necessary operation when the user authentication or account track function is set on the main body. For details, refer to Starting Job Centro (User Authentication / Account Track).
To start Job Centro, login procedure is necessary first.
preconditionConfirm that the image controller can communicate.
preconditionJob Centro is the Java application. When the Java application is blocked by the firewall, a warning screen is displayed. In this case, allow the communication by Java application on your network. In Windows, check the items that apply to your network environment, and then click Allow access.
Select Start - All Programs - MFP-Printer Utility - Job Centro 2.0 - Job Centro 2.0.
supplementary explanationMacintosh: In the Finder menu, click Go - Applications. In Applications, select MFP-Printer Utility - Job Centro 2.0, then double-click Job Centro 2.0.
Select the printer for Job Centro to be connected to and click Connect.
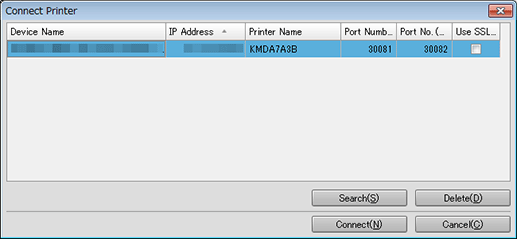
Job Centro starts and Job Centro screen is displayed.
When you log in to Job Centro for the first time, printers available for connection are not displayed in the printer list. In such a case, click Search and add a printer.
To adjust the display width of the column, double-click on the boundary between items on the item bar. The display width of the column is automatically adjusted according to the longer character strings: the strings of the item name or the strings of the item in the list.
To sort the data by item, click the header of the column. You can switch between ascending order and descending order by clicking.
You can also connect by double-clicking the line of printers on the list of Job Centro.
For details, refer to Add this Machine to the List.