
Copying a File to a Hot Folder for Printing
Overview
Creating a hot folder using AccurioPro Hot Folder allows you to print files simply by copying them to the folder.
Configure the settings in the order shown below to use this function.
1. Add a Printer (System) to AccurioPro Hot Folder
2. Add job settings
3. Set the hot folder
4. Print from the hot folder
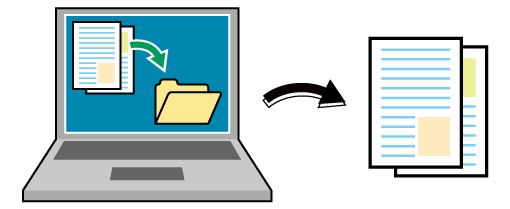
The following is recommended
This function includes the following features.
No need to launch the application or use the printer driver.
As you can register printer and job settings in advance, files can be printed by simply adding them to the hot folder.
You can create copies of hot folders for different job settings, and use them separately for specific types of tasks.
You can copy and print multiple files at once.
- You can configure the settings for the hot folder so that files remain in the folder after they are printed.
- You can set hot folders to be shared folders. Folders that have been set as shared folders can also be accessed over a network from a computer. For details about the setting, refer to Sharing a Hot Folder.
- For details about operating systems that support AccurioPro Hot Folder, refer to Operating Environment.
Target Jobs
Print jobs
Assumed Operating Environment
Item Name | Contents |
|---|---|
OS | Windows 10 |
- The actual screen displayed may differ depending on the application version or revision, and the environment you are using.
Add a Printer (System) to AccurioPro Hot Folder
If you have not added the PS Plug-in Driver to the computer, manually register the system to AccurioPro Hot Folder.
Click [KONICA MINOLTA] and then [AccurioPro Hot Folder] on the start menu to launch AccurioPro Hot Folder.
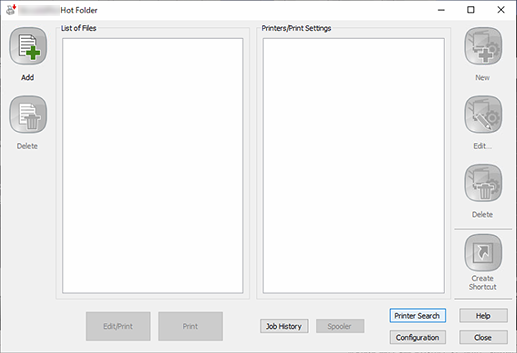
Click [Printer Search].
The [Add Printer] screen is displayed, and the printer is searched for automatically.
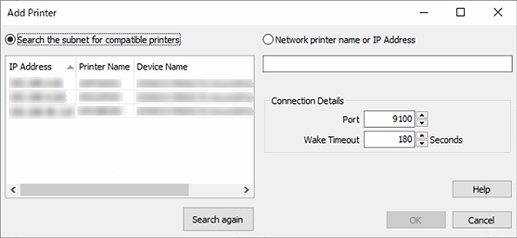
Select the system, and click [OK].
If no printers are displayed, configure [Port] and [Wake Timeout] in [Connection Details], and click [Search again].
Manually add the printer you want to use if it is not displayed. Enter the system’s printer name and IP address into [Network printer name or IP Address] and click [OK].
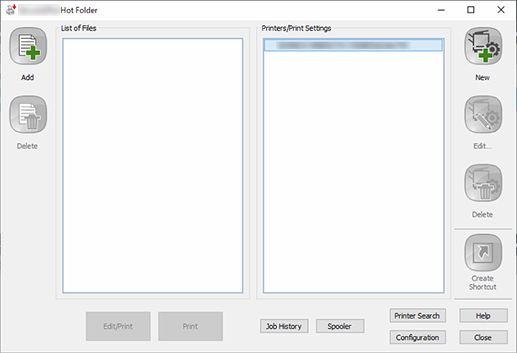
The printer added to AccurioPro Hot Folder is displayed.
Check if the printer (system) has been added to AccurioPro Hot Folder.
Adding Job Settings
Add the job setting when printing to AccurioPro Hot Folder. This section describes the process for reducing the size of original paper to A4-sized paper, performing a 2-sided imposition, and then printing 10 copies to A4 paper using 2-sided printing.

Select the printer to which the print settings are added, and click [New].
PS Plug-in Driver starts.
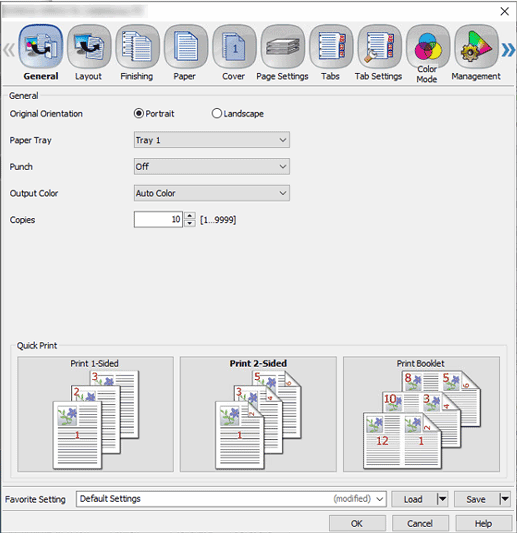
Select the [General] tab, and configure the items.
For details about the settings, refer to the [General] tab settings (described after the procedure).
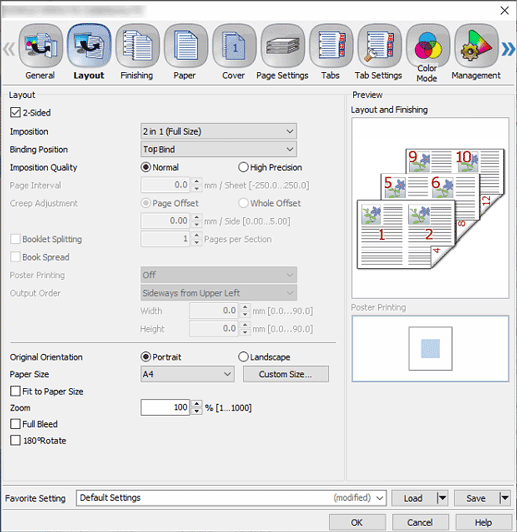
Select the [Layout] tab, configure the items, and click [OK].
For details about the settings, refer to the [Layout] tab settings (described after the procedure).
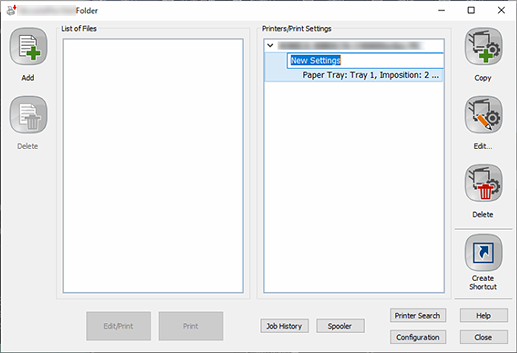
The [New Settings] is added to AccurioPro Hot Folder.
Enter the name of the print settings into [New Settings].
[General] tab settings
Item | Setting Value |
|---|---|
[Original Orientation] | [Portrait] |
[Paper Tray] | Select the paper feed tray loaded with A4 paper |
[Copies] | 10 |
[Layout] tab settings
Item | Setting Value |
|---|---|
[2-Sided] | Add check mark |
[Imposition] | [2 in 1 (Full Size)] |
[Binding Position] | [Top Bind] |
[Paper Size] | [A4] |
Set the Hot Folder
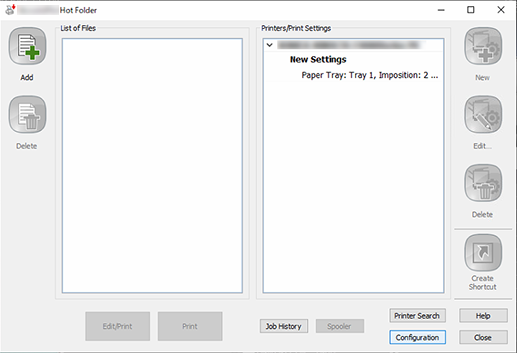
Click [Configuration].
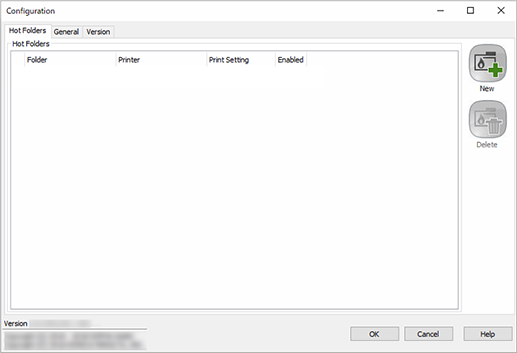
Click [New].
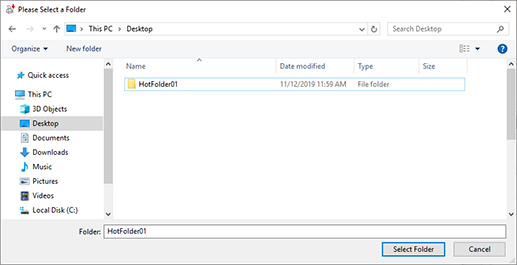
Select a folder you want to set to a hot folder, and click [Select Folder].
Here, HotFolder01 has been selected as an example.
The selected folder is registered in [Hot Folders].
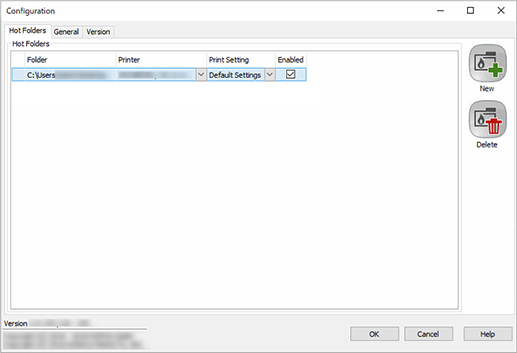
Select the hot folder, and configure the items.
For details about the settings, refer to "Hot Folder Setting Contents" (described after the procedure).
Click [OK].
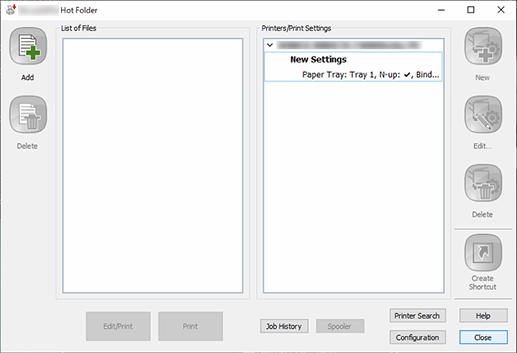
Click [Close].
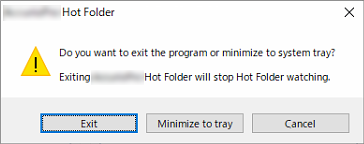
Click [Minimize to tray].
Select [Exit] to exit AccurioPro Hot Folder. The hot folder cannot be used at this point.
The AccurioPro Hot Folder screen closes.
Even though AccurioPro Hot Folder is stored in the task tray, the hot folder can still be used.
Hot Folder Setting Contents
Item | Setting Value |
|---|---|
[Printer] | Select the printer using the selected hot folder |
[Print Setting] | Select the hot folder print settings |
[Enabled] | Add check mark |
Print From the Hot Folder

Copy (drag and drop) the file to be printed into the hot folder.
The print job is sent automatically to the system to be printed.
The icon displayed in the task tray changes in appearance when a job is being processed in the hot folder. No message or screen is displayed during printing. For details about the icon types, refer to Confirming the Status of the Hot Folder.
If you selected [Move to Sub-Folder] (default) in the [General] tab on the [Configuration] screen of AccurioPro Hot Folder, the print job is moved to the Sent Files folder within the hot folder when it is sent to the system.


 in the upper-right of a page, it turns into
  and is registered as a bookmark.