
Schedule Management: Changing Output Order of Reserved Jobs
This section describes how to change the output order, hold and delete reserved jobs.
preconditionYou cannot exit from the Schedule screen with the operation dialog or paper setting dialog displayed. To exit from the Schedule screen, press x in the upper-right corner of the dialog to close it.
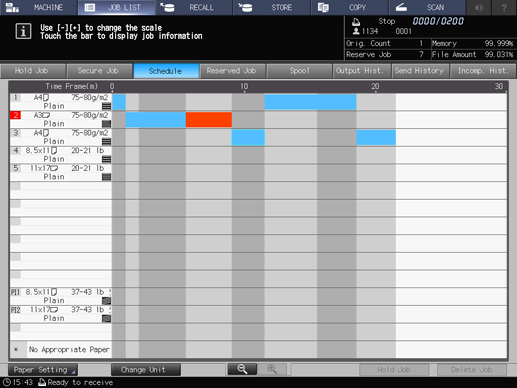
Press JOB LIST, then press Schedule.
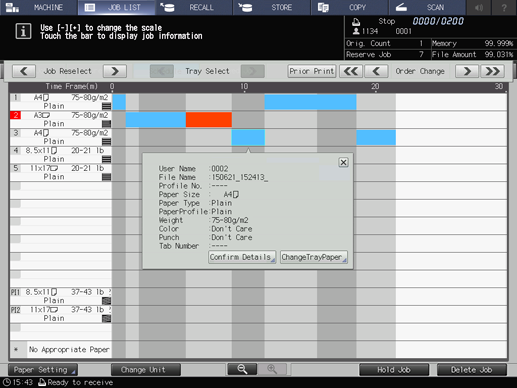
Select the desired bar from the job bar display.
supplementary explanationIf the job to be changed in output order uses more than one tray, select any one of them.
The operation dialog and paper setting dialog of the selected job bar will be displayed.
Change the output order.
Press the left and right arrow keys for Order Change in the operation dialog to change the output order of the jobs.
supplementary explanationPress
 to advance the job by one in output order, or
  to output it next to the current printing job.
supplementary explanationPress
 to delay the job by one in output order, or
  to output it last.
supplementary explanationThe keys to change the output order are unavailable if they appear grayed out.
supplementary explanationChanging output order of reserved jobs is also available on the Reserved Job screen. For details, refer to Reserved Job Operations.
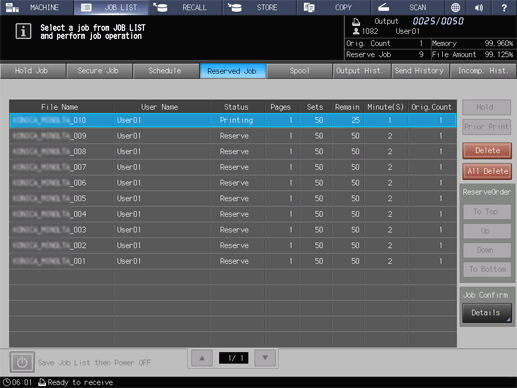
To hold the selected job, press Hold Job.
You cannot hold the next print job.

The selected job is deleted from the Schedule screen, and moved to the list on the Hold Job screen.
supplementary explanationHolding reserved jobs is also available on the Reserved Job screen. For details, refer to Reserved Job Operations.
To delete the selected job, press Delete Job.

The selected job is deleted.
supplementary explanationDeleting reserved jobs is also available on the Reserved Job screen. For details, refer to Reserved Job Operations.