
Storing a Job on the HDD
Holding a job on the HDD using the COPY screen
Position the original.
Press COPY to display the COPY screen.
supplementary explanationMake copy selections, as desired.
Press Store Setting.

The Store Setting screen is displayed.
Select a storage method.
To perform HDD Store and output simultaneously, select HDD Store + Print.
To perform only HDD Store, select HDD Store.

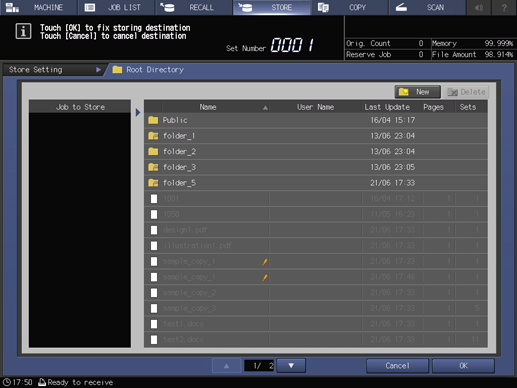
Specify a location to save an HDD saved job, and then press OK.
In the Root Directory screen, specify the location to store an HDD saved job.
For details about how to specify the storage location, refer to Overview of HDD Hold Job.

Press OK.
The screen returns to the COPY screen.
supplementary explanationWith HDD Store + Print selected, the message Ready to copy is displayed in the message area of the COPY screen.
supplementary explanationWith HDD Store selected, the message Press [Start] to scan originals is displayed in the message area of the COPY screen.
Press Start on the control panel.

With HDD Store + Print selected, a job is copied and saved on the HDD.
With HDD Store selected, a job is saved on the HDD without being copied.
Storing a job on the HDD using the STORE screen
Position an original either in the ADF or on the original glass.
Press STORE, and then press Store Setting.
Press Hold or HDD Store.

supplementary explanationPressing HDD Store displays the Root Directory screen. Select a destination, and then press OK.
Press File Name, enter the name, and then press OK.
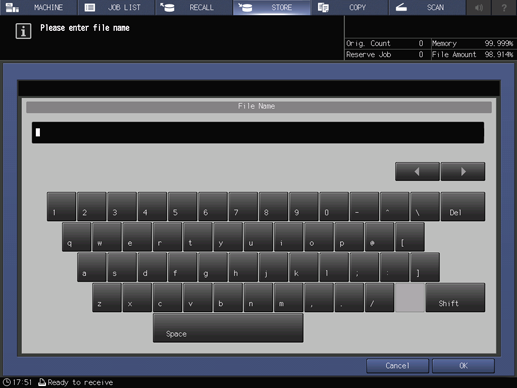
If a name is not assigned manually, 4-digit number is assigned automatically as a name.
Press OK.
The display returns to the STORE screen.
Set the scan conditions.
supplementary explanationFor details, refer to [STORE] Screen.

Press Start on the control panel.