Form: Combining Images
About Form
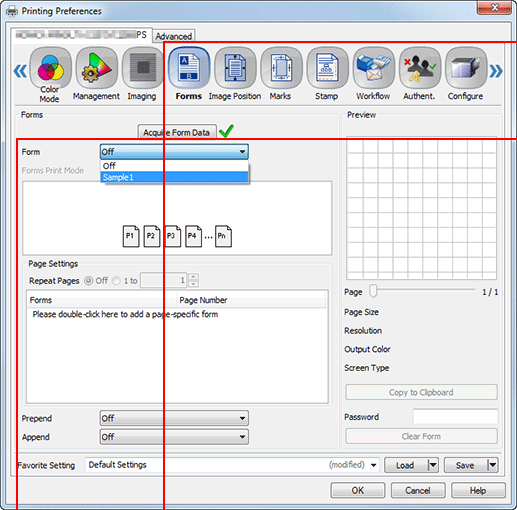
The master data you already registered is referred to as "Form (Overlay)".
This machine enables you to recall the desired form and print document data over the form (Superimposition).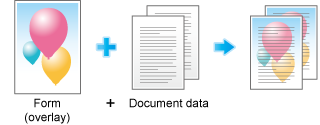
In this section, Form (Overlay) is referred to as Form.
The workflow for using the form function is as follows.
Step 1: Registering a form
Step 2: Printing over a form or printing over a form for each page
Step 3: Deleting a form (as needed)
Storing a form file
You can create an image to be printed over a form, then register it in this machine with Form.
Up to 10,000 forms can be saved, however, this number may be reduced depending on the HDD free space.
Create a document to be registered as a form by using the application software.
Select Form in Output Method on the Workflow tab.
supplementary explanationTo name the selected form, enter the desired file name in File Name. If File Name is blank, the file name of the document to be printed is displayed.
Click OK to make prints.
The document is registered as a form in this machine.
Click Form of the Forms tab, then check that the file name is displayed.
Tips
To register the document with the same name, delete the form once.
For details about how to delete a form, refer to [Forms] Screen.
If necessary, you can overwrite a form without deleting it.
For details about how to overwrite a form, refer to Duplication of Form Name.
Specifying a form file
This machine allows you to recall the form registered in this machine and overlay the form on the original for printing.
Reference
For details about how to create a form, refer to Storing a form file.
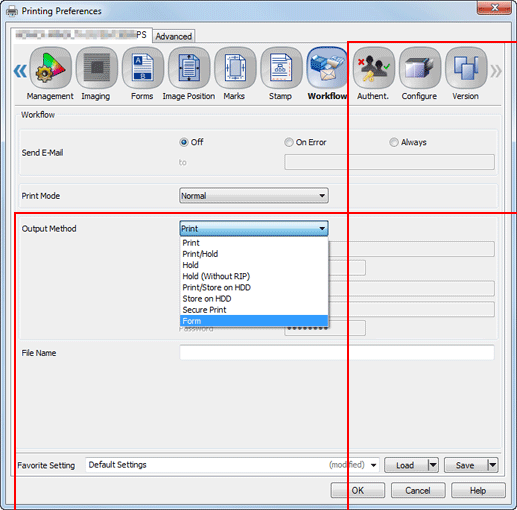
Click Form of the Forms tab, then select the desired form name.
supplementary explanationIf the resolution of the form is different from that of the job, the form name is dimmed, which means the form is not available.
The form resolution is displayed in Resolution under Preview after the form name has been selected.
You can specify the resolution in the Imaging tab.
In Forms Print Mode, select Repeated or Once.
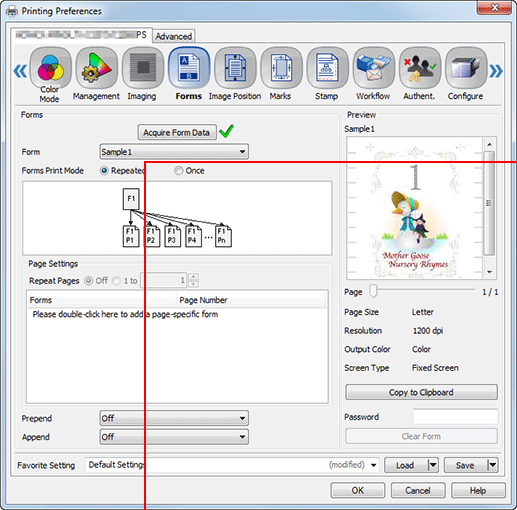
supplementary explanationRepeated: Superimposes a form on each page of a job to repeat printing. Only one or two pages can be set to a form.
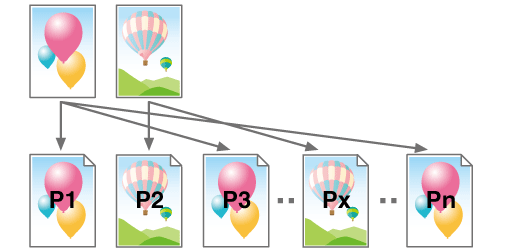
Example:
When a form has two pages, form page 1 is assigned to the first page of the job, form page 2 to the second page of the job, and form page 1 to the third page again as shown below. This pattern is repeated.
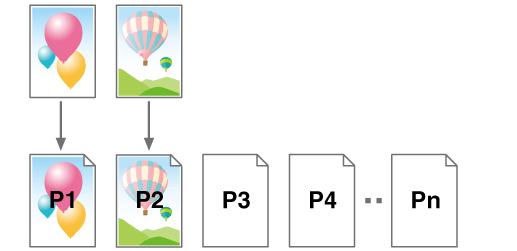
supplementary explanationOnce: Overlays a form on each page of a job once only to make prints.
Example:
When a form has two pages, form page 1 is assigned to the first page of the job, form page 2 is assigned to the second page of the job, and no form page is assigned to other pages as shown below.
Click OK to make prints.
Printing over a form for each page
Specify a form for each page to print the document over it (overlay).
Tips
If a form is specified on a page basis, only the first page is overlaid for printing even if the form has two or more pages.
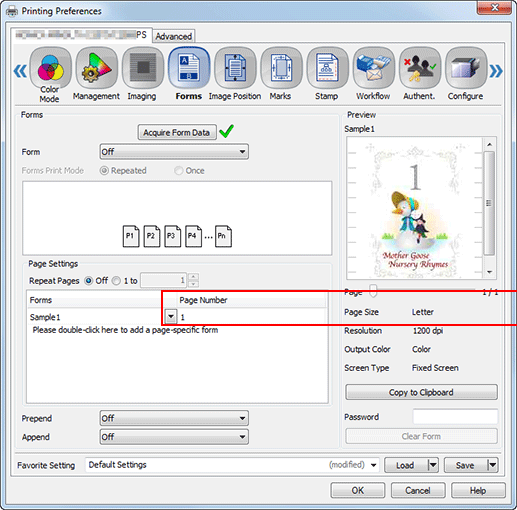
Select Page Settings in the Forms tab, then double-click Please double-click here to add a page-specific form to select the desired form name.
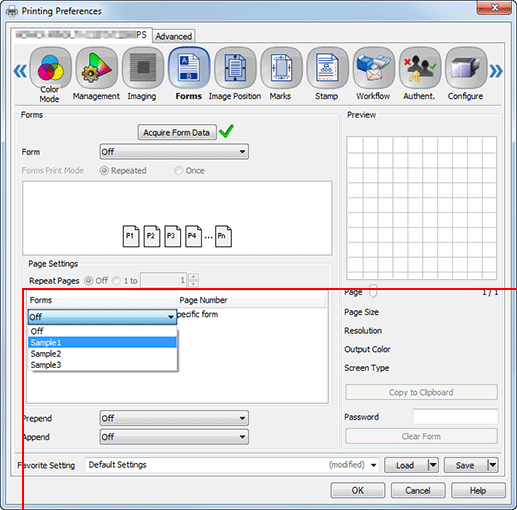
supplementary explanationIf the resolution of the form is different from that of the job, the form name is dimmed, which means the form is not available.
The form resolution is displayed in Resolution under Preview after the form name has been selected.
The resolution can be specified in the Imaging tab.
supplementary explanationThe available maximum number of forms depends on the target form and page.
Enter the numbers of the pages to be overlaid for printing.
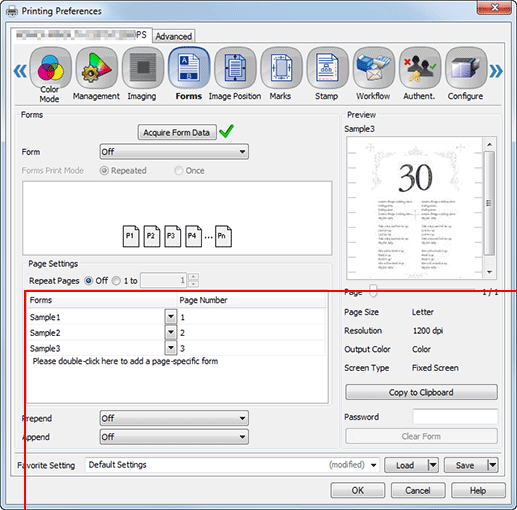
To also specify other forms, continuously double-click Please double-click here to add a page-specific form to select the form name, then enter the page number.
supplementary explanationThe same form cannot be used continuously.
Click OK to make prints.
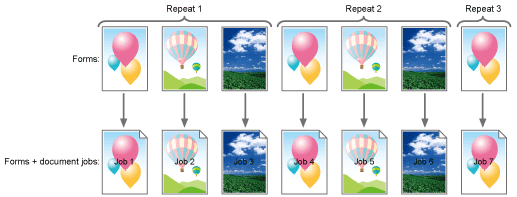
If seven pages are specified, they are printed as shown below.

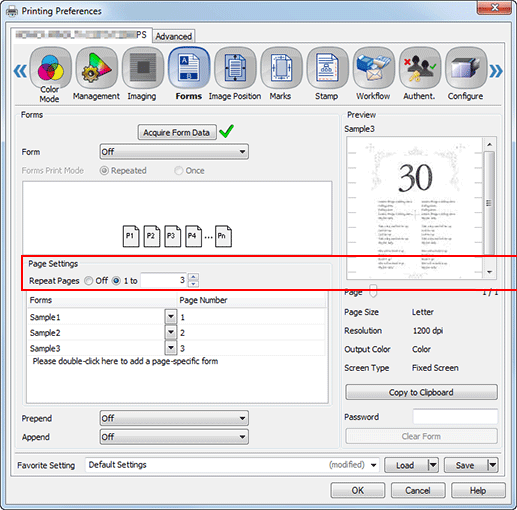
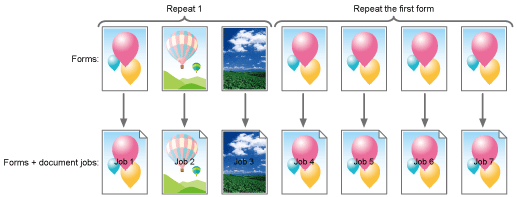
Furthermore, if Repeat Pages is specified, a form is repeatedly superimposed up to the last page of the document job to make prints. In this example, type 3.
Set the repeat unit to 3, then specify seven pages; they are printed as shown below.
Set the repeat unit to 1, then specify seven pages; they are printed as shown below.
Deleting a form
Delete a form registered in this machine.
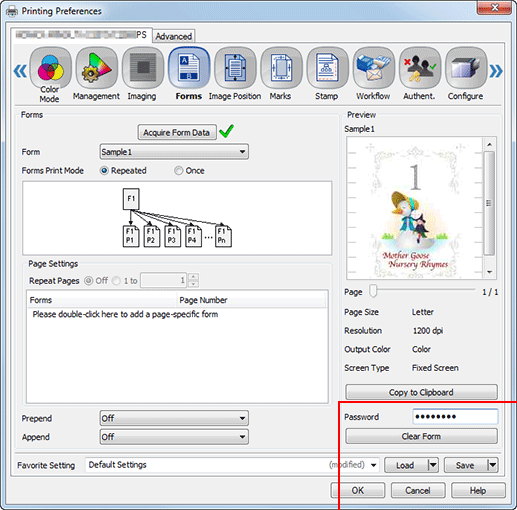
Click Form of the Forms tab, then select the desired form name.
Enter the password in Password on the lower-right side, then click Clear Form.
The selected form is deleted.supplementary explanationFor the default password, refer to the Help of the printer driver.
The password can be changed as needed. For details about how to change the password, refer to [Plug-in Form Password].