
Setting by LPR Connection
TCP/IP setting
Configure the TCP/IP settings on the Mac OS computer connected to the machine.
Click the Apple mark, and then select System Preferences from the Apple Menu.
Click the Network icon.
The Ethernet setting window appears.
supplementary explanationSelect Ethernet and click Details.
Click the TCP/IP tab.
Configure the settings including the IP address and subnet mask according to the settings of the network to which the Mac OS computer is connected.
Click the close button at the top left corner of the window. When the Would you like to apply your changes before closing the Network preferences pane? message appears, click Apply.
Adding a printer
Click the Apple mark, and then select System Preferences from the Apple Menu.
Click the Printers & Scanners icon.
Click +.
When the menu is displayed, click Add (Other) Printer or Scanner.
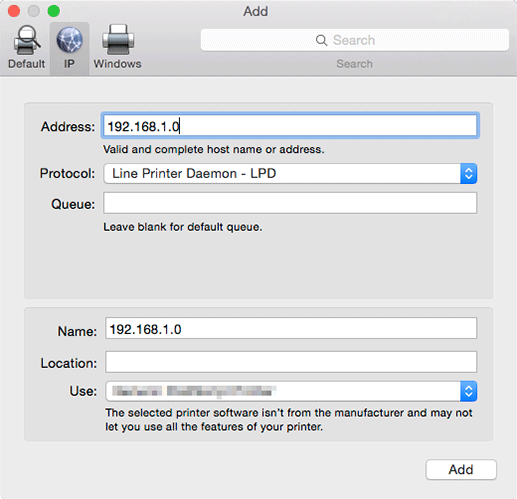
Click IP or IP Printer.
In Protocol, select Line Printer Daemon - LPD.
In Address, enter the IP address for this machine.
The printer driver corresponding to this machine being identified with its IP address is automatically selected.
supplementary explanationAfter the printer driver is selected, go to Step 8.
supplementary explanationIf an incorrect printer driver is selected, go to Step 7.
Select the desired printer driver manually. Select Select (Printer) Software from Use(Print Using), and then select the printer driver of the desired model name from the list that is displayed in the separate window.
Click Add.
When the selected printer is registered in the Printers & Scanners, the setting procedure is completed.