
For Windows
Creating a shared folder on the Windows desktop
Create a shared folder on the Windows computer. You can receive the scan data sent from the machine to the shared folder and share it with a client computer.
Create a shared folder on the Windows computer.
Example: A folder named "Scan-SMB" is created on the desktop of Windows 7.
Shared folder to be created
Description
Location
Desktop
Folder Name
Scan-SMB
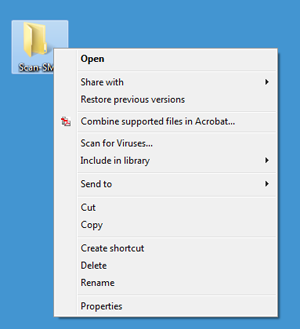
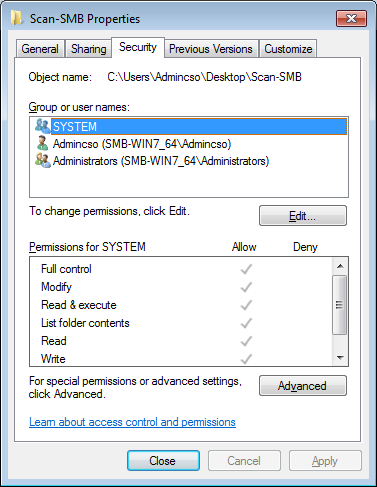
Right-click the shared folder you created and select Properties.
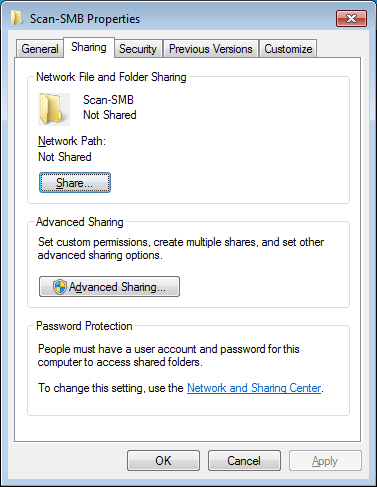
Click the Sharing tab and click Advanced Sharing.
The Advanced Sharing window is displayed.
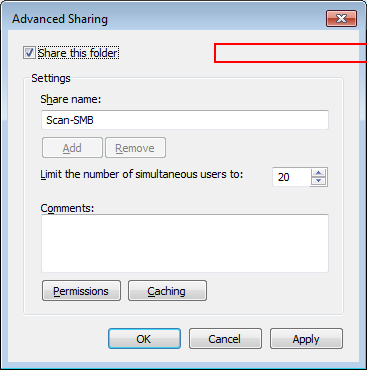
Add a check mark to Share this folder and click Permissions.
supplementary explanationSet Share name as necessary.
The folder access permission window is displayed.
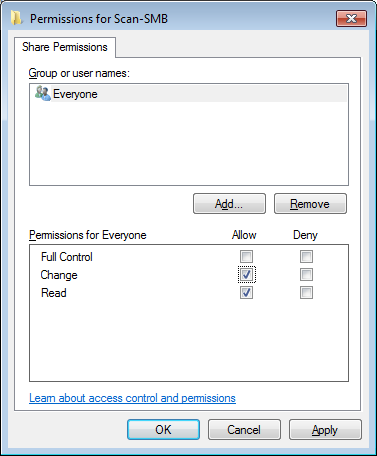
Select the group/user name to give access permission and add a check mark to Change of Allow. Click OK.
supplementary explanationTo give access permission to a specific group or user, click Add and add the group or user.
Example: Everyone (all users) is permitted to access.
Item
Setting
Group or user names
Everyone (all users)
Permissions for ###
Add a check mark to Change of Allow
To permit accessors to delete a file, add a check mark to Full control.
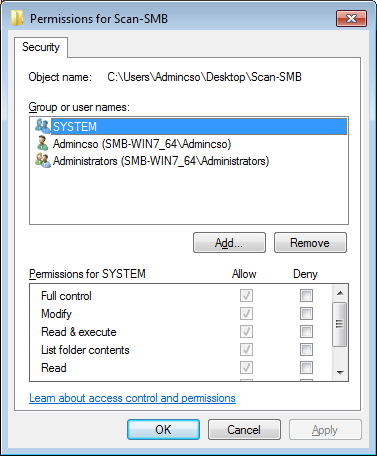
Click the Security tab and click Edit.
The security access permission window is displayed.
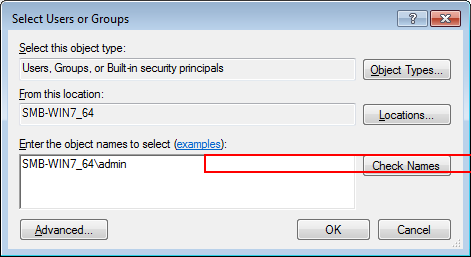
Click Add.
In the Enter the object names to select field, enter "computer (or domain) name\user name" and click Check Names.
supplementary explanationIf the computer name or domain name is displayed in From this location, the computer (or domain) name can be omitted.
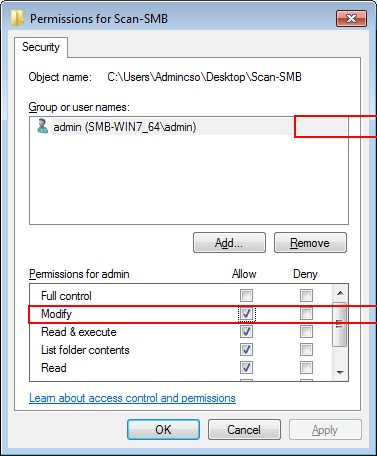
Example: Access permission is given to "SMB-WIN7_64\admin."
Item
Setting
Enter the object names to select
"SMB-WIN7_64\admin"
Computer (or Domain) name: SMB-WIN7_64
User name: admin
supplementary explanationIf the computer name or domain name is unknown, check it in the following procedure.
(1) Right-click the Computer icon on the desktop and select Properties.
(2) Click Advanced system settings and the Computer Name tab.
(3) Click Change and check Computer Name.
supplementary explanationIf you are not sure of the user name, check with the command prompt (cmd.exe). Enter "set user" and press the Enter key to display the user name to the right of USERNAME =.
When the user name is underlined, click OK.
supplementary explanationIf "computer (or domain) name\user name" entered in step 8 is wrong, "An object named ### cannot be found" is displayed when you click Check Names. Enter the correct "computer (or domain) name\user name."
Select the user name entered in step 9 and add a check mark to Modify of Allow. Click OK.
Item
Setting
Permissions for ###
Add a check mark to Modify of Allow
To permit accessors to delete a file, add a check mark to Full control.
Checking the SMB server setting
The following information is necessary to register the destination SMB server (shared folder) to the machine. Write down the following items.
Item | Description | Note |
|---|---|---|
Host Address | IP address of the SMB server
| |
File Path | Specify the file path (shared folder name) of the SMB server (shared folder). | |
Login Name | Login user name of the SMB server (Windows computer)
| |
Password | Login user password of the SMB server (Windows computer)
|

Registering the SMB server setting to the machine
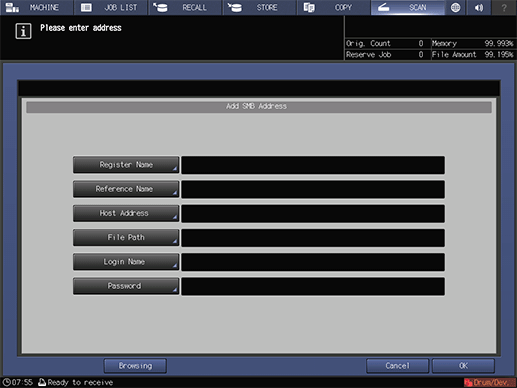
Register the destination SMB server to the machine on the touch panel of the main body.
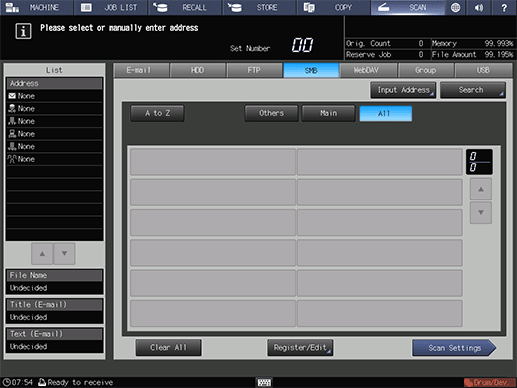
On the touch panel of the main body, press SCAN.
Press SMB and press Register/Edit.
Press Add.
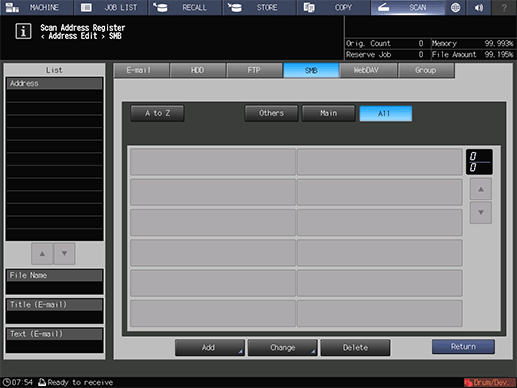
The Add SMB Address screen is displayed.
Press Register Name.
Enter the registration name and press OK.
supplementary explanationFor details about how to enter the file name, refer to Inputting Characters.
Example: "sample-smb" is entered as the registration name.
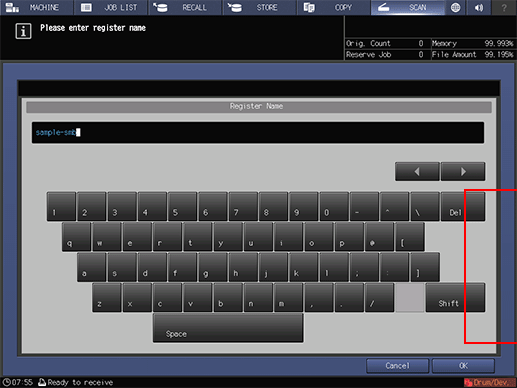
Register Name and Reference Name are entered.
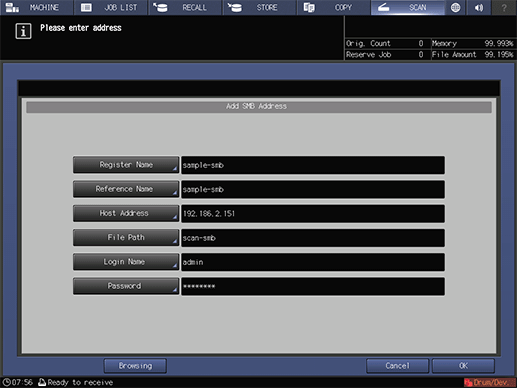
Press the Host Address, File Path, Login Name and Password items and enter the settings in the same manner.
After entering the items, press OK.
Check that the SMB server has been registered.
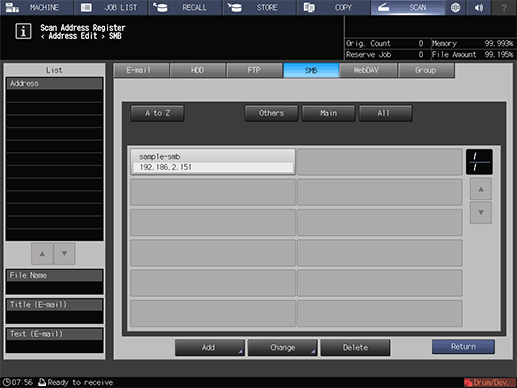
supplementary explanationPress Return.
To Search for an SMB Server Using the Host Address
Enter the contents you wrote down in Checking the SMB server setting.
toEach item is required.
To Search for a Host Address from a Browsing List
Press Browsing on the File Destination Setting screen.
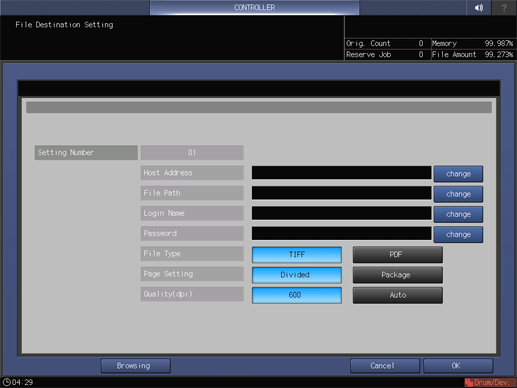
supplementary explanationPress Browsing to display the browsing list for networks.
Select a workgroup name and press Down.
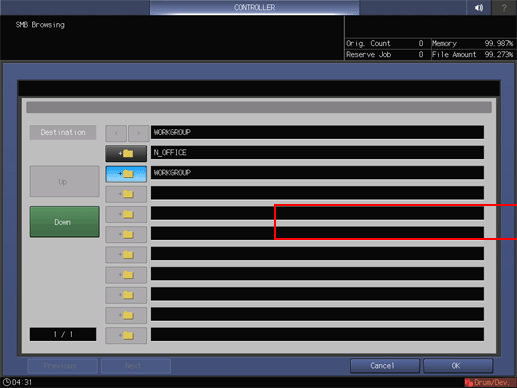
supplementary explanationWhen the list consists of more than one page, you can move between pages by pressing Previous or Next.
supplementary explanationIt can display up to 512 workgroups.
Select a workgroup name and press Down.
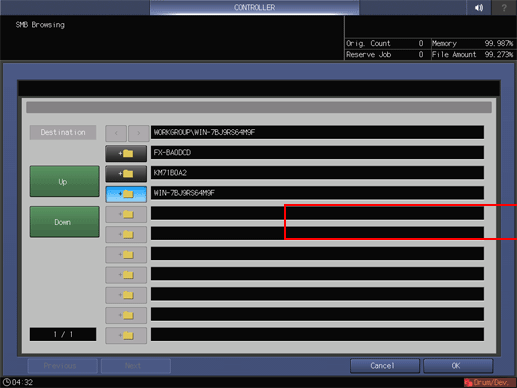
supplementary explanationWhen the list consists of more than one page, you can move between pages by pressing Previous or Next.
supplementary explanationPress Up to move to the upper level.
supplementary explanationIt can display up to 512 computers.
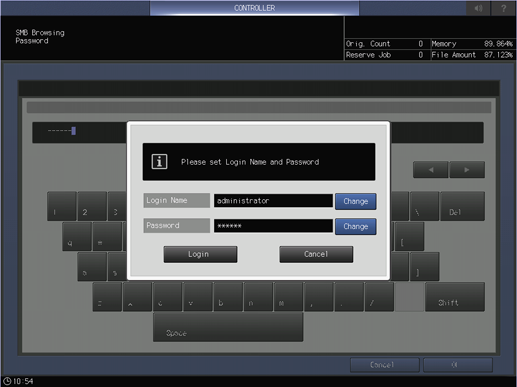
The authentication screen is displayed. Press Change for both the login name and password, and then input the authentication information.
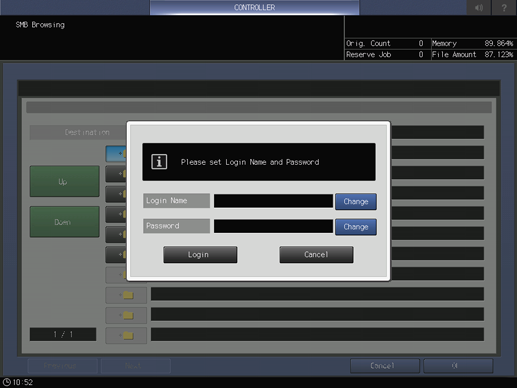
Press Login.
Select a destination folder, and then press OK.
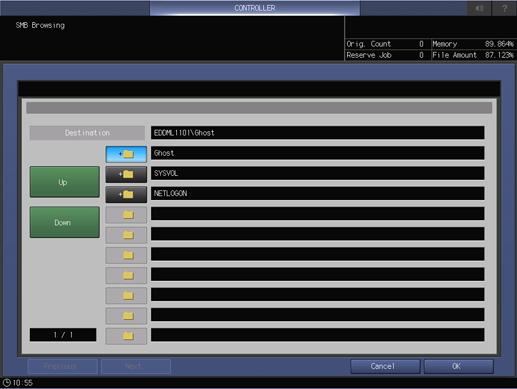
supplementary explanationPress Up to move to the upper level.
supplementary explanationIt can display up to 256 folders.
supplementary explanationIf the file path length exceeds the maximum (80 one-byte characters/40 two-byte characters), you can set the file path within the length.
Press OK.

Sending the scan data to the SMB server
Send the scan data to the SMB server from the machine.
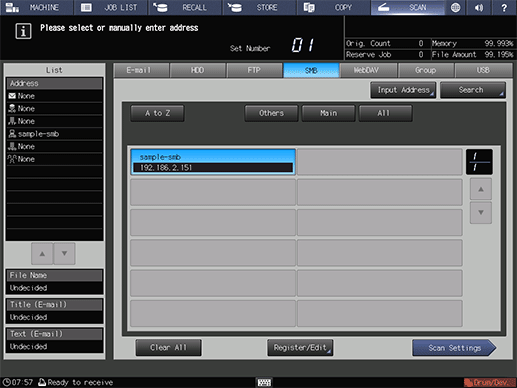
Select the SMB address registered and press Scan Settings.
supplementary explanationAfter pressing SCAN, press SMB to display this screen.
Set the image quality, resolution and other items.
supplementary explanationFor details about each item on the screen, refer to Scan Settings Screen.

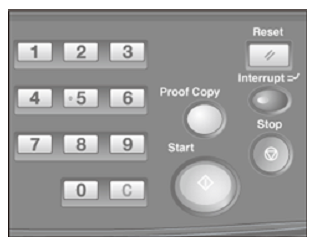
Set an original, and then press Start on the control panel.
The original is scanned and sent to the SMB server (shared folder).