
Scan to USB
Perform the following steps to save scan data on a USB flash drive.
Press SCAN tab.
Press USB.
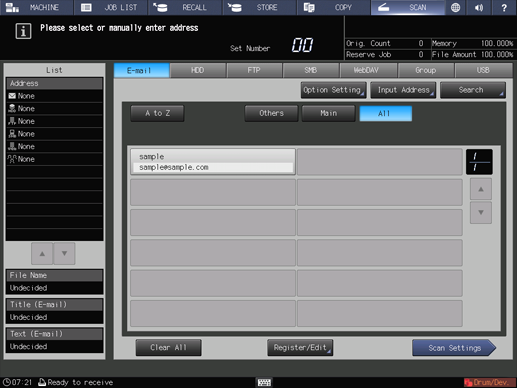
supplementary explanationAs default, the E-mail address list is displayed. For details about the default destination tab on the SCAN screen, refer to [User Setting]: [Scan Setting].
Connect the USB flash drive to a USB port.
The following operations are not available unless a USB flash drive is connected to the port.
Press USB Flash Drive in the address list.

supplementary explanationThe register name of the selected USB flash drive is displayed in List on the left side of the screen.
supplementary explanationTo deselect the register name, press the selected register name again.
Press Scan Settings.

Set the scan conditions.
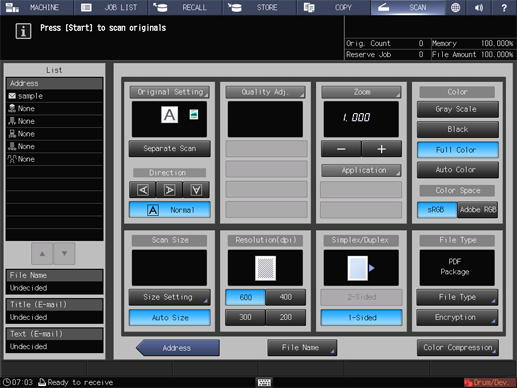
supplementary explanationFor details, refer to Scan Settings Screen.
supplementary explanationPress File Name if you want to specify the file name.
Set an original, and then press Start on the control panel.
The original is scanned, and the scan data are saved to an specified address.
supplementary explanationTo return to the SCAN screen, press Address.
supplementary explanationThe settings on the Scan Settings screen and the address selected on the SCAN screen may remain until the machine is restarted. It is recommended to release the setting and address once the operation is completed.
supplementary explanationTo clear the setting, press Reset on the control panel when the Scan Settings screen is displayed. To clear the address, press Address to return to the SCAN screen, and then press Clear All, or press Reset on the control panel.