
Replacing the Media Core
This section describes how to replace the media core of Roll Winder RW-201.
To replace the media when the print job is finished
To replace the media when the winding diameter reaches the maximum value 500 mm / 19.69'
Before removing the media from Roll Winder RW-201, make sure that the machine is stopped.
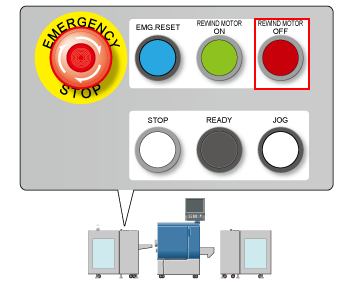
Press REWIND MOTOR OFF on the control panel of Roll Winder RW-201
The winding motor of Roll Winder RW-201 stops.
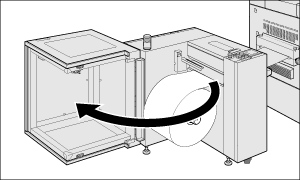
Open the media cover of Roll Winder RW-201.
Turn the media in a clockwise direction to loosen, and then use scissors to cut it.
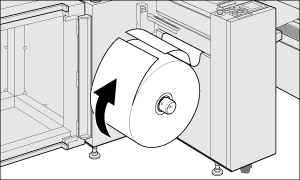

Loosen the media so that the edge of the media can reach a new media core.

When cutting the paper, be careful not to injure your hands or fingers.
Adhere the cut part of the media with masking tape.
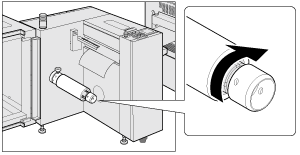
While holding the media, turn the lug protruding/retracting handle of Roll Winder RW-201 in a counterclockwise direction to confirm that the lug is stored into the winding shaft.
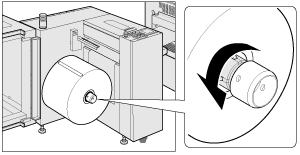
If the lug protruding/retracting handle is too hard to turn, use a Phillips screwdriver inserting into the hole of the lug protruding/retracting handle to turn it.
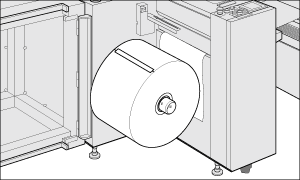
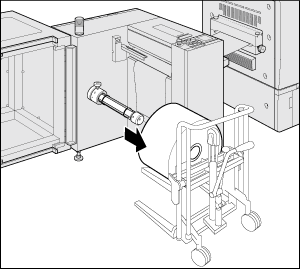
Remove the media with using a lifter.
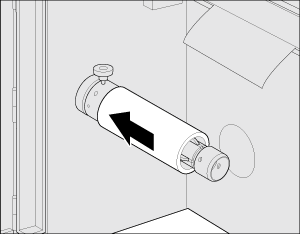
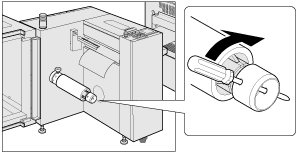
Place the new media core on the winding shaft.
Insert the media core deep into the winding shaft until it stops.
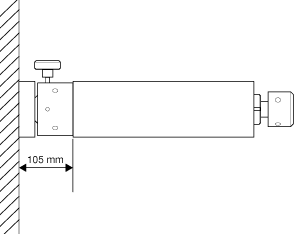
Confirm that the edge of the media core is set 105 mm / 4.13'' (±0.25 mm / 0.01'') from the metal surface of the inside of Roll Winder RW-201.
Turn the lug protruding/retracting handle in a clockwise direction until it stops to fix the media core.
Use a Phillips screwdriver inserting into the hole of the lug protruding/retracting handle to turn the handle in a clockwise direction.
If the media core is not properly held, the winding shaft may rotate unnecessarily. If turning the lug protruding/retracting handle with too strong force, it may damage the media core.
When tightening the lug protruding/retracting handle, pass a Phillips screwdriver etc. through the hole of the winding shaft to fix the winding shaft or hold the fixing handle of the winding shaft with hand to fix the winding shaft.
Attach the media to the media core with pieces of masking tape.
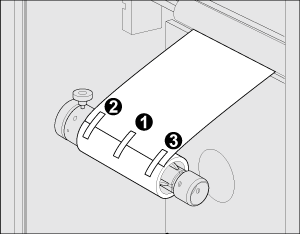
Be sure to attach in three positions, center, back, and front in the order to equalize the tension on the front and back.
Make sure the media is securely adhered to the media core. Otherwise, the media may lean to one side.
Close the media cover.
