
Setting the media core to the winding shaft of Roll Winder RW-201
Open the media cover of Roll Winder RW-201.
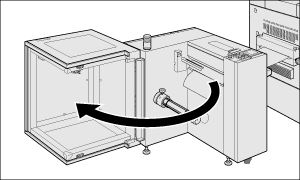
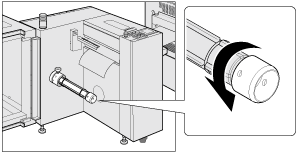
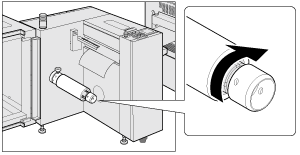
Rotate the lug protruding/retracting handle of Roll Winder RW-201 counterclockwise and confirm that the lug is stored in the winding shaft.
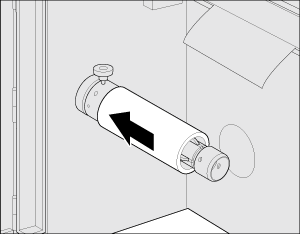
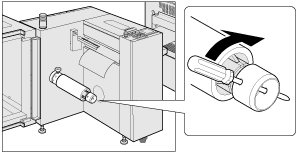
Set the media core to the winding shaft.
Insert the media core deep into the winding shaft until it stops.

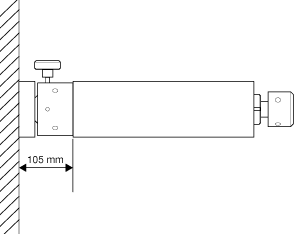
Confirm that the end of the media core is set at 105 mm (±0.25mm) / 4.13" (±0.01") away from the metal surface of the inside of Roll Winder RW-201.
Hold the media core and rotate the lug protruding/retracting handle clockwise until it stops so that the media core is fixed.
Use a Phillips screwdriver inserting into the hole of the lug protruding/retracting handle to turn the handle in a clockwise direction.
If the media is not properly held, the winding shaft may rotate unnecessarily. Note that if the lug protruding/retracting handle is rotated too much, the media core may be damaged.
When tightening the lug protruding/retracting handle, pass a Phillips screwdriver etc. through the hole of the winding shaft to fix the winding shaft or hold the fixing handle of the winding shaft with hand to fix the winding shaft.
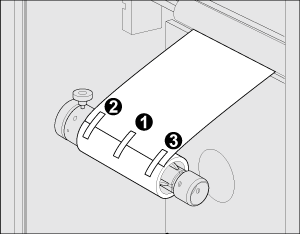
Adhere the media to the media core with masking tape.
Always adhere the center, back, and front, in that order so that the tension of the media will be equal.
Close the media cover of Roll Winder RW-201.

Go to Adjusting the media.