Set media to the leading section
This section describes how to set the media on the leading section.
Turn on the main power switch and the sub power switch of the main body and the power switch of Roll Winder RW-101/Roll Winder RW-201 beforehand.
Preparations for setting media to the leading section
Before setting the media to the leading section, pull out extra 1.5 m / 11.1" of paper. This section describes how to operate just Roll Winder RW-101 and pull the media.
When the machine is stopped with EMERGENCY STOP, press EMG.RESET on the control panel of Roll Winder RW-101 or Roll Winder RW-201.
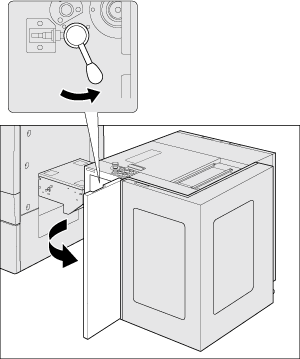
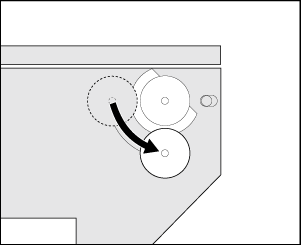
Open the front door of Roll Winder RW-101 and move the lever to press the rubber roller.
On the touch panel of Roll Winder RW-201, select [Menu] - [1,Machine state/2,Machine setting] - [2], and then set [Unwinder Offline], [Rewinder Online].
Roll Winder RW-101 is enabled to operate individually.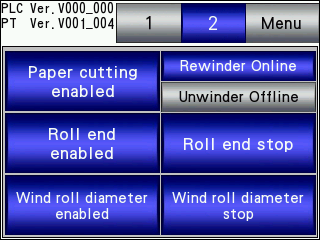
Press READY on the control panel of Roll Winder RW-101.
The ready alert beeps.

After the beeping stops, press JOG on the control panel of Roll Winder RW-101.
While pressing JOG, the media can be pulled from Roll Winder RW-101.
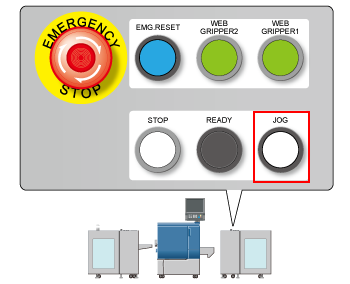

Press JOG within five seconds after pressing READY and the ready alert beeps. After five seconds, press READY to feed again.
Press JOG of Roll Winder RW-101 and pull the media as required until the media setting is complete.
The loop fan automatically stops after five seconds.
When you want to stop immediately, press STOP on the control panel of Roll Winder RW-101.
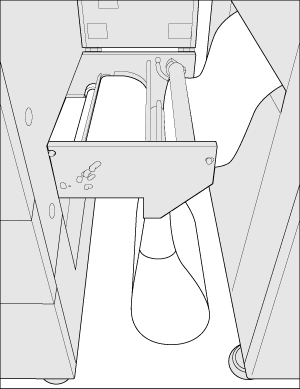
Set media to the leading section
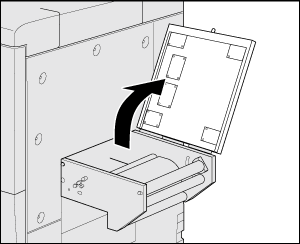
Open the top cover of the leading section.
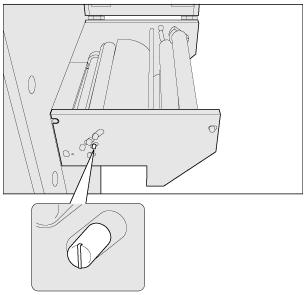
Confirm the location of the tension roller 2 is "Bottom".
If it is set to "Top", change to "Bottom". For details, refer to Setting the tension according to the paper type and thickness (weight).
Confirm the aligning roller is set to "rotate".
If the aligning roller is set to "fix", change to "rotate". For details about changing the position, Setting the tension according to the paper type and thickness (weight).
Pass the edge of the media between the tension roller 1 and tension roller 2.
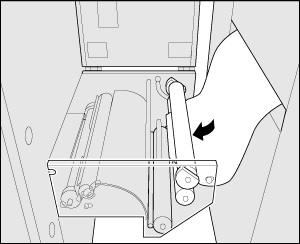
Pass the edge of the media between the tension roller 3 and tension roller 4 from beneath the tension roller 3 and then move the media along the guide plate.
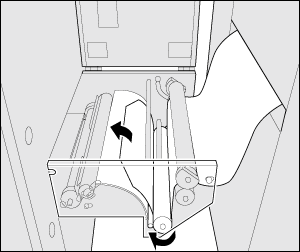
Insert the edge of the media between the aligning roller and guide plate.
Confirm that the media guide of the tension roller 1 and the restriction guide of the restriction roller are set in the right positions.
Move the media back and forth to adjust the position to the reference position.
Reference position:
・ The media guide (back side) of the tension roller 1 should be 35 mm (±0.25 mm) / 1.38" (±0.01") from the metallic surface.
・ The media guide (front side) of the tension roller 1 should be 0.5 mm (±0.25 mm) / 0.02" (±0.01") from the media.
・ The restriction guide (back side) of the restriction roller should be 35 mm (±0.25 mm) / 1.38" (±0.01") from the metallic surface.
・ The restriction guide (front side) of the restriction roller should be 0.5 mm (±0.25 mm) / 0.02" (±0.01") from the media.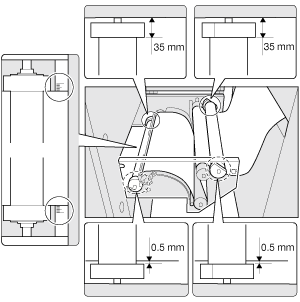
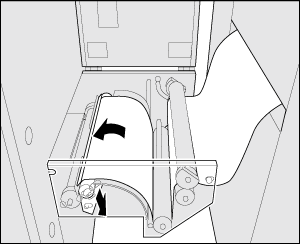
Under the leading section, pull out the media from the bottom of the restriction roller.
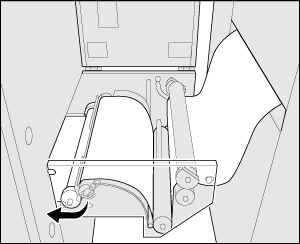
Pull out paper underneath the leading section.