Print All Pages
When the test print is finished, print all the pages.
Prepare the machine to print beforehand. For details, refer to Prepare the Machine.
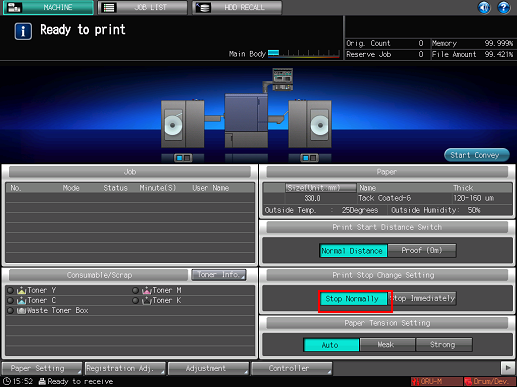
Press the [MACHINE] tab on the touch panel of the main body and make sure that [Stop Normally] is selected for [Print Stop Change Setting].
If [Stop Immediately] is selected, press [Stop Normally].
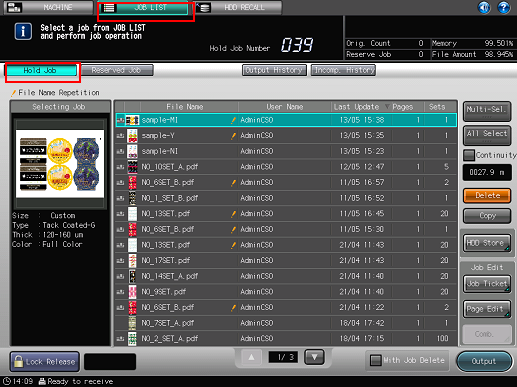
On the touch panel, press [JOB LIST] and display the [Hold Job] screen.
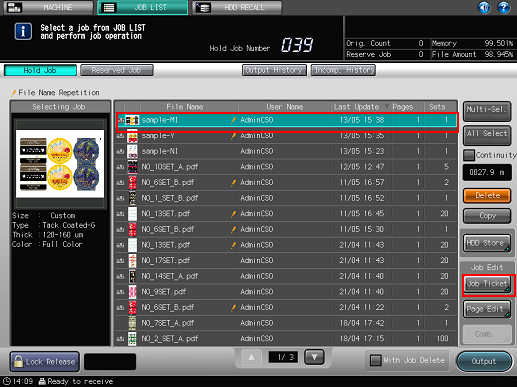
Select a job that you want to print, then press [Job Ticket].
Press [Continuity] and select multiple jobs, the machine prints selected jobs continuously only inserting a specified blank area at the end of each job without pausing between jobs, warm-up operation, adjustment for avoiding meandering.
Press [Set Number].
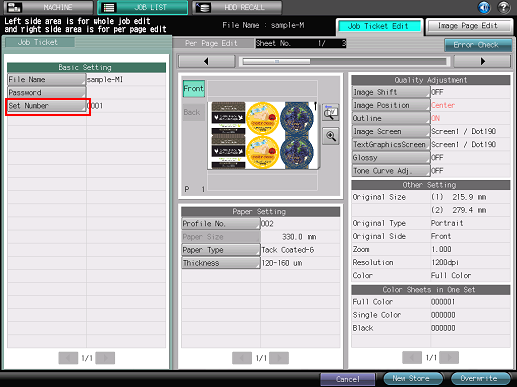
Enter the number you want to print, press [OK].
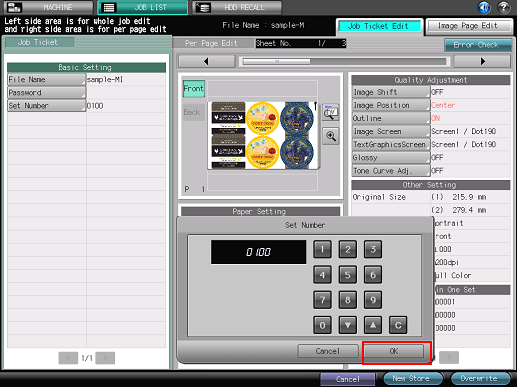
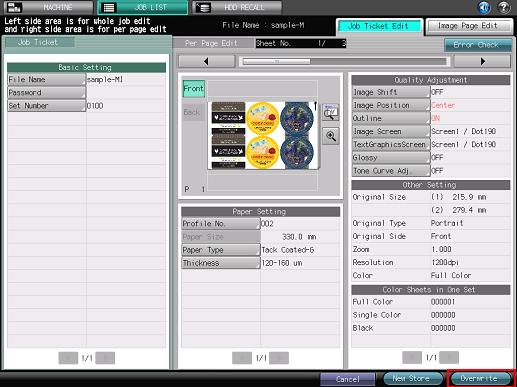
Press [Overwrite].
Press [Output].
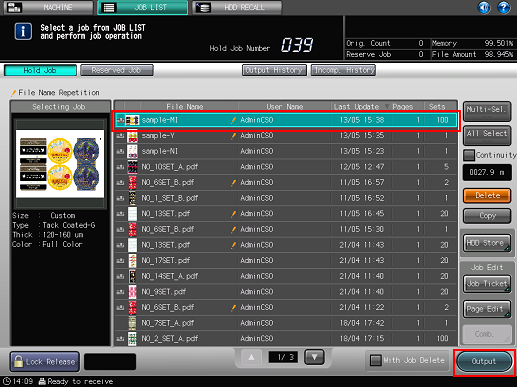
It is recommended to press [Job Ticket] and check [Set Number], [Paper Type], and [Thickness] (or [Weight]) on the [Job Ticket Edit] screen before pressing [Output].
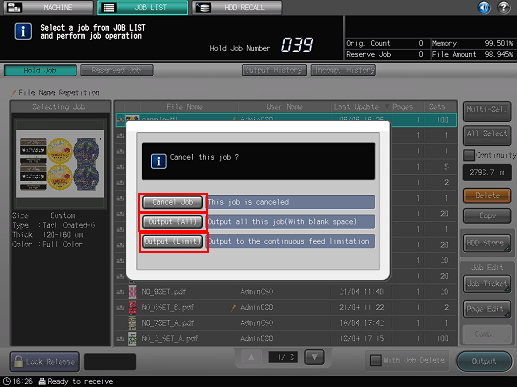
The maximum distance you can print continuously is 300 m/ 984.24'. If you press [Output] to print a job whose total length exceeds 300 m/ 984.24', the [Cancel this job?] message and the following three options are displayed. Press any of the following: [Cancel Job], [Output (All) ], [Output (Limit)]
 Cancel Job: This job is canceled.
 Output (All): A blank page is inserted after 300 m / 984.24' is printed for adjusting the machine system. After the machine adjustment, another 300 m / 984.24' is printed.
 Output (Limit): The first 300 m / 984.24' is printed and subsequent printing is canceled.
For continuous printing, you can print continuously up to 300 m / 984.24' including the space set in [Continuous Job Space Setting].
Spaces over 3 m / 9.84' are calculated as 3 m/ 9.84'.
The blank area can be specified on the [UTILITY] screen. For details, refer to Continuous Job Space Setting.
To pause or cancel output operation, press Stop on the control panel of the main body or STOP on the control panel of Roll Winder RW-101/Roll Winder RW-201.


