Maximum Density Adjustment (Regular Adjustment Flow (High Accuracy))
Perform the maximum density adjustment in the regular adjustment flow.
The maximum density adjustment is required when the gamma automatic adjustment does not improve density or when you want to perform the high accuracy adjustment.
Position of the Maximum Density Adjustment in the Regular Adjustment Flow
The maximum density adjustment is required when the gamma automatic adjustment does not improve print results.
 In the pre-output image quality adjustment flow, this adjustment is positioned shown below.
Gamma automatic adjustment

Maximum density adjustment (This adjustment)

Controller calibration

Advanced controller calibration (Exact Color or G7 calibration)
For details about the gamma automatic adjustment, refer to Gamma Automatic Adjustment (Regular Adjustment Flow (High Accuracy/Adjustment Flow When Changing the Screen)).
For details about the controller calibration, refer to Controller Calibration (Regular Adjustment Flow (High Accuracy/Adjustment Flow When Changing the Screen)).
For details about the advanced controller calibration, refer to Advanced Controller Calibration (Regular Adjustment Flow (High Accuracy/Adjustment Flow When Changing the Screen)).
Perform the Maximum Density Adjustment.
Press Stop Immediately for [Print Stop Change Setting] on the [MACHINE] screen on the [touch panel ] of the main body.
If [Stop Immediately] is selected, printed image stops near the delivering section.
If [Stop Normally] is selected, printed image is wound on Roll Winder RW-201 and stops.
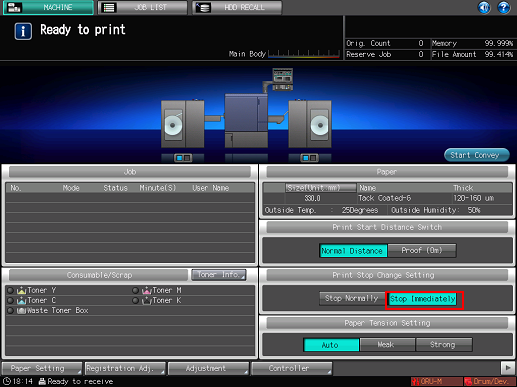

[Print Stop Change Setting] is back to [Stop Normally] when the sub power switch of the main body is turned OFF.
Press Utility/Counter on the machine's control panel.
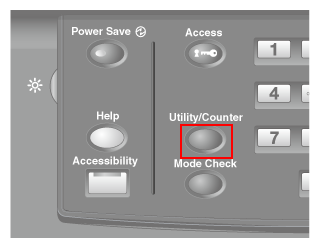
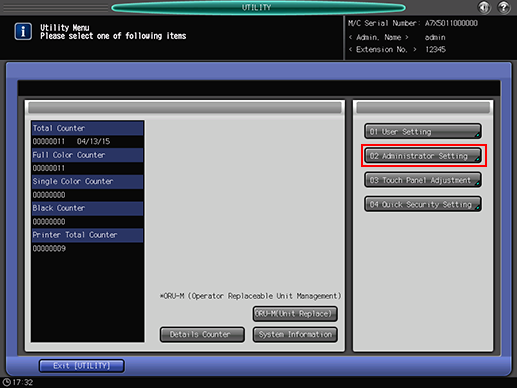
The [UTILITY] screen is displayed.
Press [Administrator Setting].
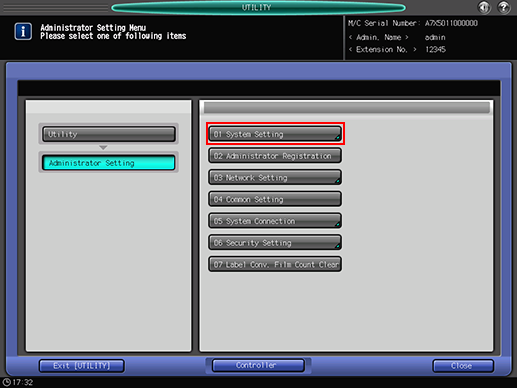
Press [System Setting].
Press [Expert Adjustment].
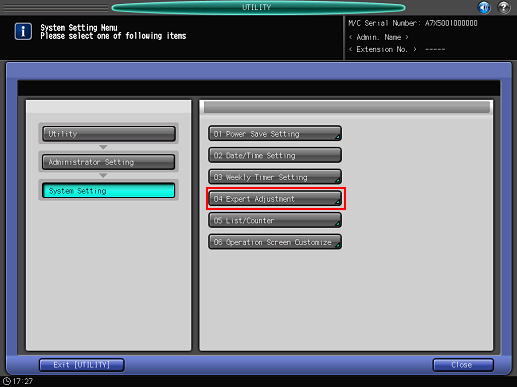
Press [Process Adjustment].
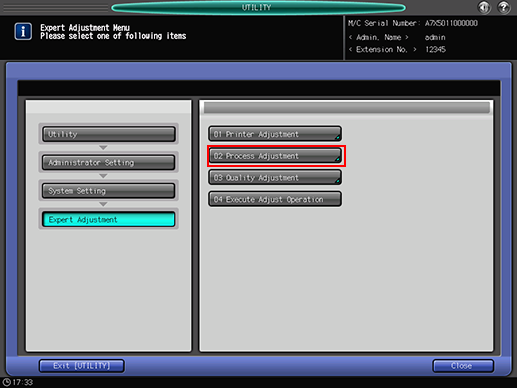
Press [Maximum Density Adjustment].
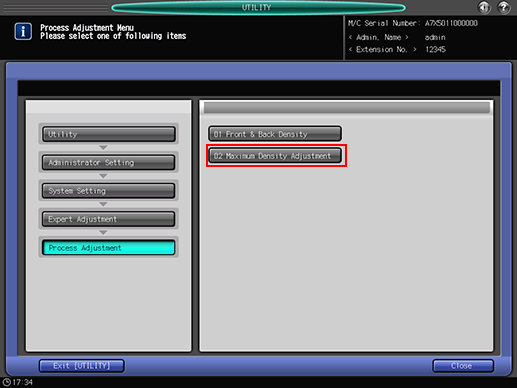
Press [Print Mode].
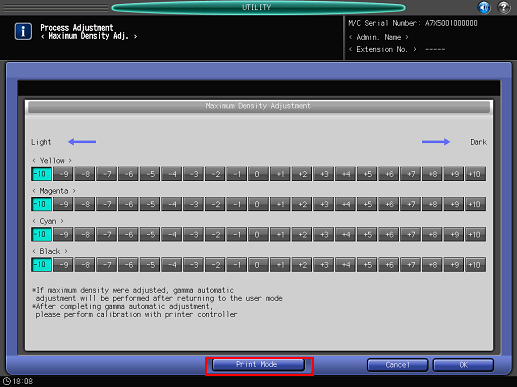
Press Start on the control panel.
Chart printing is executed.
Pressing [Proof (0m)] for [Print Start Distance Switch] on the [MACHINE] screen on the touch panel of the main body reduces the amount of paper conveyed before printing and media consumption.
Cut out a printed test chart from the media core of Roll Winder RW-201.
When cut out the printed chart, refer to Cutting the output paper and be careful not to injure your hands or fingers.
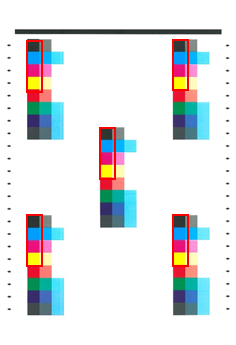
Use a colorimeter and measure four colors (BK, C, M, Y) of the five color samples in the red-boxed area respectively and calculate the average of each color.
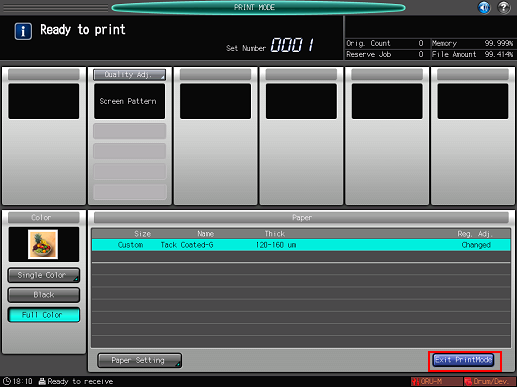
Press [Exit PrintMode].
The screen returns to the [Maximum Density Adjustment] screen.
Compare the average values calculated from the printed chart and the target values.
According to the result, select the desired density value for [<Yellow>], [<Magenta>], [<Cyan>], and [<Black>], respectively.
When the measured density is lower than the target density (target value): Adjust the density toward the + side (darker).
When the measured density is higher than the target density (target value): Adjust the density toward the - side (lighter)
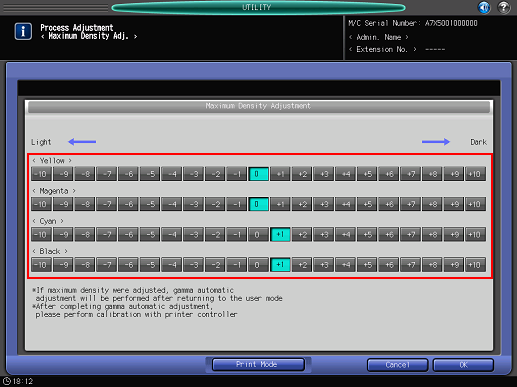
The amount of the density change differs depending on the type of paper. Repeat the adjustment to achieve your most desired density.
Measure the density with an external spectrophotometer (densitometer) and manage the measurement data.
Press [OK].
When you exit out of [UTILITY], the maximum density adjustment starts. Wait for the adjustment to finish.

When you are ready to print all the pages of a job, be sure to set [Stop Normally] for [Print Stop Change Setting] before printing all the pages.
Adjust the timing for the Stop Immediately mode in order to reduce the damage of paper or improve the performance of conveyance. For details, refer to Machine Adjustment.
Depending on the media, using the [Stop Immediately] mode may result in the media deforming or the glue running out. In such cases, print test pages in the [Stop Normally]mode. Contact the manufacturers about the specifications of media.

